Invite contacts to a portal and manage invitations
- Contacts - View, Add and Edit Contacts;
- Portal - Admin
In order to make a portal active, you must invite someone to use it. When you invite someone via your Contacts module, a new portal is created for that contact. You can have multiple portals, one for each of your contacts. You can invite multiple people to use each of those portals.
The invitation you send to a specific e-mail address contains a link to register for the portal. If the e-mail is forwarded to another person without the link being clicked, that other person can click the link and register for the portal. Once the link is clicked, it expires and cannot be used again.
The expected method of use for Portal is for you to send an invitation to the e-mail address stored on the Contacts record and then for the person who opens that e-mail and registers with Portal to invite other people to the portal.
Personal invitations need to be sent out to the e-mail addresses of all the people who want to register for the portal.
Portal invitations expire seven days after they have been sent.
Contents
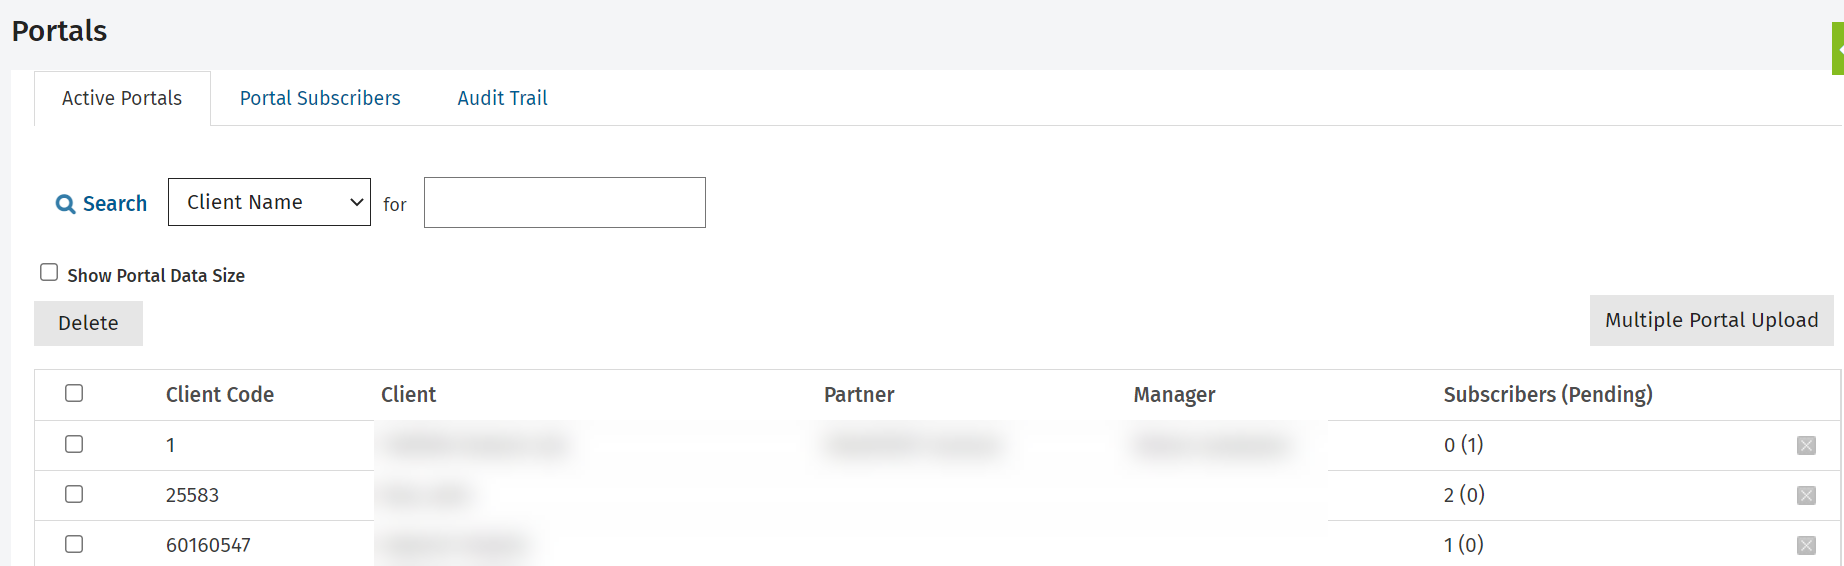
Individually invite contacts
When you invite someone to a portal, the following occurs:
- The invitation is sent to that person (subscriber) via e-mail.
- The Portal Subscribers panel appears in the contact's Summary tab. The panel displays the subscriber's name and e-mail address, along with the word Pending in red. This word disappears when the subscriber registers to use Portal.
- The label on the Invite to Portal button changes to Invite more to Portal button.
- The contact now appears in your Portal module, where it can be removed, if required.
To invite someone to a portal:
- Click Contacts.
- Search for and click the required contact record to open their Contact Details page.
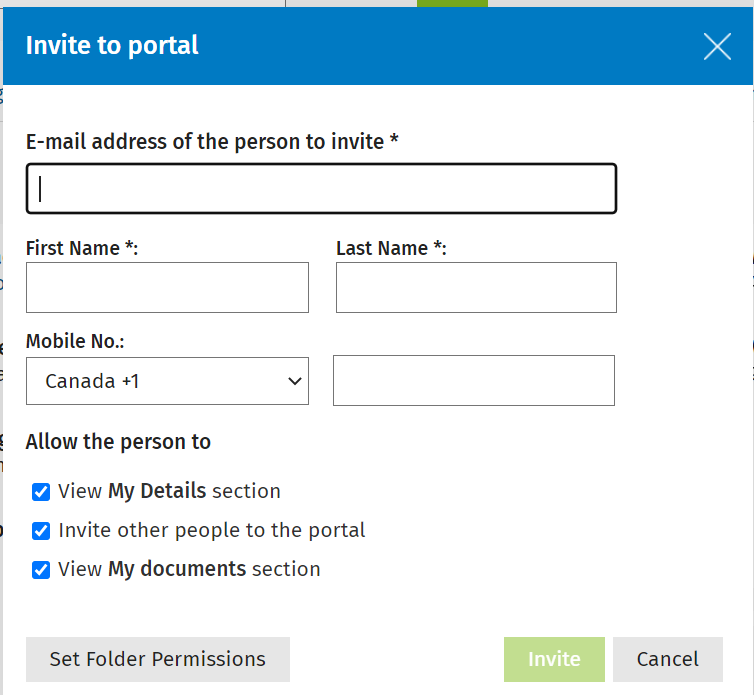
- Click Invite to Portal.

- Click Invite to send the invitation to the default e-mail address (from the Contacts database) that appears.
-
The first and last name of the invitee to the portal can be entered, even for a corporation.
-
If no information is entered, this means that no information has been entered in the contact information section. Therefore, it should be entered manually.
-
You can modify the default information to invite someone else.
-
By default, a subscriber will have access to all portal folders and files. If required, you can restrict access to certain folders or files within the portal as described at the next step.
- Restrict access to certain folders or files within the portal, if required:
- Click Set Folder Permissions
- Select the check box of the folder or file that you want to prevent the person from accessing.
- Click Deny Access.
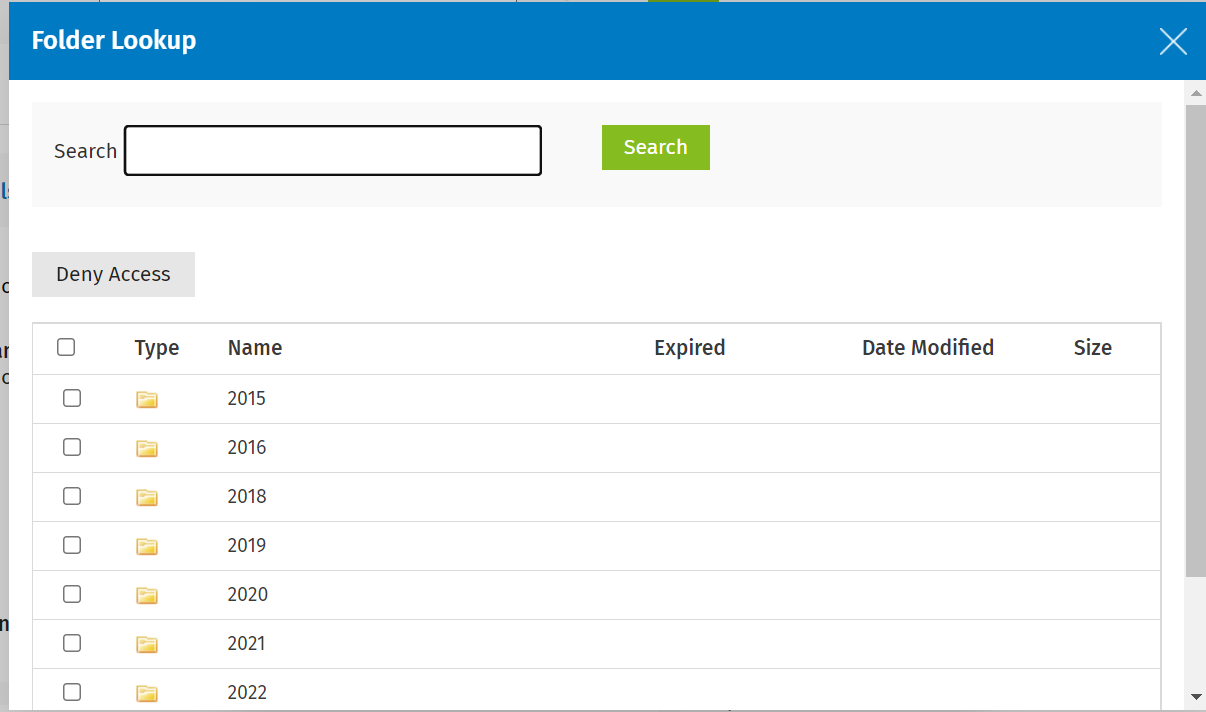
- Click Invite.
Bulk invite contacts
You can invite multiple contacts to use your portal.
- Click Contacts > All Contacts.
- Click the Bulk Invite to Portal button at the top of the page.
- Select the check boxes for the contacts that you want to invite to the portal, then click Invite to Portal.
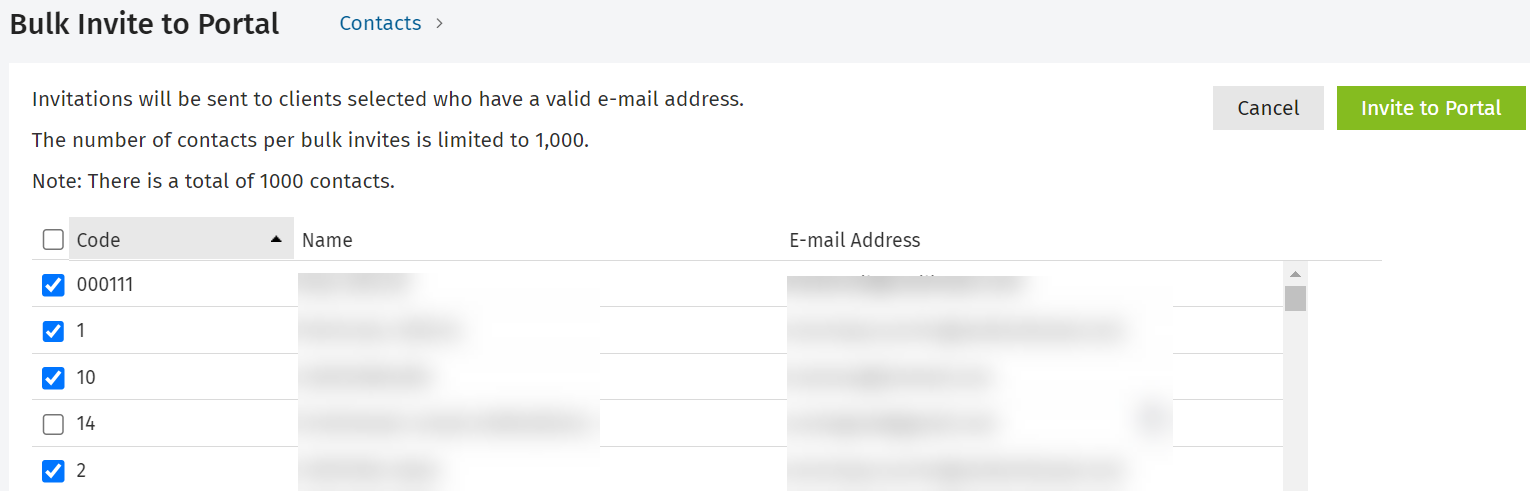
- Click OK.
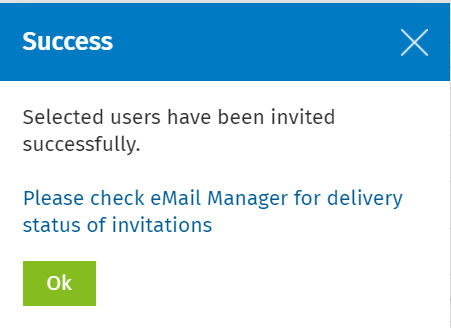
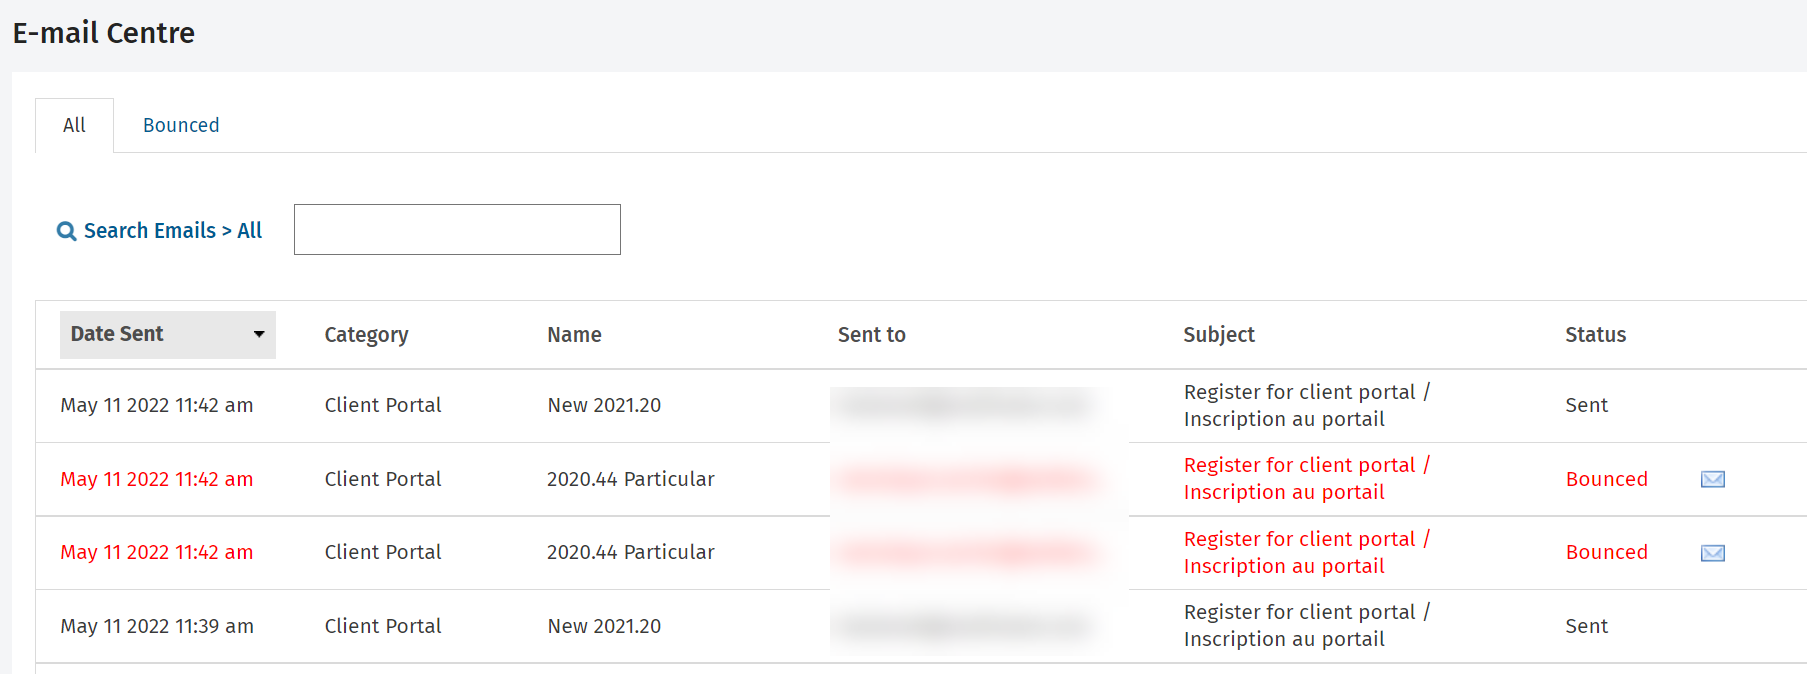
- Monitor the status of the invitation e-mails in the E-mail Centre.
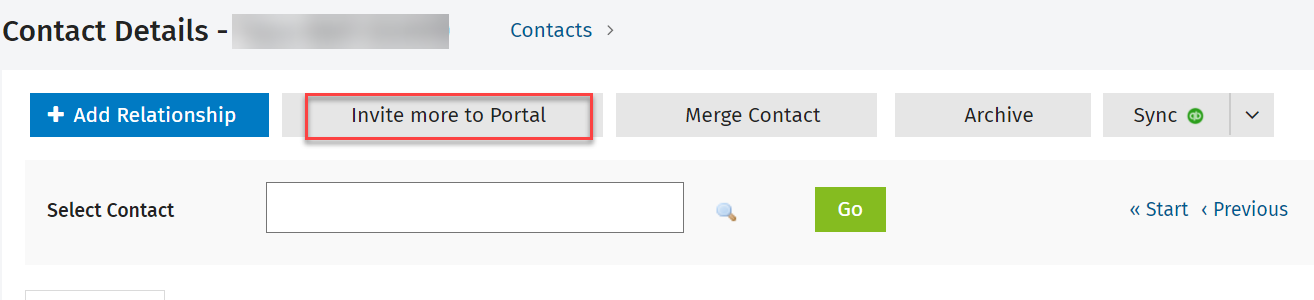
Invite more people to a portal
- Click Contacts.
- Search for and click the required contact record to open their Contact Details page.
- Click Invite more to Portal.
- Type the name and e-mail address of the person you want to invite. By default, a subscriber will have access to all portal folders and files. If required, you can restrict access to certain folders or files within the portal as described at the next step.
- Restrict access to certain folders or files within the portal, if required:
- Click Set Folder Permissions
- Select the check box of the folder or file that you want to prevent the person from accessing.
- Click Deny Access.
- Click Invite.
Manage invitations
When you invite someone to a contact's portal, if that person registers to use the portal within seven days, he/she becomes a subscriber. Portal subscribers can be managed in the Portal and the Contacts modules.
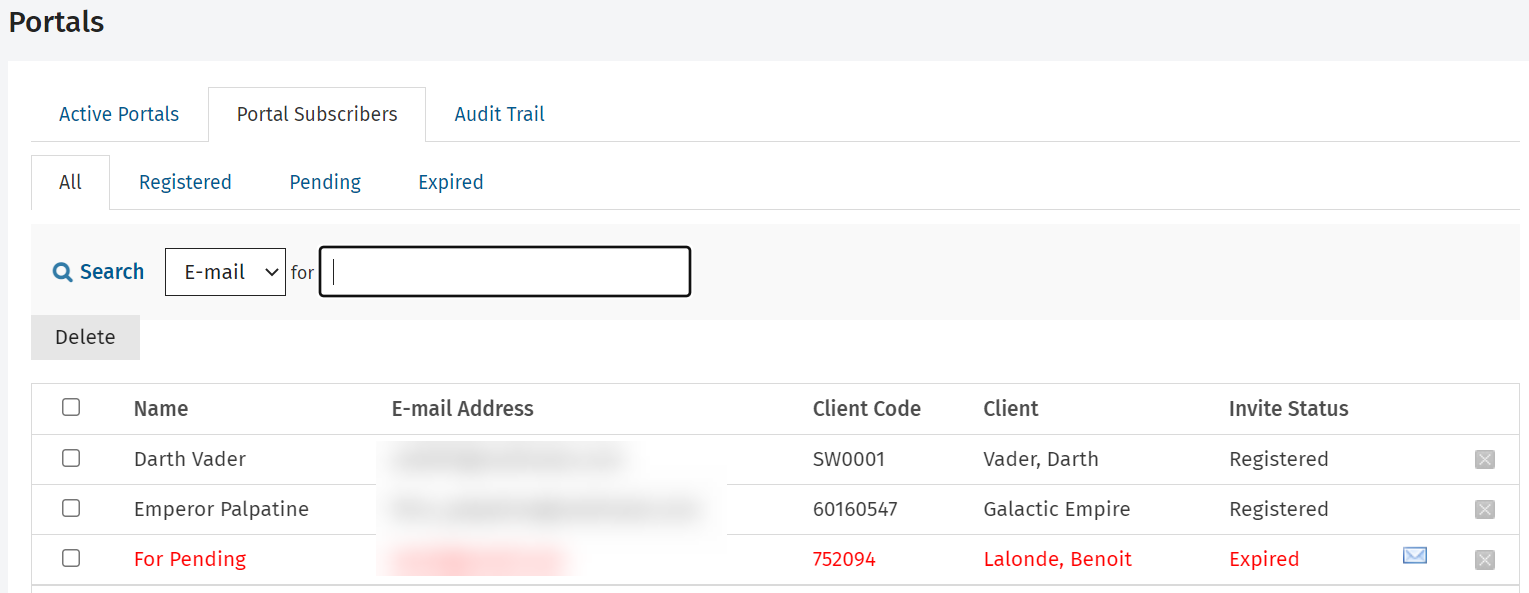
Manage invitations in the Portal module
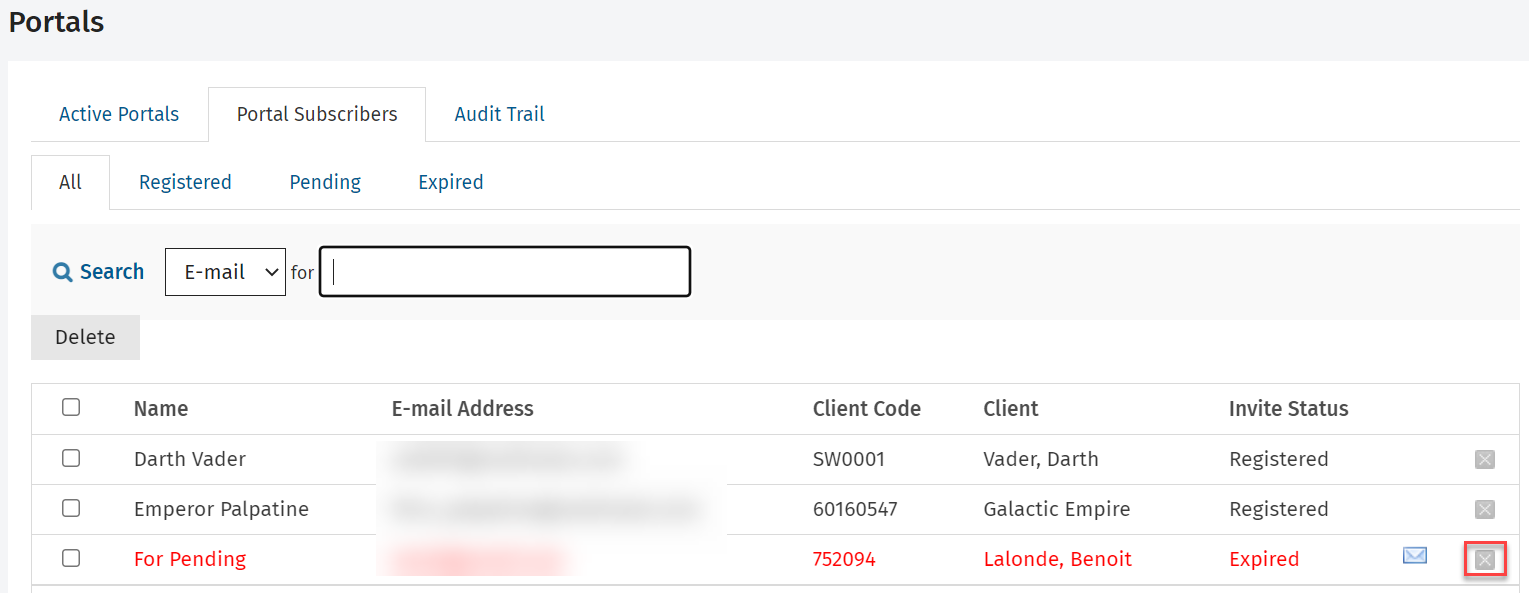
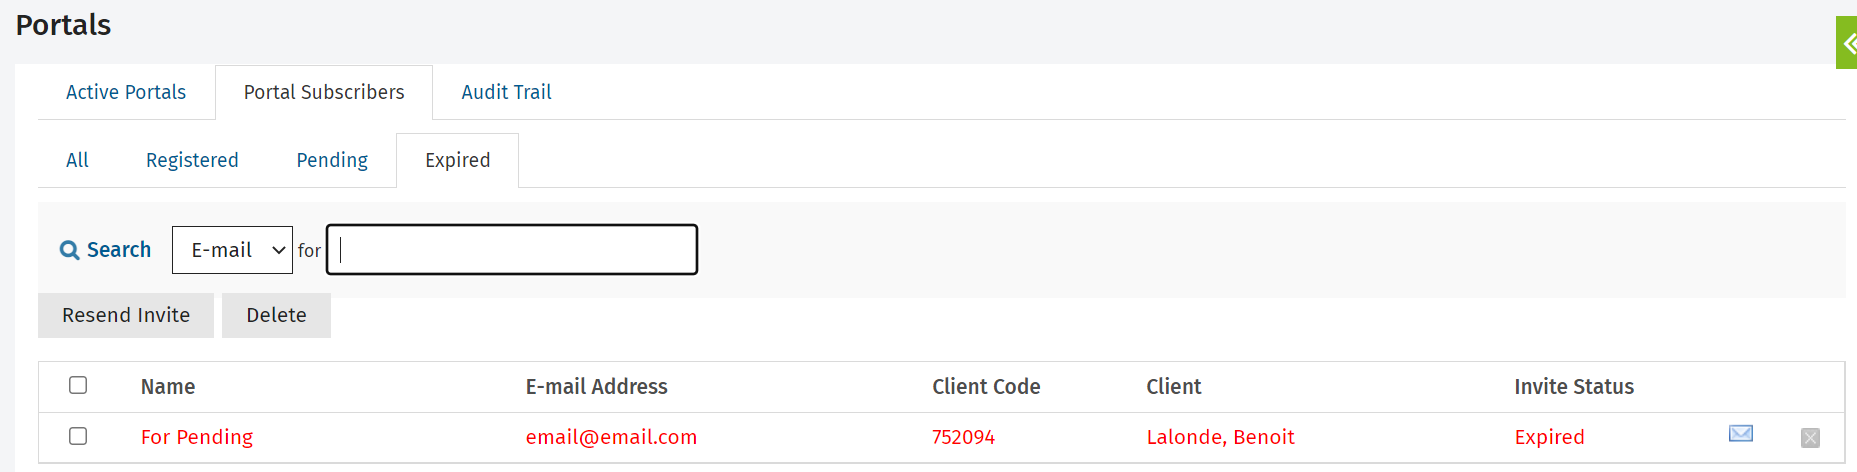
On the Portal Subscribers tab in the Portal module, you can delete subscribers and resend invitations to expired subscribers, either individually or in bulk.
- Click Portal.
- Click the Portal Subscribers tab.
- View and filter subscribers by their status (click the Registered, Pending or Expired tab).
- Delete invitations, if required:
- To delete a subscriber individually, click the Delete button
 on their row, then click Yes to confirm.
 - To delete subscribers in bulk, select their check boxes, click the Delete button, then click Yes to confirm.
- To resend expired invitations, click the Expired tab, if required (this moves the subscriber back to the Pending tab):
- To resend invites individually, click the Resend button
 on the row of the subscriber.
 -
To resend invites in bulk, select the check boxes of the subscribers, then click Resend Invite.
Manage invitations in the Contacts module
On the contact's Summary tab you can view the subscribers and edit (delete) one or more of them.
- Click Contacts.
- Search for and click the required contact record to open their Contact Details page.
-
Click Edit Subscribers in the Portal Subscribers panel.

- Click the Delete button on the row of the subscriber(s) you want to delete.
- Click Yes to confirm.
Remove a contact's access to their portal
- Contacts - View, Add and Edit Contacts;
- Portal - View
When you remove a contact from the Portallist, all subscribers are prevented from accessing that portal. Note that files are not deleted.
- Click Portal.
- Select the contact(s) from whom you want to remove access to the portals:
- Individual delete: click the Delete button at the end of the row of the individual contact, then click Yes to confirm.
- Bulk delete: select the check boxes of all the required contacts, then click the Delete button. Click Yes to confirm.