Merge contacts
Contacts - View, Add and Edit Contacts
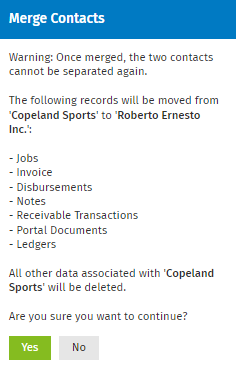
If you have more than one record for the same contact, you can merge these duplicate records into one. When you do this, the contact you open is merged to the one you select. This means that all the Jobs, Invoices, Disbursements, Notes, Receivable Transactions, Portal Documents and Ledgers for the first contact are moved to the second contact. All other data for the first contact is deleted.
Once you have merged contact records, this action cannot be undone.
- Click Contacts > All Contacts.
- Open the contact you want to delete.
- Click Merge Contact.
- Type or select the contact you want to merge to.
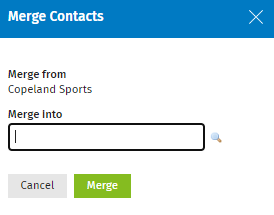
- Click Merge.
- Click Yes to confirm.
-
When you merge a contact that is linked with Taxprep or CCH iFirm Taxprep, make sure that the contact which is linked is selected in the Merge Into box. This way, you will keep the link active. If you merged into the contact that is not linked, you will have to manually recreate the link.
-
To ensure files will be available when you merge a contact that has a portal, make sure that the contact selected in the Merge Into box also has a portal.