To learn more about the Documents add-in for Microsoft Word, Excel and PowerPoint
The Microsoft Word, Excel and PowerPoint add-in allows users to save documents directly to a client folder in the Documents application. The add-in is compatible with the Microsoft Word, Excel and PowerPoint desktop and online applications.
Contents
System requirements
Here are the system requirements to have the Documents add-in for Microsoft Word, Excel and PowerPoint to run properly with CCH iFirm:
- Operating system – Windows 10, version 1903 or higher;
- Office version – Microsoft 365, version 16.0.11629 or higher.
- Earlier versions of Windows/Office use IE11, which is no longer supported by CCH iFirm or Microsoft. You must update your operating system and/or your Office version. Alternatively, you can install Microsoft Edge WebView2, which will allow the add-in to work.
- The installation of the add-in is not supported via MS Store at this time.
Install the Documents add-in for Microsoft Word, Excel and PowerPoint
Settings - Installation
- Click Settings > Installation.
- Click Documents Add-in for Microsoft 365.
The iFirm_DMS_Office_Addin.xml file will be downloaded to the Download folder. - To proceed with the installation, please refer to the appropriate procedure based on the Word, Excel and PowerPoint version being used.
Install the add-in for the desktop version of Word, Excel and PowerPoint
There are three distinct steps required for the installation of the add-in for desktop applications.
- Share a folder
- In File Explorer on the Windows computer where you want to host your add-in, go to the parent folder (or drive letter) of the folder you want to use as your shared folder catalogue.
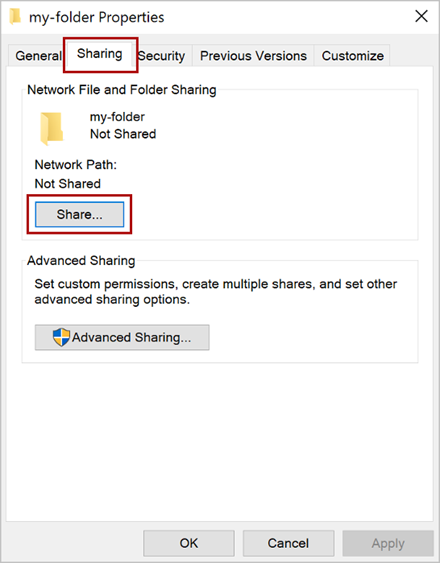
- Open the context menu for the folder you want to use as your shared folder catalogue (right-click the folder) and choose Properties.
- Within the Properties dialog window, click the Sharing tab and select the Share button.
-
Within the Network access dialog window, add yourself and any other users and/or groups with whom you want to share your add-in. The Read/Write permission will need to be granted to the folder. After you have finished choosing people to share the add-in with, click the Share button.
-
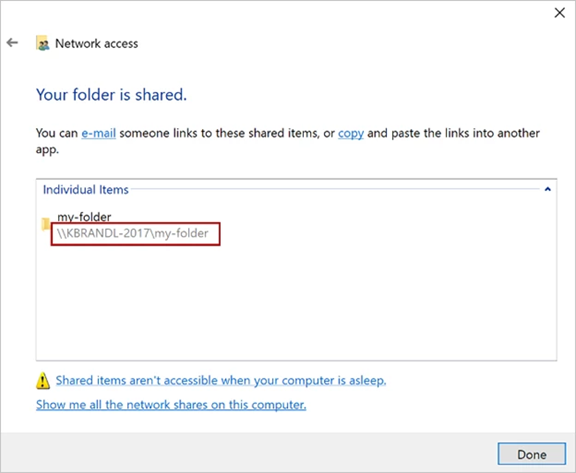
When you see confirmation that Your folder is shared, make a note of the full network path that's displayed immediately following the folder name. Click the Done button to close the Network access dialog window.
- Click the Close button to close the Properties dialog window.
-
Define the shared folder as a trusted catalogue - Configure the trust level manually
- Open a new document in Excel, Word or PowerPoint.
- Click the File tab and choose Options.
- Choose Trust Center, then click Trust Center Settings.
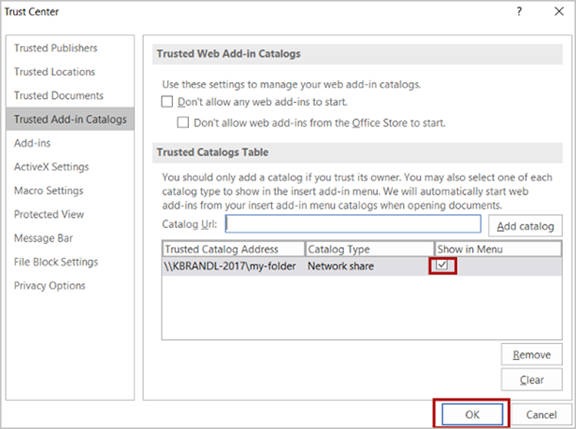
- Choose Trusted Add-in Catalogs.
- In the Catalog Url box, enter the full network path to the folder that you shared previously as per step 1 above. If you failed to note the folder's full network path when you shared the folder, you can get it from the folder's Properties dialog window.
- After you've entered the full network path of the folder into the Catalog Url box, click the Add catalog button.
- Tick the Show in Menu check box for the newly added item, then click the OK button to close the Trust Center dialog window.
-
Click the OK button to close the Options dialog window.
-
Ensure you close and reopen the Office application so your changes will take effect.
-
Install add-in from Word, Excel and PowerPoint
-
Open a new document in Word, Excel or PowerPoint.
- Click Insert, then click Get Add-ins.

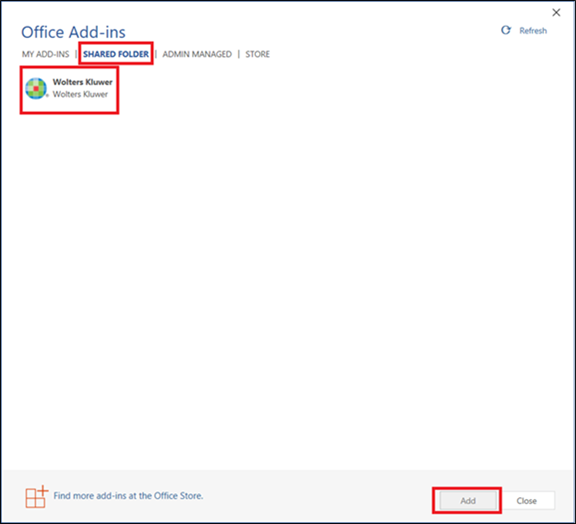
- Click SHARED FOLDER, select your add-in, and click the Add button.
- You may need to click Refresh in order to see the add-in.
- You may need to click Refresh in order to see the add-in.
-
Installation of the add-in for Office 365 online Word, Excel or PowerPoint
- Click Insert, then click Add-ins.
- Click Upload My Add-in, then click Browse in the pop-up window.
- Select the add-in you want to install and click Open.
- Click Upload; the add-in will install.
Establish the connection to your CCH iFirm site
Once the add-in is installed, the CCH iFirm button will be displayed on the Data ribbon in Excel, the References ribbon in Word and the Insert ribbon in PowerPoint.
Excel:

Word:

PowerPoint:

- Click CCH iFirm.
- Click Next to establish a connection.
- To connect to your CCH iFirm site, enter your username and password and click Login. If applicable, enter the authentication code for multi-factor authentication purposes.
- Click Allow Access to grant access.