Insert and format image
Intranet - Add and Edit Content
Using images makes your page more interesting to look at.
Insert an image
- Position the cursor where you want to insert the image.
- Click the insert image
 icon.
icon. - Locate and select the required image and click Insert.
Edit an image
For best results, we recommend that you edit images in a dedicated graphics program before adding them to a page in Intranet. However, once you have uploaded an image you can make minor adjustments, such as set the image opacity, width, and height, and flip, rotate, or crop the image.
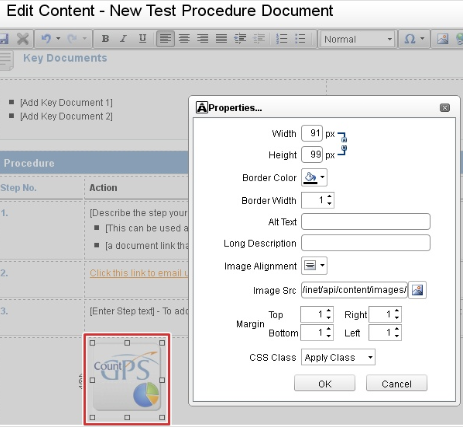
You can adjust the size, border, alignment, and label for an image. To access these options:
- Right-click the image and click Properties....
- Adjust the width and height - click the lock/unlock
 icon to adjust the width and height in relation to each other.
 - Click the arrow beside the border colour
 icon and select a colour for the image border.
 - Click the arrow beside the Image Alignment field and select the required option.
- Click the arrows beside the Border Width field to select the required width.
- Adjust the margin fields as required.
- Enter a tool tip for the image in the Alt Text field that users will see if they hover on the image.
- Enter a description for the image in the Long Description field, if required.
- Click OK.