Use tags
Intranet - Add and Edit Content
Tags are a keyword or term you assign to content. They are used to categorize content.
Intranet uses tags to determine which content displays in a content list. Intranet users can search using tags to help them find what they are looking for. If you also have the Jobs & Billing module, you can assign a tag that allows the content to be accessed from the Job Details screen.
You can add a tag when you are initially adding the content item (HTML content, external document or external Website link) to your Intranet. Alternatively, you can add a tag later when you edit a content item.
Contents
Add a tag to a content item
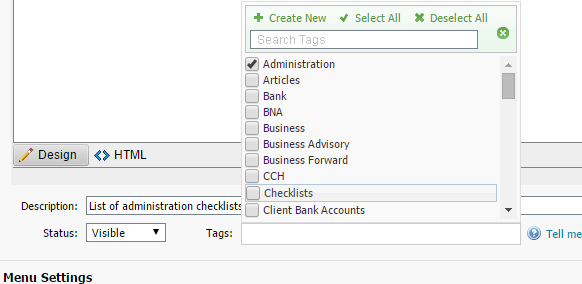
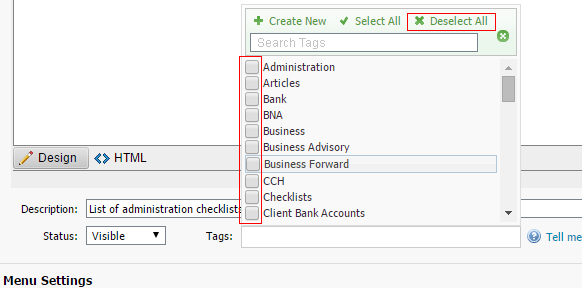
On an Add Content or Edit Content page:
- Click the Tags box.
- Select the tag(s) that you want to add using either of these methods:
- Scroll through the tags list and select the tag you want to add.
- Click Search Tags and start typing the tag name, then select the tag you want to add.
- Click out of the Tags box.
- Click Save as Draft or Save & Publish.


Create a tag and add it to a content item
On an Add Content or Edit Content page:
- Click the Tags box.
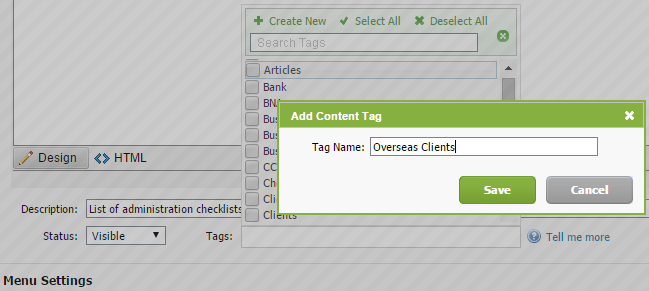
- Click Create New.
- Type the tag name.
- Click Save - the tag is selected by default.
- Click out of the Tags box.
- Click Save as Draft or Save & Publish.

Remove a tag from a content item
You can remove a tag that was added to a content item. The tag is no longer linked to that item, but still remains in your list of tags and can be used on other content items.
On an Add Content or Edit Content page:
- Click the Tags box.
- Remove the existing tag(s) using one of these methods:
- Scroll through the tags list and clear the check box of the tag(s) you want to remove.
- Click the Search Tags box and start typing the tag name, then clear the check box of the tag(s) you want to remove.
- Click Deselect All to remove all tags assigned to the item.
- Click out of the Tags box.
- Click Save as Draft or Save & Publish, as required.
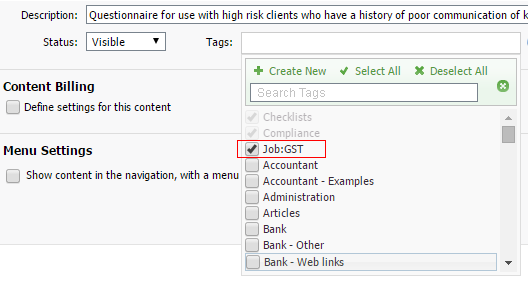
Set up job type tags for use in Jobs & Billing
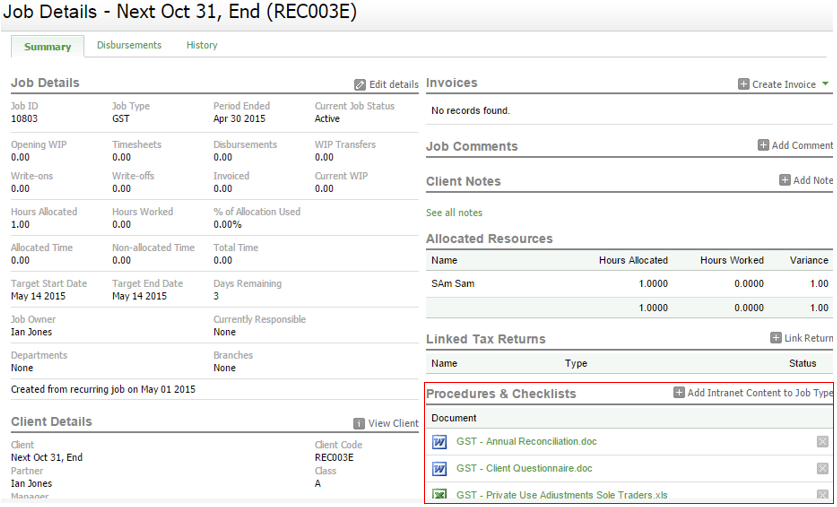
If you are using Jobs & Billing, you can create tags that incorporate your job types. You can then apply these tags to content that you want displayed for the relevant jobs.
On an Add Content or Edit Content page (of the first content item that you want to add a job type tag to):
- Click the Tags box.
- Click Create New.
- Type the tag name.
- Use following format: Job:<job type> For example, Job:STAX.
- Make sure that your tag has no spaces and that the capitalization matches your Jobs & Billing job types precisely.
- Click Save - the tag is selected by default.
- Click Save & Publish.
- Add the tag to other related content item(s).
- Add the tagged content to a job in Jobs & Billing.