Roll Forward
CCH iFirm Taxprep allows you to roll forward returns from the previous taxation year that were prepared with CCH iFirm Taxprep as well as the returns that were prepared with another tax program.
Content
Roll forward returns prepared with CCH iFirm Taxprep
Tax – Returns – Roll forward iFirm Taxprep
To roll forward a return prepared with CCH iFirm Taxprep, proceed as follows:
-
Choose the relevant product.
-
Choose a previous taxation year and select the returns that need to be rolled forward.
-
Click Roll forward, followed by Roll forward selected documents.

-
Click Roll Forward Settings and select all options to be included in the roll forward of the returns. Then, click Save.
Note: Documents in Planner mode cannot be rolled forward. -
Click Roll forward.
A notification will display when the roll forward is completed.

Information regarding the roll forward of returns prepared with another tax program
During the roll forward process, new contacts are created automatically when no match with an existing contact is found. More specifically, an attempt to link imported files with existing contacts is made, using account numbers first. Otherwise, the client name is used if an exact match is found.
Here is the list of account numbers used to link existing contacts based on the type of taxpayer:
- Social insurance number for individuals
-
Business number for corporations
-
Trust number for trusts
-
Registered charity number for non-profit organizations
-
RZ account number for partnerships
Make sure to enter an exact match for the account number or the client name in the existing contacts to prevent duplicate creation of contacts.
Roll forward returns prepared with another tax program
Tax - Returns - Roll forward from Other Software
-
Choose the relevant product.
-
Choose a previous taxation year.
-
Click Roll forward, followed by Roll forward from another software.

-
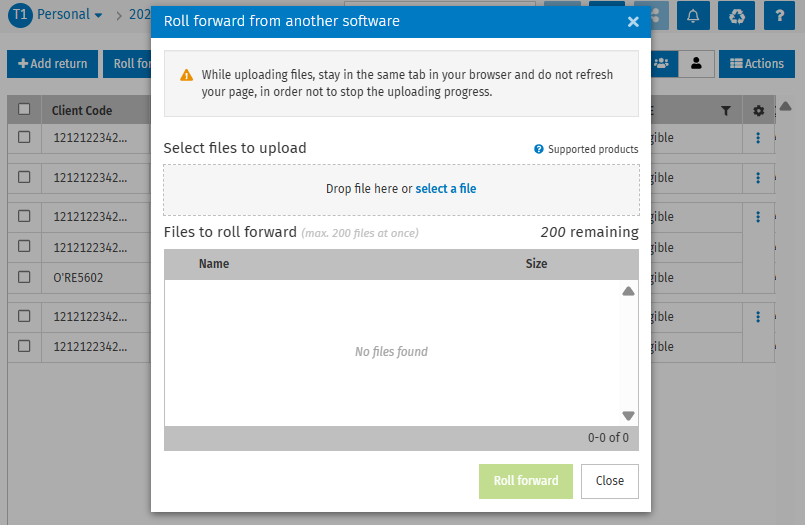
In the Roll forward from another software dialog box, drag a file or click select a file, then select the file(s) you want to upload. You can upload one or more files at a time.
Note: The following file types are supported:Intuit ProFile
TaxCycle
Taxprep
Cantax
DT Max

-
Click Roll forward.
A notification will display when the roll forward is complete, and a contact will be created in the Contacts module for each return.
Note: Make sure that you remain in the same tab of your browser and that you do not refresh the page to avoid interrupting the upload.
Roll forward settings options
Before rolling forward your returns, you can select roll forward settings from the lists of options below.
|
Product |
Options |
|
T1 – Personal |
Remove patients’ names from the medical expenses form Remove donation beneficiary names Remove slip issuer names Sort medical expenses by patients’ name Sort donations by beneficiaries’ name Sort slips by issuer’s name Keep answer to T1135 form (CAN$100,000) Keep answer to Elections Canada Keep the opening and closing paragraphs Keep the reviewer’s name Keep the preparer’s name Keep attached breakdowns Keep attached spreadsheets Keep the document note(s) Keep the document details Keep the document label Keep the forms open |
|
T2 – Corporate |
Keep the GIFI notes Keep data for SR&ED projects (T661 – Part 2) Remove donation beneficiary names Keep the opening and closing paragraphs Keep the reviewer’s name Keep the preparer’s name Keep attached breakdowns Keep attached spreadsheets Keep the document note(s) Keep the document details Keep the document label Keep the forms open |
|
T3 – Trusts |
Keep the trustee information Keep the certificate information Keep the reviewer’s name Keep the preparer’s name Keep attached breakdowns Keep attached spreadsheets Keep the document note(s) Keep the document details Keep the document label Keep the forms open |
|
TF – Forms |
Keep the capital contributed data (T5013) Keep the number of partnership units acquired in the year (T5013) Keep data for SR&ED projects (T661 – Part 2) Keep the reviewer’s name Keep the preparer’s name Keep attached breakdowns Keep attached spreadsheets Keep the document note(s) Keep the document details Keep the document label Keep the forms open |
You can also choose whether to keep the comments in the cells of the slips and forms by selecting None, Selected or All.
See the roll forward report
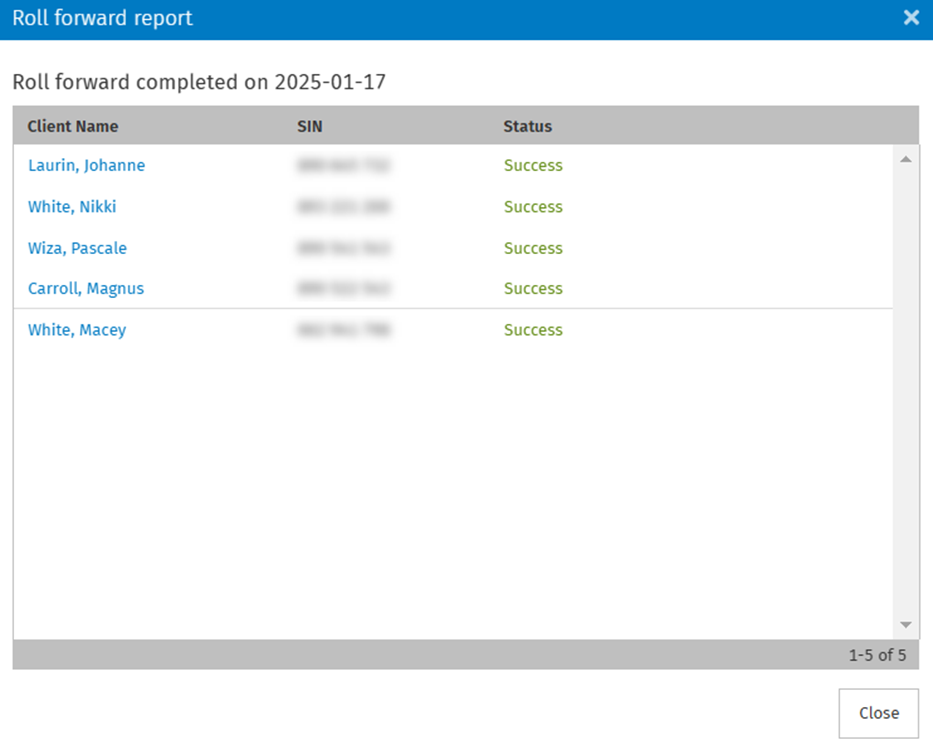
Once the roll forward is complete, a report will be generated. This report contains the list of returns that you tried to roll forward as well as the roll forward statuses.
To see this report, proceed as follows:
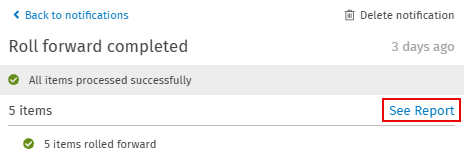
- In the menu bar, click the Notifications icon
 .
. - Click the notification relating to the roll forward for which you want to display a report.
- Click See Report.

The box Roll forward report displays.
- For more information on the roll forward status, place the cursor of your mouse on the status text. A tooltip displays additional information.

- To access the return of a client, click his or her name in the Client name column.
