Set Up the Digital Signature Feature
The Portal module integrates with DocuSign to allow you to use digital signature feature and, as a result, you can manage a sign and return workflow for your documents. You can upload one or more documents to be signed, specify who needs to sign them (signatories) and then send them in a package known as an envelope. Once the documents are signed, you will be notified via e-mail. See the Send documents to be signed page for information on how to use this feature. There are four key steps involved in setting up the digital signature feature, as outlined below.
Step 1 - Enable the digital signature feature in CCH iFirm
First, enable the feature on your CCH iFirm site.
- Click Settings > Portal > Portal Settings.
- Ensure that the reply e-mail address in the Portal settings is valid, as this is where the DocuSign activation e-mail will be sent.
Note: We recommend that you use a generic (e.g. admin@yourfirm.ca) e-mail address in your portal settings as there may be a significant number of e-mail notifications sent to this address.
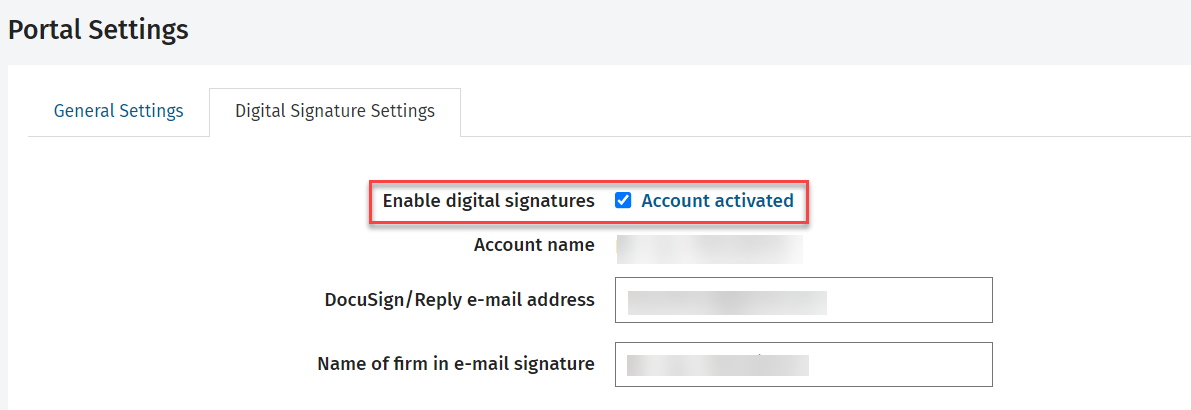
If you already have a DocuSign account, you will need to set up a special one to use with CCH iFirm. The e-mail address must be different from the one associated with your existing DocuSign account. - Click the Digital Signature Settings tab.
- Select the Enable digital signature check box.
- Enter the Account Name (Firm name) and the Name of firm in e-mail signature.
- Click Save.
Step 2 - Set up and activate your DocuSign account
In order to use the digital signature feature, you need to have a DocuSign account, which will be set up by Wolters Kluwer. Once you have clicked the Create Account link, an e-mail from DocuSign will be sent to the e-mail address specified in your portal settings. This e-mail will prompt you to activate your account and specify your DocuSign password, which you will need for Step 3.
- Click Settings > Portal > Portal Settings.
- Click the Digital Signature Settings tab.
- Click the Create Account green text link (under the Enable digital signature check box), so that we can get a DocuSign account set up for you.
- Browse your e-mails for the account activation e-mail.
- Open the account activation e-mail you receive from DocuSign and activate your account and create a password via the link in the e-mail.
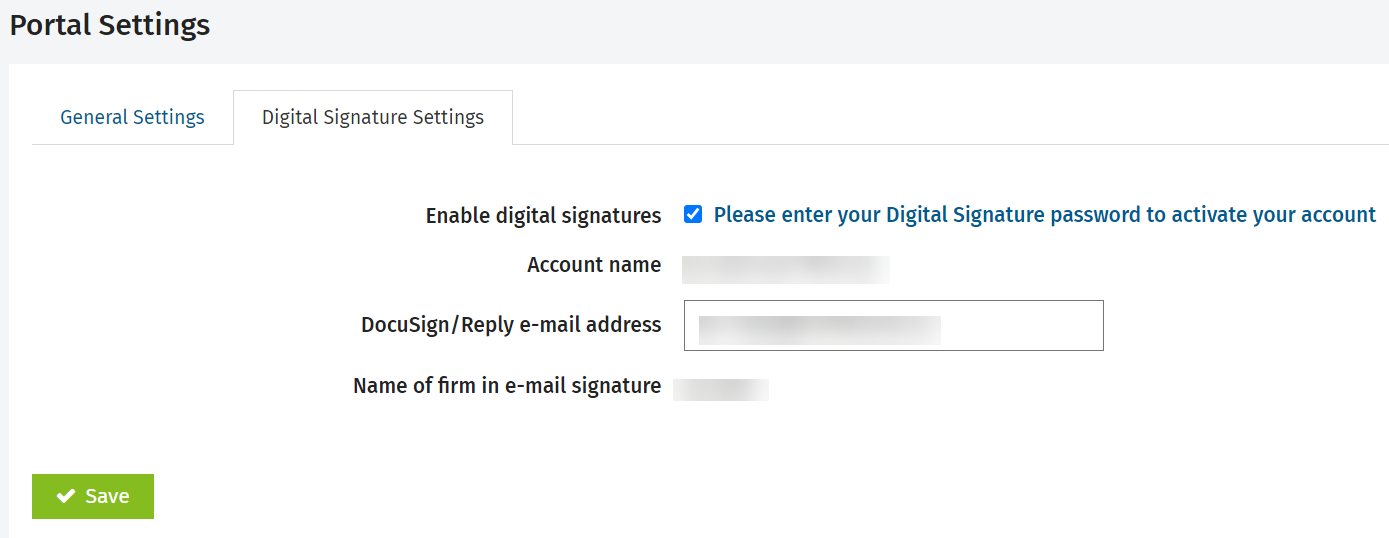
Step 3 - Activate your digital signature account in CCH iFirm
Once you create a DocuSign password in step 2 above, you can activate your digital signature account on your CCH iFirm site.
- Click Settings > Portal > Portal Settings.
- Click the Digital Signature Settings tab.
- Click the green text link (under the Enable digital signature check box) to activate your digital signature account.
- Enter the DocuSign password you created in step 2 above.
- Click Save.
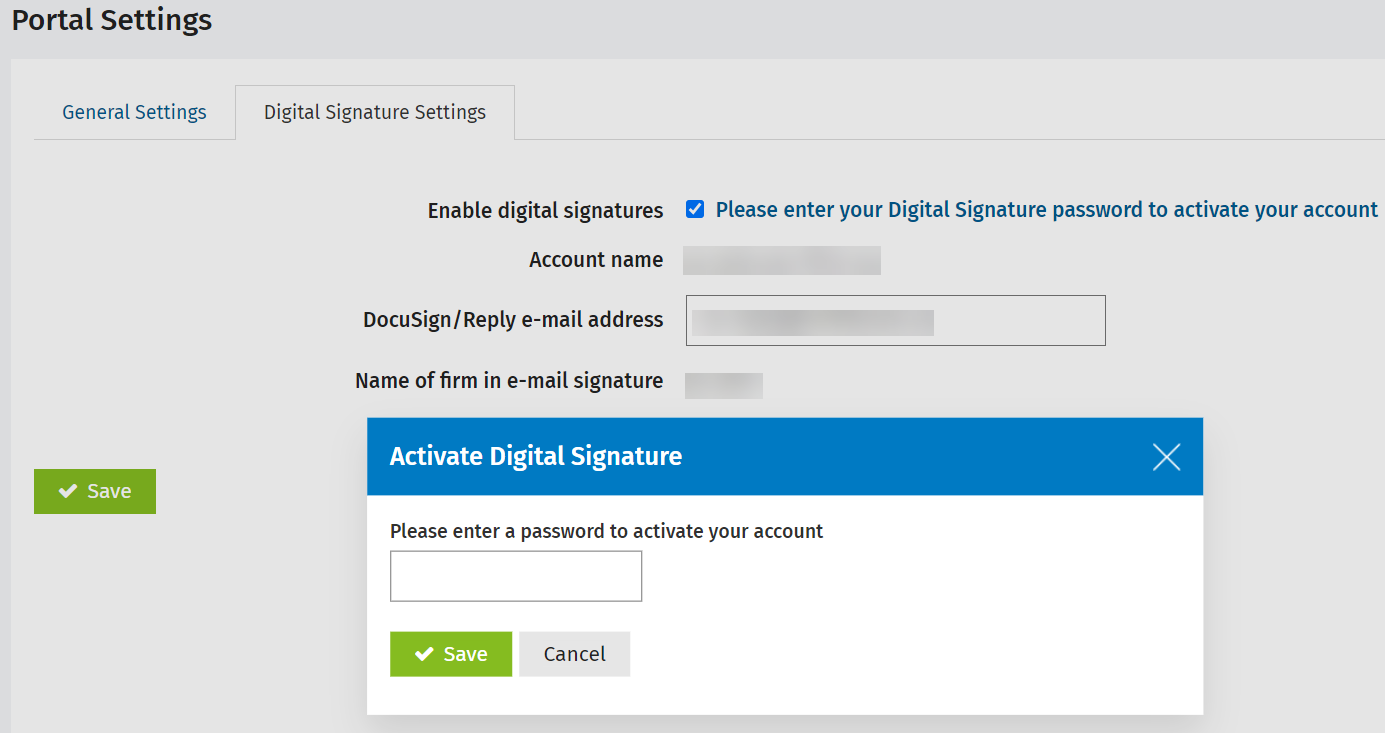
Once you enter your password, a message displays advising you that your digital signature account has been successfully activated. As a result of the activation, additional settings become available.
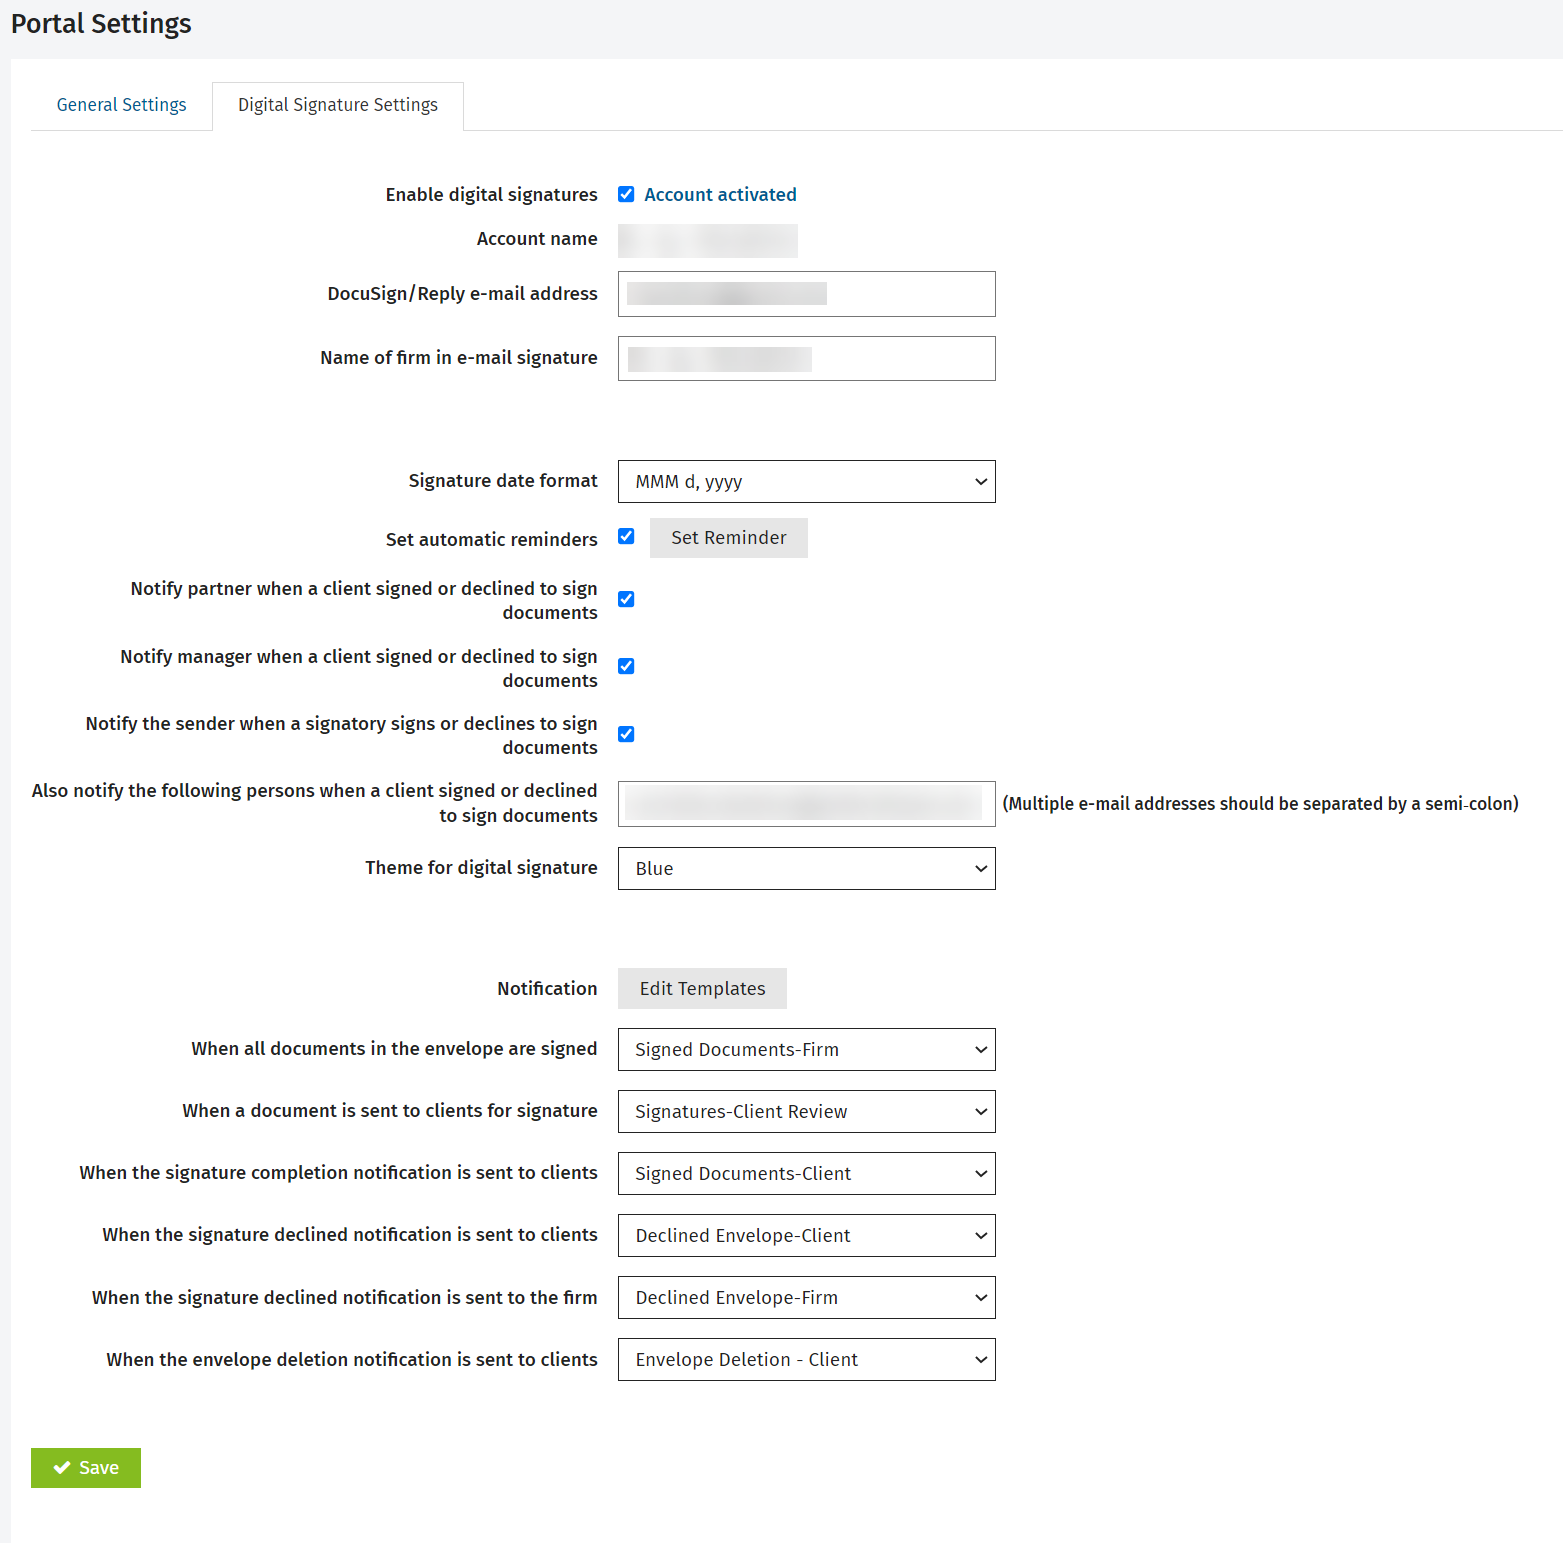
Step 4 - Customize your digital signature settings
Client Portal - Electronic Signing
- Click Settings > Portal > Portal Settings.
- Click the Digital Signature Settings tab.
-
Edit the Digital Signature e-mail address, if required.
- Log in to your DocuSign account to make the e-mail change and keep a valid connection.
- Edit the default name of firm in e-mail signature, if required.
- The default name comes from the name of firm in e-mail signature that is set in your firm settings.
- You may want to change this to reflect the business name you want your clients to see on the e-mail that is generated for signing.
- Select your preferred signature date format to use for the Date tag in the envelopes.
- Enable automatic reminders and expiration for the envelope, if required.
- Select the Set Automatic Reminders check box, then click the Set Reminder button.
- Enter your preferred reminder and expiration settings, then click Save.
- Select your preferred e-mail notification settings:
- These are automated e-mails that notify you when the document is signed or if the recipient declined to sign the document.
- Select the check box to notify the partner and/or the manager. To notify other people, type the e-mail addresses separated by a semicolon (up to 254 characters maximum) into the box.
- Select the theme for the digital signature (blue, green, orange or red).
This depicts the colour theme the signatory will see while signing the document. - Select the default e-mail templates that you want to use for notifications.
- Click Save.
Note: These settings will be applied to an envelope only once you select the Send automatic reminders check box while creating an envelope in the Add Document dialog box. For more information, see the Send documents to be signed topic.
You can now use your digital signature feature. For more information, see the Send documents to be signed page.