Add or edit a contact group
Contents
Learn about contact groups
You can add contact groups and then organize related contacts into those groups. For example, you could create a group called ABC Pharmacy Group and add group members to it, such as ABC Pharmacy Ontario, ABC Pharmacy Québec and ABC Pharmacy Alberta. Grouping contacts is different from adding relationships between contacts (e.g. their shareholder, trustee, and beneficiary connections). It provides an easy way to consolidate a group of related contacts and report on the group as a whole.
Organizing contacts into groups is useful for working in the Jobs & Billing CCH iFirm module:
- A team member who is assigned allocated to a job can see whether or not other clients could be affected by the work they have been assigned to do. This information will display on the Job Details page.
- A payment can be split between group members when managing your receivables.
- When you keep track of the WIP, you can maximize your efficiency using the groups, the Grouped Aged Receivable Accounts and Grouped Work in Progress reports.
-
Services rendered by the members of a group can all be grouped on the same invoice.
Add a contact group
Contacts - View, Add and Edit Contacts
There are three ways to add a contact group. You can do it manually via the Contact Groups area or from within a contact record (see below). Alternatively, you can assign a contact to a contact group when you import the contact details (via the ContactGroup field).
- Click Contacts > Groups.
- Click Add Contact Group to set up a new group.
- Enter the Group Name.
- Click Save.
- Proceed to add contacts to the group:
Note: A contact can only belong to one contact group but can be a member of a billing group.
- Enter the first few letters of the contact's name in the field provided or click the search
 icon to select the required contact.
 - Click Add.
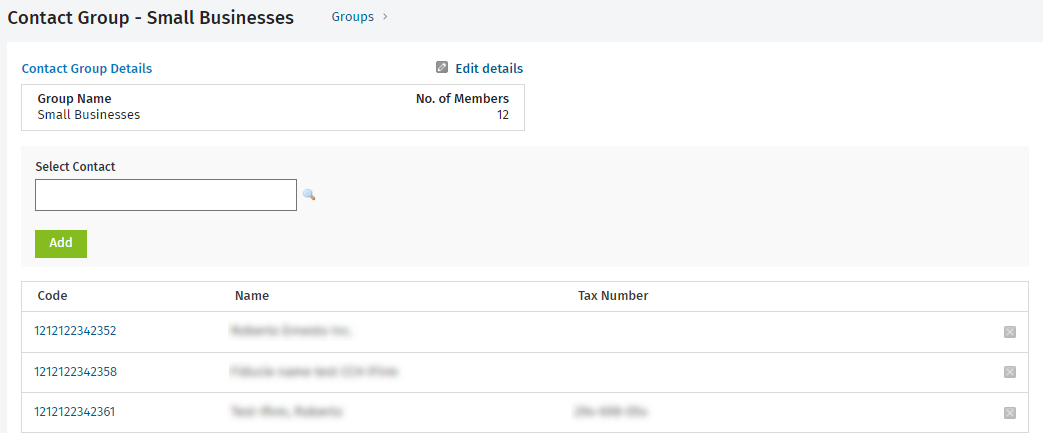
Alternatively, you can add contacts to the group later. Access your contact groups using one of the following methods:
- Click Contacts > Groups, click the row of the contact group to open it and follow step 5 above.
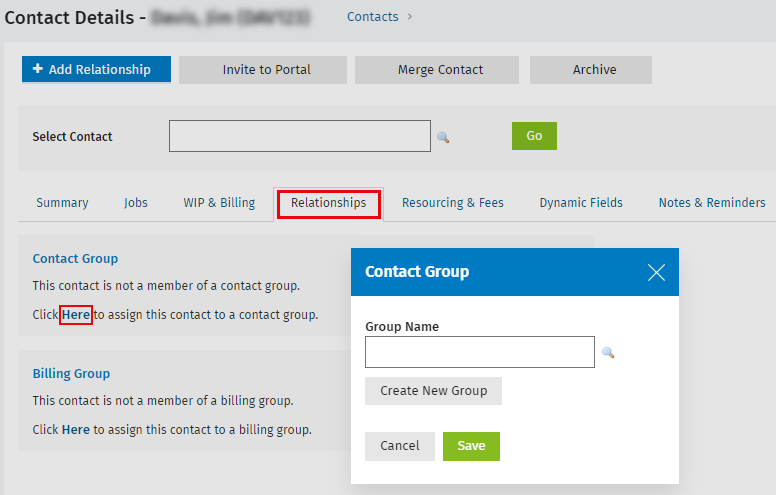
- Click Contacts then locate and select the required contact. Click the Relationships tab then click the Click here to assign this contact to a contact group message. Either locate the group or create a new group and click Save.
View contact groups
Contacts - View, Add and Edit Contacts
- Click Contacts > Groups.
The list of groups is displayed, including the number of group members. - Click a contact group to open it - You can then edit it.
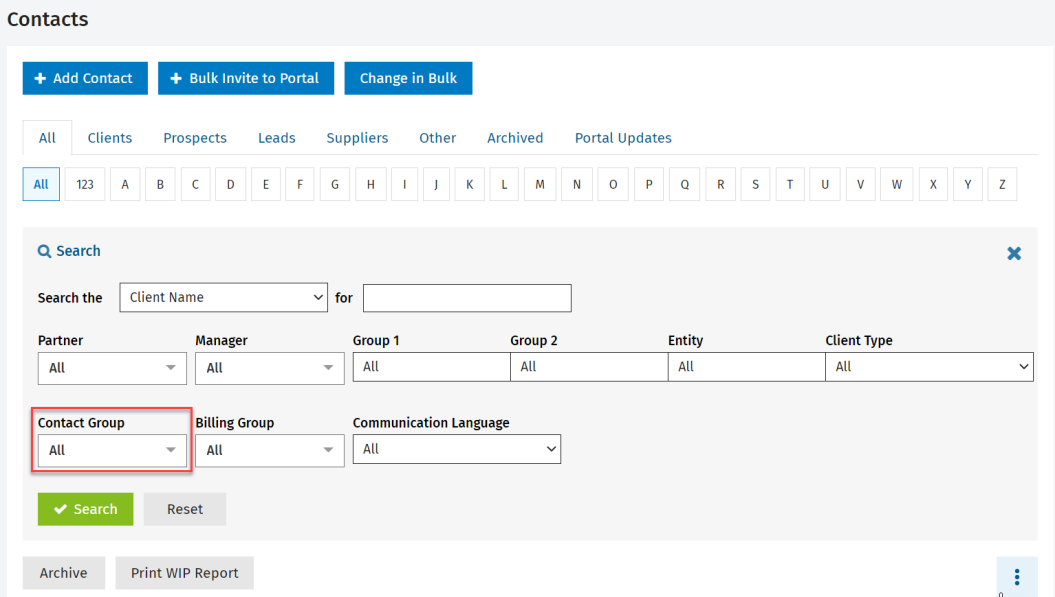
You can also filter your Contacts search results by contact group.
Edit a contact group
Contacts - View, Add and Edit Contacts
- Click Contacts > Groups.
- Click the row of the group you want to edit.
- Edit the group's name, if required:
- Click the Edit details
 icon.
icon. - Make the required changes.
- Click Save.
- Click the Edit details
- Add another contact to the group, if required, using either one of these methods:
- Enter the first few letters of the contact name in the search box, click the required contact in the list that appears, then click Add.
- Click the search icon, locate and click the required contact, then click Add.
- Remove a contact from the group, if required:
- Click the delete
 icon at the end of the row of an existing contact.
 - Click Yes to confirm.
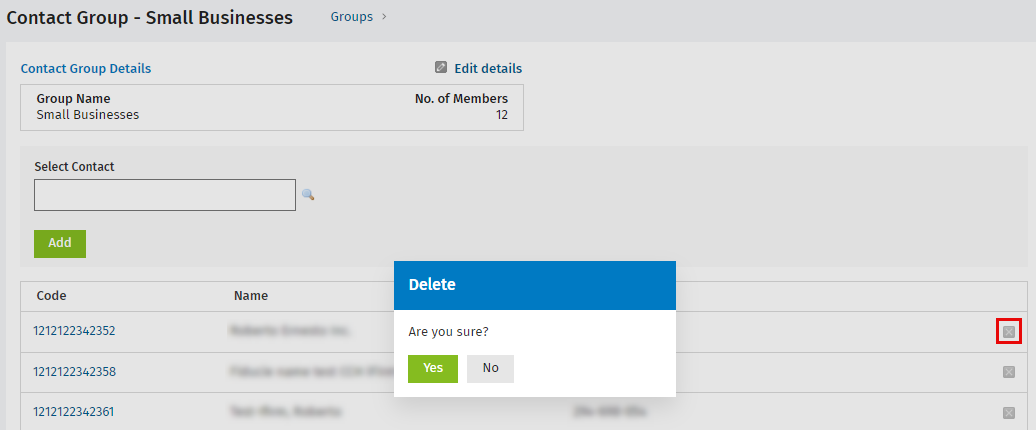
- Click the delete
Delete a contact group
Contacts - Archive and Delete Contacts
- Click Contacts > Groups.
- Click the delete
 icon on the row of the group that you want to delete.
 - Click Yes to confirm.