Manage tags
- Settings - Contacts
- Documents - Firm Documents
Tags allow you to organize your documents and make it easier to search. They play the role of folders. You can add tags in files kept in CCH iFirm Documents. However, unlike folders, you can apply more than one tag to a single document. Tags can also be used for retention periods.
To simplify the use of tags, certain tag assignments have been automated. As a result, the Job Type tag will be assigned to the documents kept in the jobs, and tags with the To Assign, Permanent and Contact will be assigned to documents saved in those folders. Tags can be added, modified and displayed from the documents chart. Use the Tag filter in the search bar to search for these tags and find documents more quickly.
The list of tags is managed by the firm. To help you maintain a seamless tag structure, only authorized users can create tags.
Contents
- Display tags
- Add a tag to the list of available tags
- Add or assign a tag when uploading a file
- Add or assign a tag using Office 365 add-ins
- Assign a tag to an existing file
- Batch-assign tags to files in the same folder
- Edit a tag
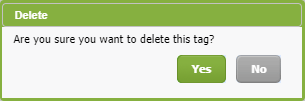
- Delete a tag
Display tags
- Settings > Documents.
- Click Tag Settings.
The list of available tags is displayed
Add a tag to the list of available tags
- Click Settings > Documents.
- Click Tag Settings.
- Click Add Tag. The Add Tag dialog box is displayed:
- In the Tag Name field, enter the tag name.
Note: When creating the tag, the English name will be selected by default. However, you can assign a French and English name to the tag by clicking the and
and  buttons. The tag name will display depending on the application’s interface language.
- Click Save.

- In the Tag Name field, enter the tag name.
Add or assign a tag when uploading a file
- Open the Contact Details page (Contacts > All Contacts > click the desired contact) or the corresponding Job Details (Jobs & Billing > Jobs > click the desired job), then click the Documents tab.
- Click Upload Documents.
- Select the file to upload.
- In the Tags field, enter the tag name or select the tag you would like to assign to the file.
- Click Upload Files.
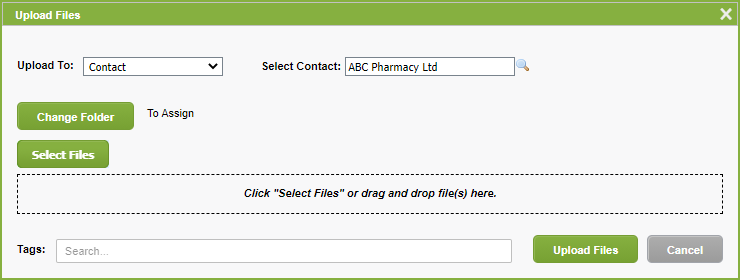
The indicated tag will be automatically associated with the uploaded file.
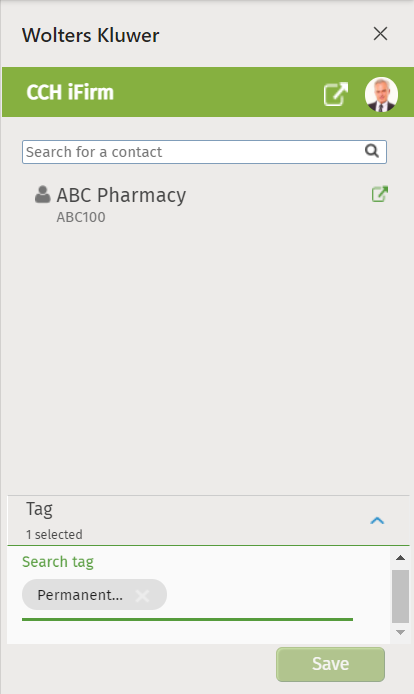
Add or assign a tag using Office 365 add-ins
Outlook
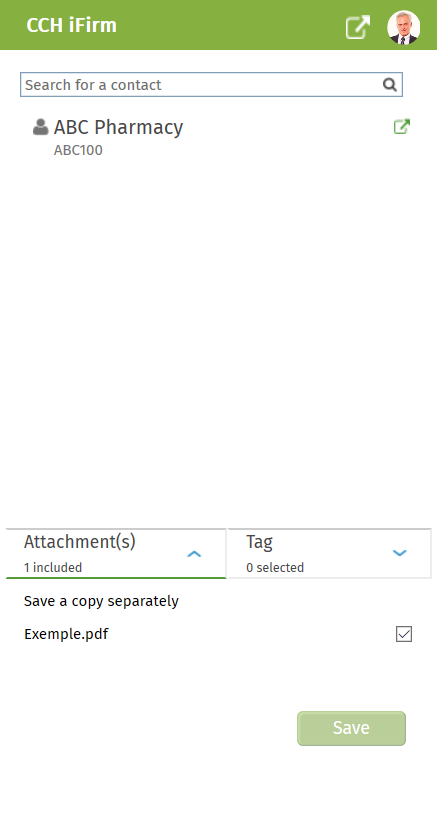
To add a tag when you are using the Outlook add-in, proceed as follows:
- Open the Outlook add-in from am e-mail that contains an attached document.
- Select the documents to transfer to the Attachment(s) pane.
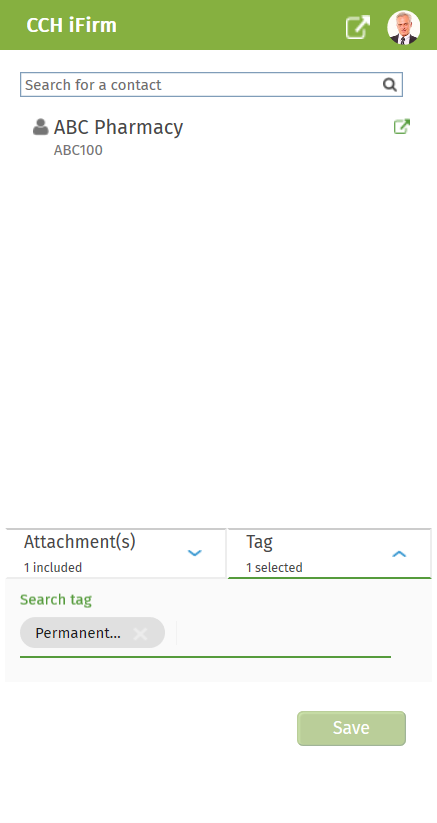
- Click the Tag pane.
- Select the tags to add.
- Click Save.
Word/Excel
To add a tag when you are using the Word/Excel add-in, proceed as follows:
- 1. Open the Word/Excel add-in from a document. The Tag pane will be displayed automatically.
- 2. Select the tags to add.
- 3. Click Save.
Assign a tag to an existing file
- Click Documents in the left menu.
-
In the Document Management System page, find and click the desired client in the Client Documents tab.
-
Click the folder to access the desired file.
- Click the tag symbol
 associated with the file, then click in the section of the field.
- Select the tag to add from the drop-down list.
The additional tag will then be added to the file.
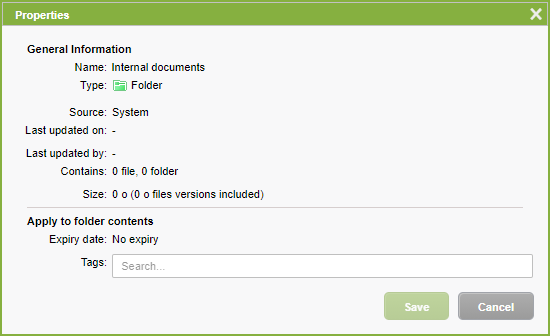
Batch-assign tags to files in the same folder
- Click Documents in the left menu.
- In the Document Management System page, click the button
 at the end of the line of the desired file.
 - Select the tag(s) to apply.
- Click Save.
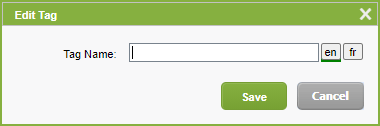
Edit a tag
- Click Settings > Documents.
- Click Tag Settings.
- Click the tag to edit. The Edit Tag dialog box is displayed:
- Edit as required.
- Click Save.
 to the right of the tag.