Add, edit or delete a profile
Security- Manage User Security
You can add profiles for the staff in your firm. These profiles have specific security roles assigned to them. You can then choose the relevant profile when setting up new users. Creating profiles enables you to quickly add users with the various security roles needed. This is particularly useful if you have a large firm, for example 100 staff.
Contents
Add a profile
- Click Settings > Users. The User Manager page displays.
- Click the Manage Profiles button.
The Profiles page is displayed. - Click Add Profile.
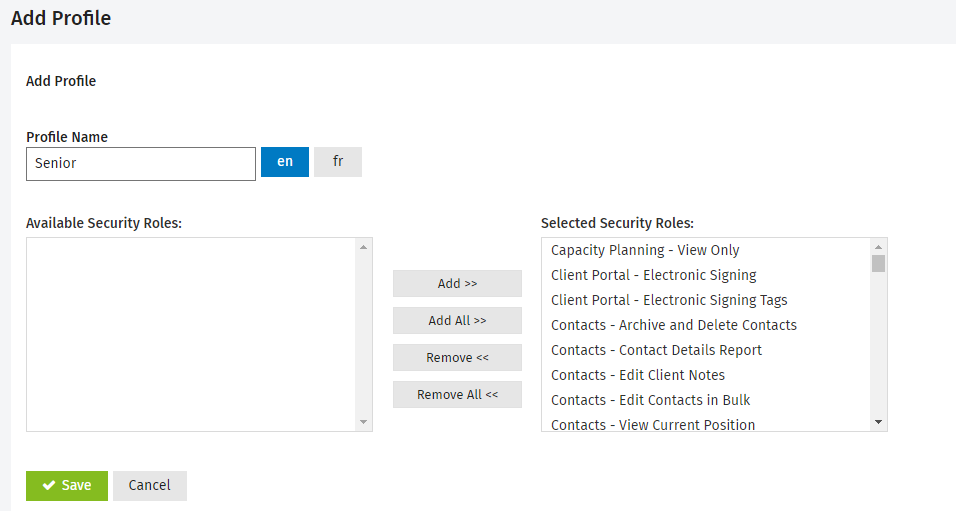
- Type the profile name - this is required and can be a maximum of 25 characters including, letters, numbers, &, and -.
If your firm is also using CCH iFirm in French or if you have to communicate with some French speaking contacts, you have to click the button and then enter the French description of the label.
 - Select the security roles that you want to assign to the profile.
- Click Add.
- Click Save.
- The new profile displays in the page.
- Click the row of the new profile to edit it, if required.
- This profile can now be assigned to a user.
Edit a profile
- Click Settings > Users. The User Manager page displays.
- Click the Manage Profiles button.
The Profiles page is displayed.
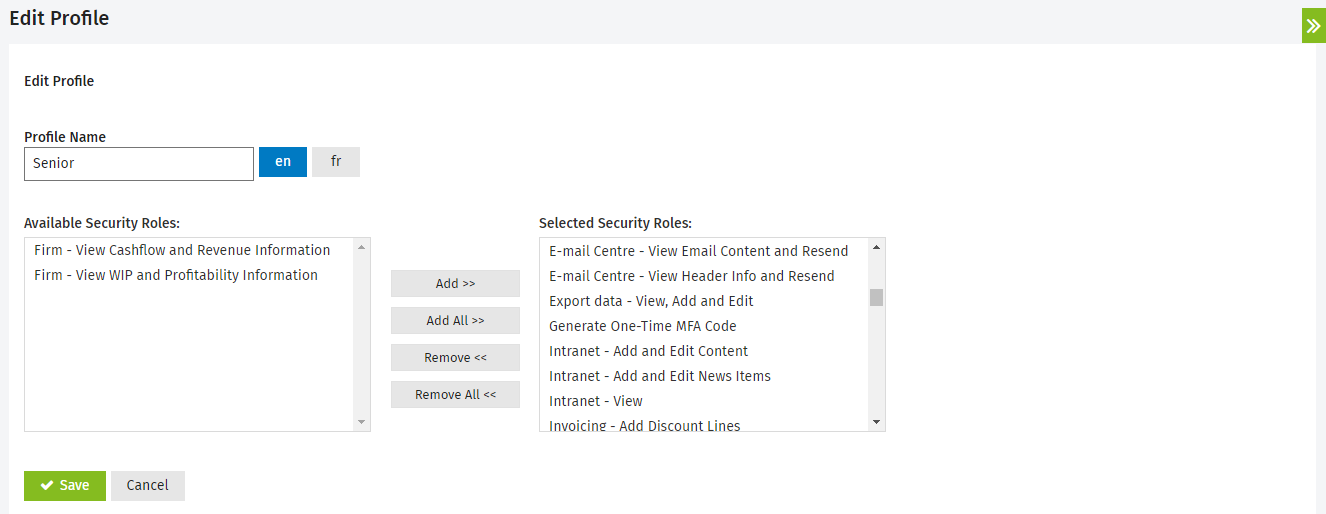
- Click the row of the profile you want to edit.
- Edit the profile name, if required.
If your firm is also using CCH iFirm in French or if you have to communicate with some French speaking contacts, you have to click the button and then enter the French description of the label.
 - Add or remove the security roles assigned to the profile, as required.
- Click Save.
Delete a profile
You can only delete a profile if it has not been assigned to a user (active or inactive).
- Click Settings > Users. The User Manager page displays.
- Click the Manage Profiles button.
The Profiles page is displayed.

- Click the Delete button
 at the end of the row of the profile you want to delete.
 - Click Yes to confirm.


