Customize the CCH iFirm dashboard
You can customize your dashboard by deciding what widgets are displayed and where they are located on the screen. You can also add content to the dashboard, such as your firm's logo, and choose a different colour theme.
Contents
Learn about the dashboard
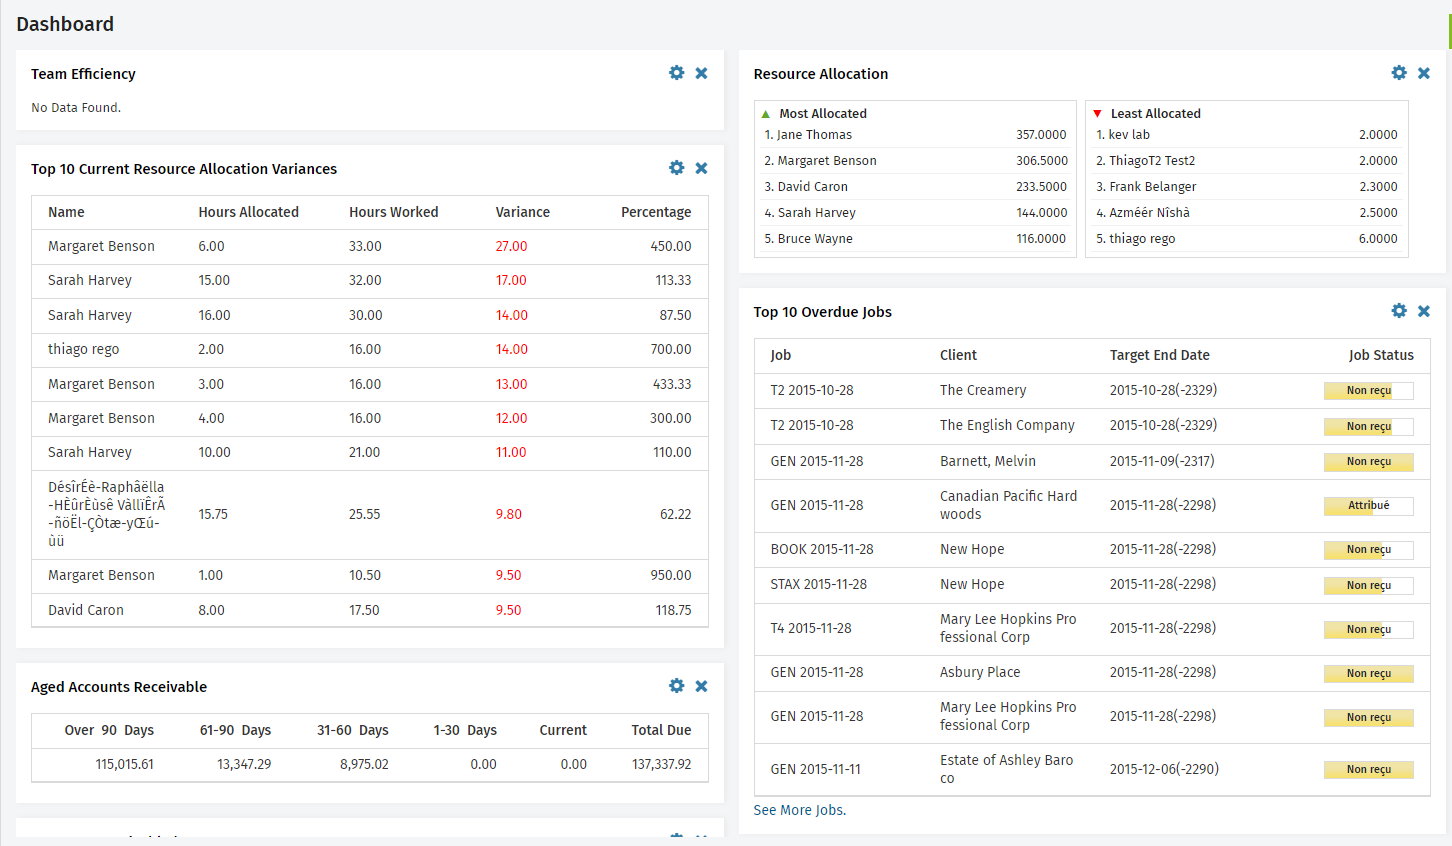
When you log in to CCH iFirm you will see the Dashboard page. The dashboard consists of various widgets that provide live information on the key areas of your firm. The information you see on your dashboard depends on your security role and the modules of CCH iFirm you have purchased. You can choose which dashboard widgets are displayed on your dashboard.
Add a widget to the dashboard
- Click Dashboard.
-
Click your user name in the upper right corner.
-
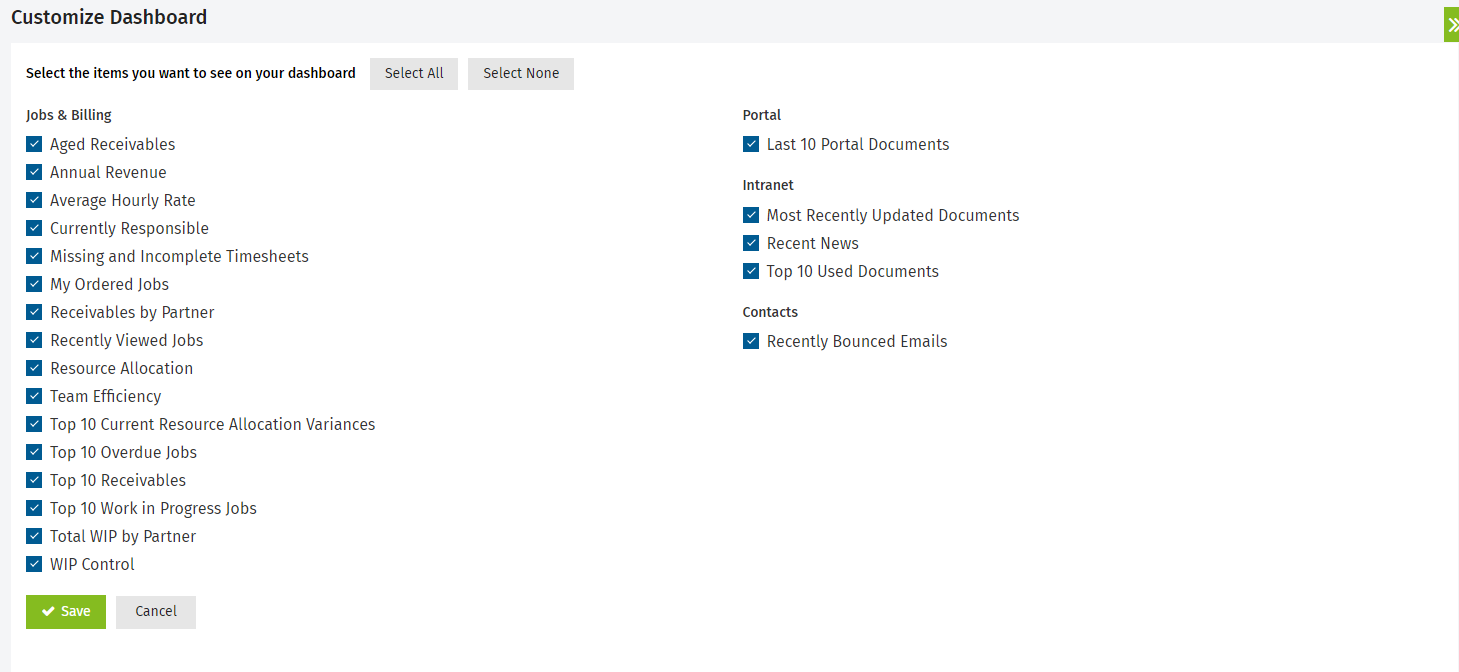
Click Customize Dashboard.
- Select the check boxes of the widgets you want displayed on your dashboard, and clear the check boxes of the widgets you do not want displayed.
- Click Save.
Rearrange the dashboard widgets
You can control the position of your dashboard widgets. You can rearrange them so that the more relevant widgets appear at the top. The arrangement of widgets applies to the individual user profile only.
- Move your mouse over the green header bar for the widget you want to move; the cursor changes from the usual arrow to a multiple direction arrow
 , which shows the user the widget can be dragged around.
 - Left-click your mouse and hold it down to drag the widget to a new location
- The widget will appear faded while being dragged.
- Other widgets will move to accommodate the one being dragged.
- Release the left-click button on your mouse to save the widget's new location.
Remove a widget from the dashboard
- Click the delete
 icon in the widget header.
 - Click Yes to confirm.
Edit the widget settings
Each dashboard widget has settings that you can apply to change the data displayed in the widget. The settings that you apply will be saved for your user profile, so the widgets will be set up the way you like it every time you visit the dashboard. The settings vary for each dashboard widget, depending on what is relevant. For example, the option to filter by billing entity is relevant on receivable and invoice widgets, but not on job widgets.
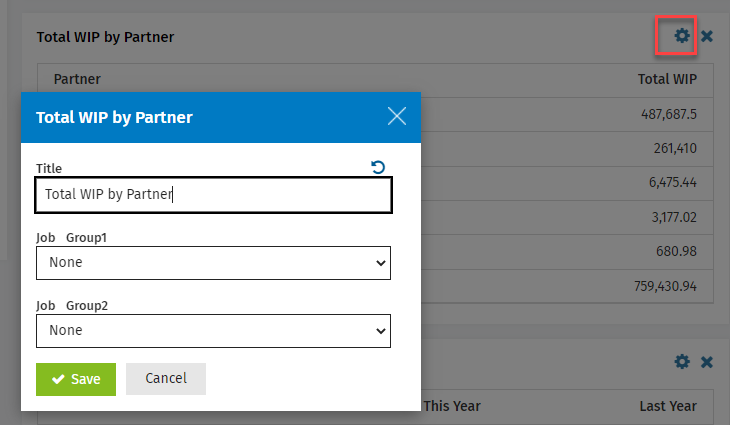
- Click the settings
 icon in the widget header.
 - Make your changes.
- Each widget will have its own settings.
- If you change the title from the default, the next time you access the widget settings you will see a revert
 icon beside the title. Click this icon to restore the default title text.
 - If you change any other settings (not the title), you will see a filter
 icon to the right of the title on the widget.
- Click Save.
Add content to the dashboard
You can add content to your dashboard, so you can personalize it for your firm. For example, you could add your firm's logo and some important information at the top of the dashboard above the widgets. You can also change the theme of the dashboard, so you can have a different colour for the widget headers.
- Click Settings > Firm Settings.
- On the Firm Settings page, click Dashboard Content.
- Edit the Title of the Dashboard page, if required.
- Select a new theme (colour scheme) from the drop-down list, if required.
- Add content, such as images, RSS feeds, text, hyperlinks, tables, videos, and more, using the HTML editor toolbar.
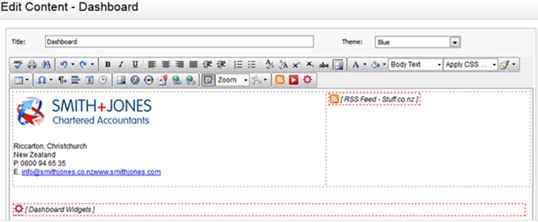
Note: You will see a red rectangle with an object inside a red box that takes up the width of the screen. This represents all the dashboard widgets. You may add content above or under the rectangle before and after it. If you accidentally delete the red rectangle, click the Insert the dashboards widgetsicon in the toolbar to restore it.
- Click Save.
The Dashboard page displays and you can see your new content.
Example
In the following example the advanced HTML editor was enabled so that a table could be inserted. An image, text and hyperlinks were added to the left column and an RSS feed was added to the right column. Below this newly added content are the CCH iFirm dashboard widgets. The theme colour was changed to blue.