Edit general timesheet settings
Settings - Jobs & Billing
You can set the number of minutes in each unit of time, specify the period over which timesheets can be edited, and control when timesheets are automatically locked.
- Click Settings > Jobs & Billing.
- Click General Settings.
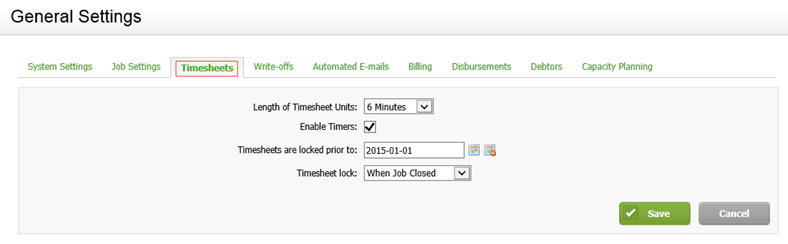
- Click the Timesheets tab.
- Select the required length of time for each unit from the drop-down list.
- Select the Enable timers check box, if you want use the timesheet timers functionality. This setting is selected by default.
- Use the calendar
 icon to select the cut-off date before which users will not be able to add, edit, or delete timesheets (optional).
- In other words, you are specifying that timesheets will be automatically locked by this date. All timesheets are locked for all jobs, regardless of whether the job has been completed, invoiced or closed. Any timesheet entries that are entered before the selected date cannot be added, edited, or deleted.
- If you are new to Jobs & Billing and are still entering timesheets manually, we recommend that you select the date of when you started using Jobs & Billing. Once you are up and running with Jobs & Billing, you can adjust the date as required, for example to the end of each month.
- Select when you want the timesheet to lock from the drop-down list.
- Timesheet entry for a job will be locked when it is completed or closed.
- Timesheets can be unlocked, if required.
- Timesheets can also be locked manually, if required.
- Click Save.