Customize print formats
In addition to predefined print formats, it is possible to customize your print formats to print returns to PDF with the CCH iFirm Taxprep module.
You can add print formats, edit them, roll them forward to another taxation year and delete them so that they meet your needs.
Add a print format
Tax - Settings - Print formats - Add, Edit
To add a print format, proceed as follows:
-
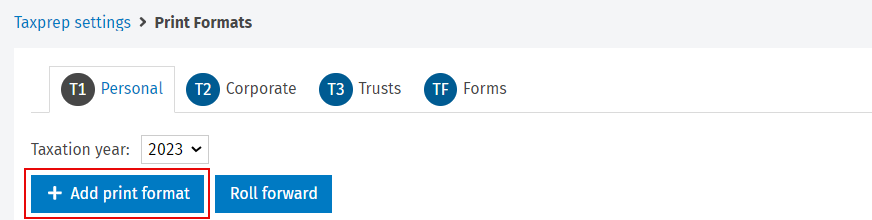
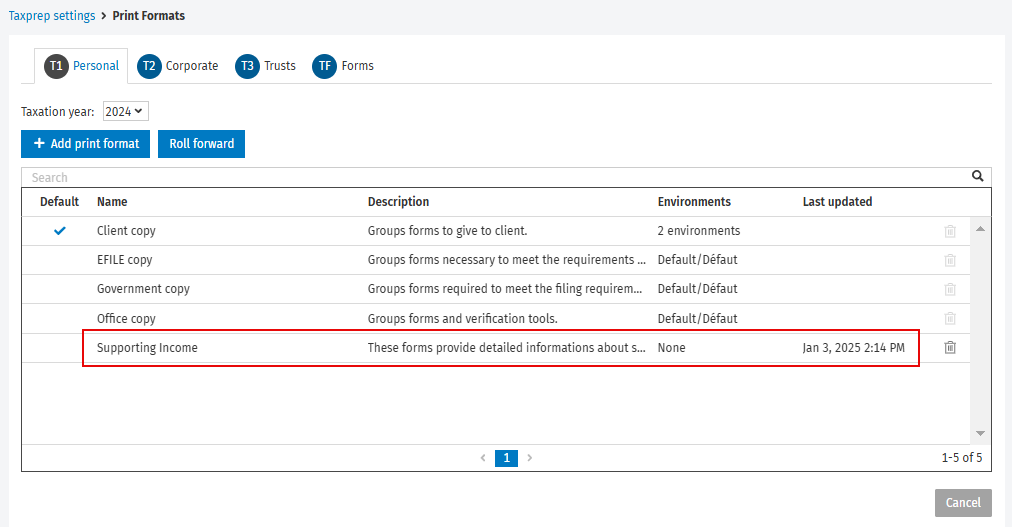
Click Settings, select Taxprep, then Print formats.
-
Select the tab corresponding to the product for which you want to add a print format.
-
Click Add print format.
-
Select the desired print format among the available options, then click Add.
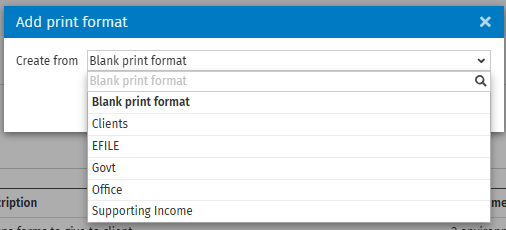
Note: Choose the Blank print format option to create a fully customized print format. If you select another print format, multiple forms will be added automatically for printing, which you will be able to adjust in the Print column afterwards.
-
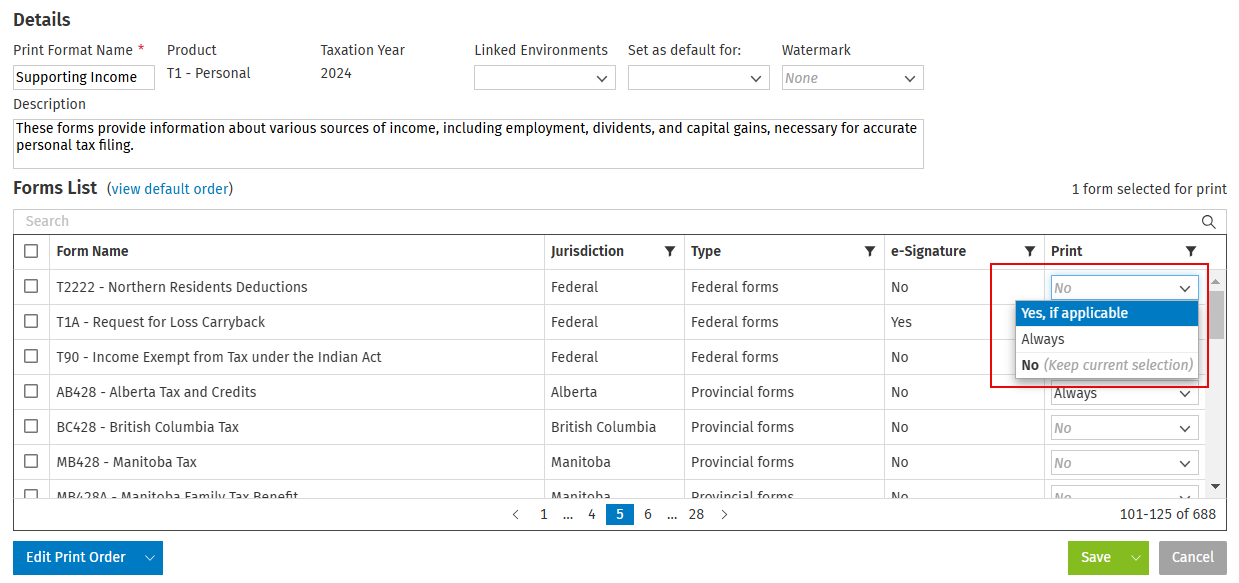
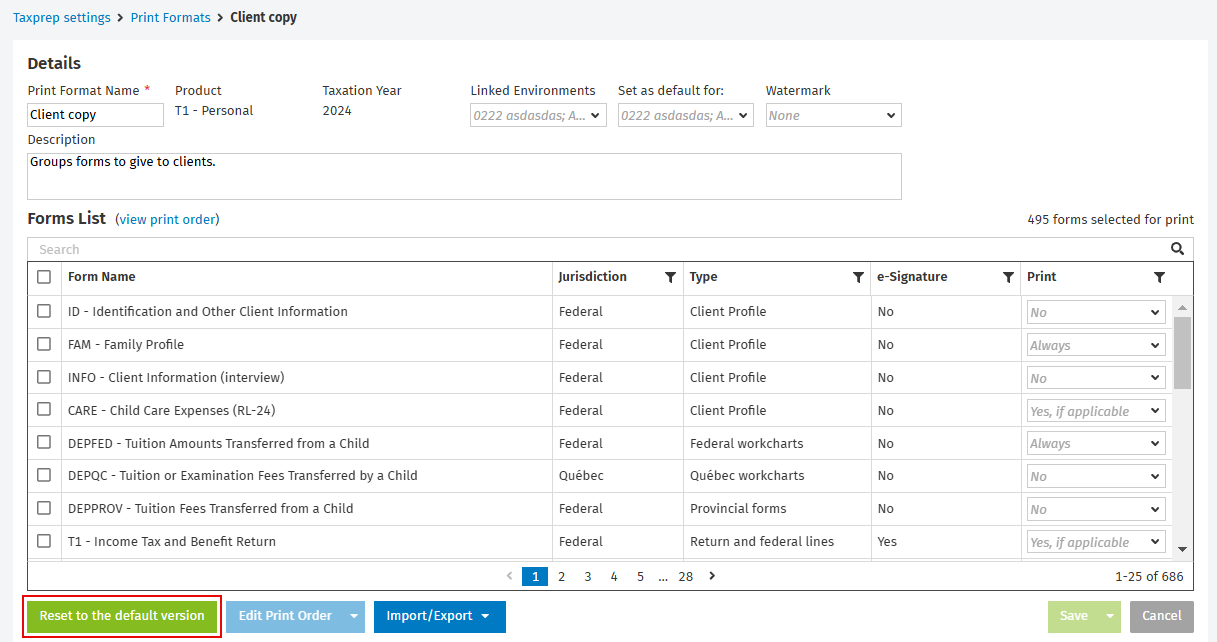
Enter the print format name in the Print Format Name field. A description can also be added to the Description field.
-
Optional: Select the linked environments from the Linked Environments drop-down list. You can also set these environments by default by selecting them from the Set as default for drop-down list.
Note: For the T2 – Corporate and TF – Forms print formats only, you can select the Print Revenu Québec forms in French, if required check box under the Option section.
-
From the Forms List section, select all forms to print that you want to include in your new print format by selecting the Yes, if applicable option or the Always option in the Print drop-down list.
To find a specific form, you can use the search bar. You can also apply filters by clicking the
 icon to the right of the Jurisdiction, Type, e-Signature and Print columns. Then, select the relevant items.
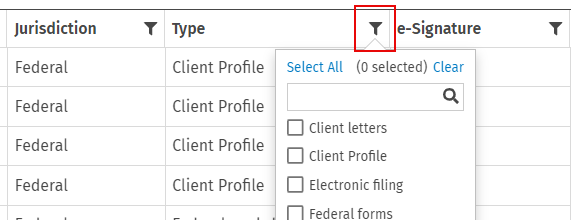
-
Click Save. Your new print format is now displayed in the list of available print formats.
Edit a print format
Tax - Settings - Print formats - Add, Edit
To edit a print format, proceed as follows:
-
Click Settings, select Taxprep, then Print formats.
-
Select the tab corresponding to the product for which you want to edit a print format.
-
Click the print format you want to edit. If you select a predefined print format, click Edit the predefined print format.
Note: A predefined print format can be reset by clicking Reset to the default version.
-
Edit the order and the list of forms to print as required.
-
Click Save.
Roll forward a print format
Tax - Settings - Print formats - Roll forward
To roll forward a print format and make it visible in the desired taxation year, proceed as follows:
-
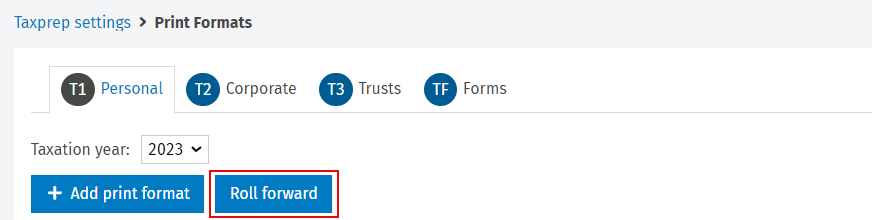
Click Settings, select Taxprep, then Print formats.
-
Select the tab corresponding to the product for which you want to roll forward a print format.
-
Click Roll forward.
-
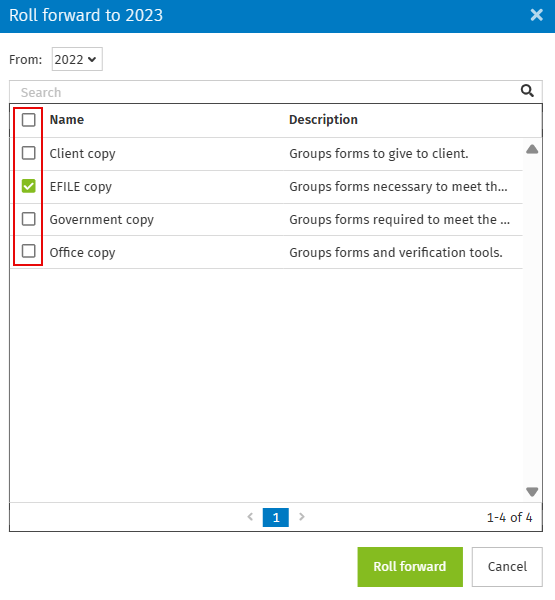
From the drop-down list, select the taxation year from which you want to roll forward print formats.
-
Select the print formats that you want to roll forward, then click Roll forward.
Delete a print format
Tax - Settings - Print formats - Delete
To delete a print format, proceed as follows:
-
Click Settings, select Taxprep, then Print formats.
-
Select the tab corresponding to the product for which you want to delete a print format.
-
From the list of print formats, click the icon at the right of the print format that you want to delete.
Note: A predefined print format cannot be deleted. However, it can be modified.
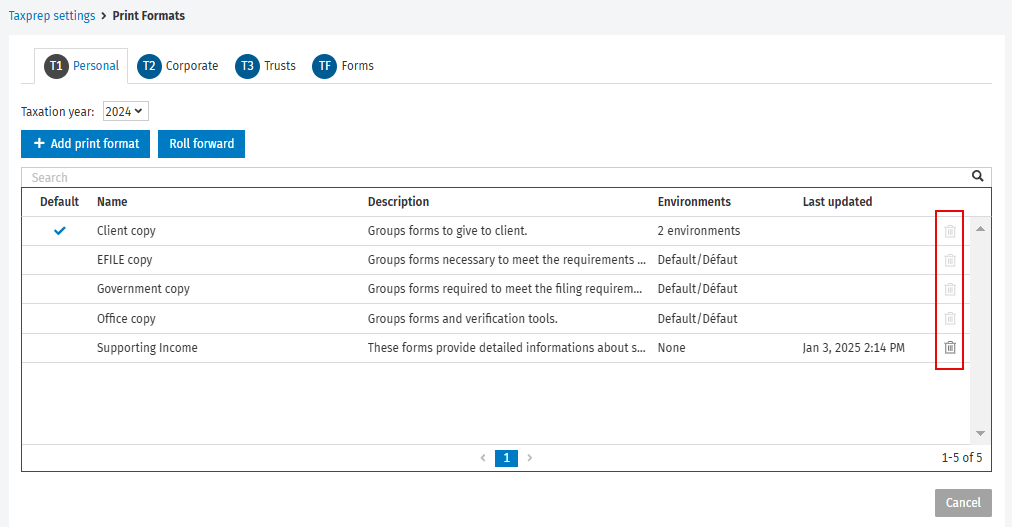
-
Click Delete to confirm.