Print forms and tax returns to PDF
Tax — Returns — Print to PDF
Printing forms and tax returns can be done directly from the CCH iFirm Taxprep module, allowing digital documents to be created and easily accessed in PDF format.
Print a current form to PDF
To print the current form on the screen, proceed as follows:
-
Choose the relevant product, then select the return.
-
From the PREPARE tab, select the form to be printed.
If needed, click the Forms button and search for the desired form.
-
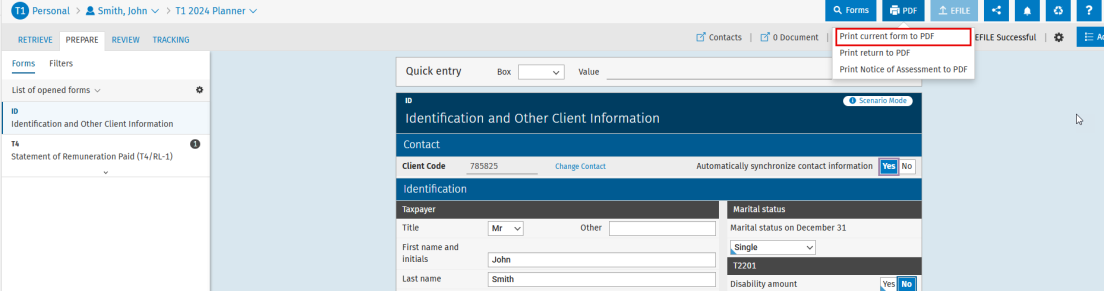
Click the PDF button at the top right corner of the screen, followed by Print current form to PDF.
-
Select the clients for whom the form is to be printed and select English or French in the Language drop-down list.
-
If a watermark must be added to the form to be printed, select the relevant option in the Watermark drop-down list.
-
Under PDF options, select or clear the options as required:
-
If a date other than today’s date is required, select Override printed date and enter the date to be printed on the form.
-
If documents must be uploaded to the tax folder of the current year of the contact(s), select Send a copy to the Documents module.
-
If the security role Tax - Returns - Print options is assigned, additional printing options are available through More options.
Tip: If multiple associated clients are present and all forms of each family member are to be merged into a single PDF file, select Merge PDF files into a single file in the Print options window. Note that this only applies to CCH iFirm Taxprep T1. -
-
Click Print. The printing process will begin in a new window of the web browser.

-
The PDF file can also be accessed directly from notifications by clicking the
 icon, then by selecting the element and clicking Download.
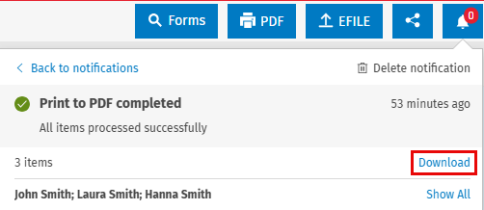
Print a tax return to PDF
To print a tax return, proceed as follows:
-
Choose the relevant product, then select the return.
-
Click the PDF button at the top right corner of the screen, followed by Print return to PDF.

-
Select the relevant print formats in the Print Formats section.
-
For each print format selected, configure the following options:
-
To add a watermark to the return being printed, select the appropriate option from the Watermark drop-down list.
-
To upload documents to the tax folder of the current year of the contact(s), set the Documents option to Yes.
-
Tip: The Custom form format allows specific forms to be selected for printing. Print formats can be customized to determine which forms will be included.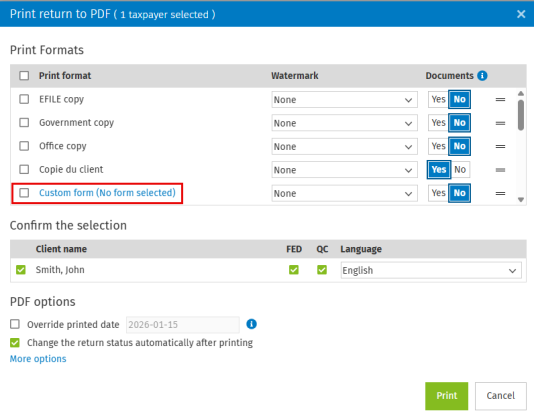
-
-
Select the clients for which returns must be printed and indicate whether both federal and provincial returns are to be included. Then, select English or French in the Language drop-down list.
-
Under PDF options, select or clear the options as required:
-
If a date other than today’s date is required, select the Override printed date check box and enter the date to be printed on the form.
-
If the return status must not be updated automatically, clear the Change the return status automatically after printing option so the return status remains unchanged.
Note: This option is available only in the CCH iFirm Taxprep Pro package. To find out which package you have, consult this article: CCH iFirm Taxprep packages. -
If the security role Tax - Returns - Print options is assigned, additional printing options are available through More options.
-
-
Click Print. The printing process will begin in a new window of the web browser.
-
The PDF file can also be accessed directly from notifications by clicking the
icon, then by selecting the element and clicking Download.
Note: Multiple tax returns can be printed at once from the return manager. Select the relevant returns, click the PDF button, followed by Print return to PDF.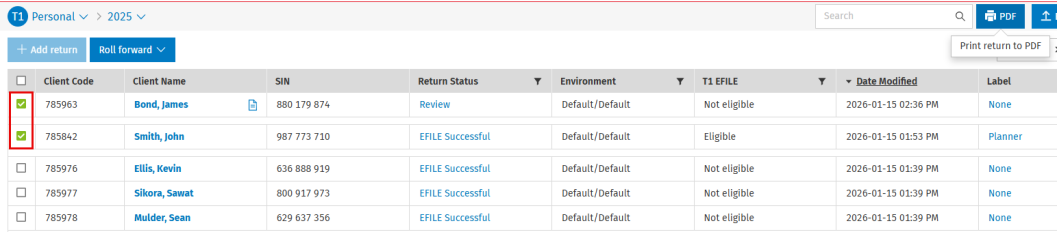
Watermark
Tax - Settings - Customize PDF File
A watermark can be added to the forms and returns in PDF format that are being printed.
To add a watermark or to change an existing watermark, proceed as follows:
-
Click Settings, followed by Taxprep and Customize PDF File.
-
From the General tab, click Add watermark, then enter the desired name. You can also modify the name of an existing watermark.
-
Click Save to confirm.
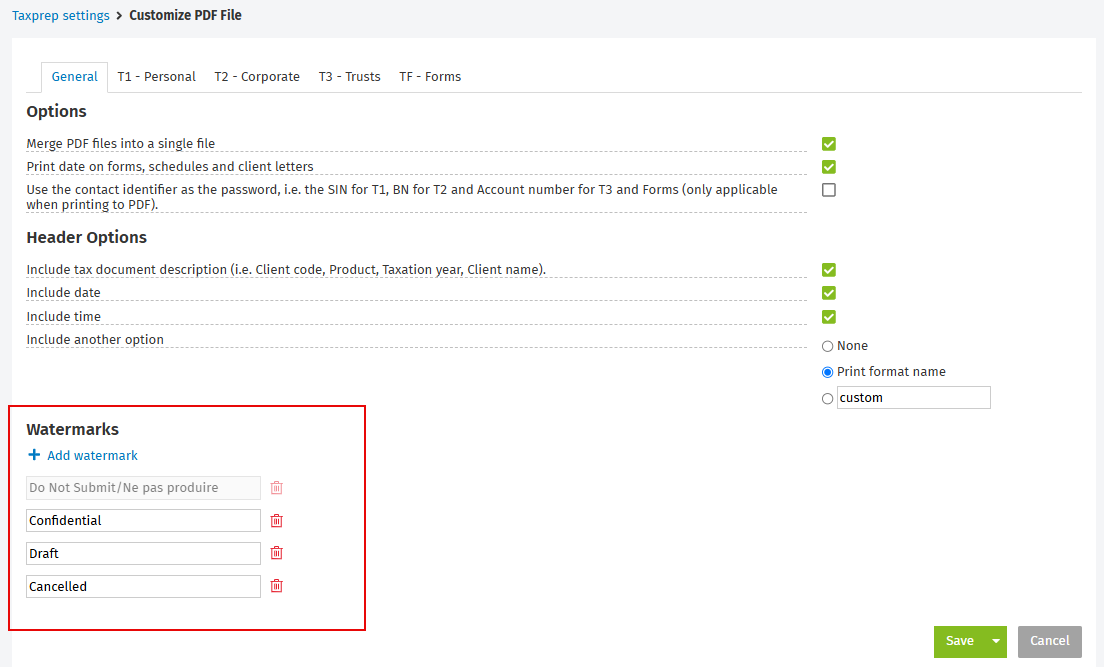 Note: The Do Not Submit/Ne pas produire watermark cannot be deleted nor modified.
Print options
Tax — Returns — Print options
For each product, several print options can be selected or cleared by clicking More options to customize the documents to be printed.
|
Product |
Description |
| T1 - Personal |
|
|
T2 - Corporate |
|
|
T3 - Trusts |
|
|
TF - Forms |
|
For each product, the following header options can be selected or cleared:
-
Include tax document description (Client code, Product, Taxation year, Client name)
-
Include date
-
Include time
-
Include another option
-
Mask SIN in header and footer (T1 – Personal only)