Manage files
- Contacts - View, Add and Edit Contacts;
- Portal - View
You can upload files to a contact's portal. You also have the option to view any files that have been uploaded by others, and delete them.
All file types can be uploaded to the Portal application, except for executable files (i.e. .exe, .bat and .cmd files).
Contents
Upload files
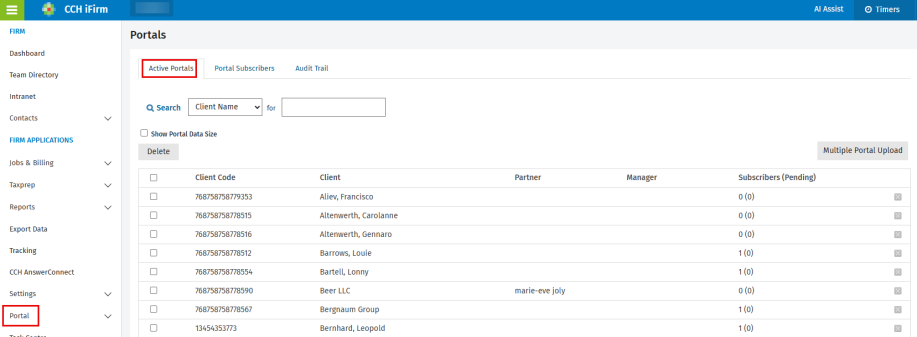
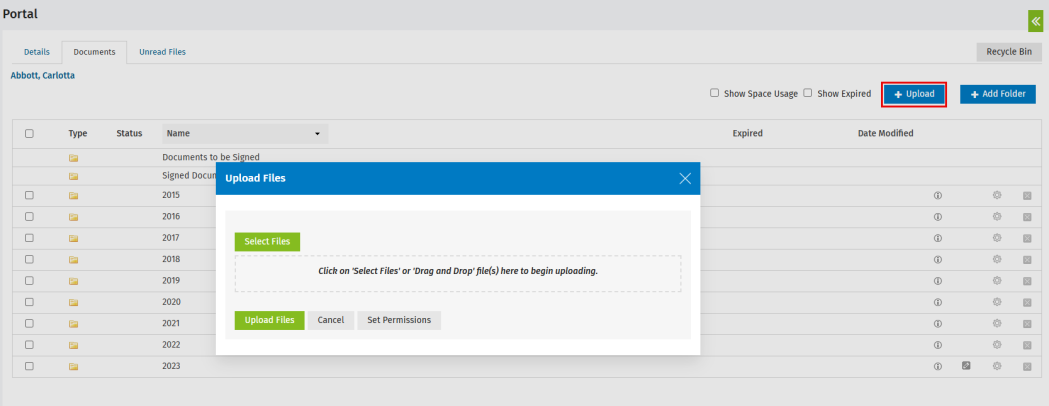
- Click Portal.
- Under the Active Portals tab, click the required portal.
- Click the Documents tab.
- Click the folder that you want to upload files to, if applicable.
- Click the Upload button
 .
. - In the Upload Files dialog box, click Select Files, then locate the file(s) that you want to upload - you can upload one or more files at the same time.
The maximum size of a file that you can download is 1 GB. - Click Upload Files to upload the files to the portal.
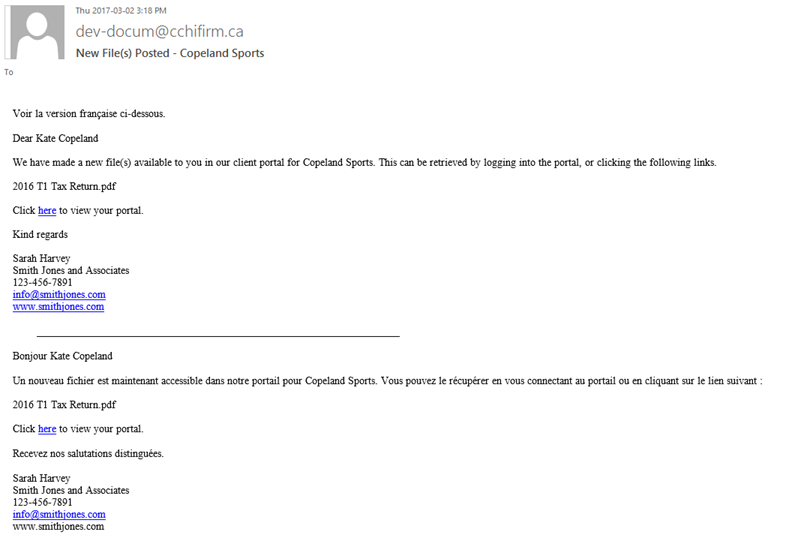
A notification e-mail is sent to all portal subscribers to tell them about the newly uploaded file(s).
You can now take the following actions:
- View and edit the file properties.
- View and edit the subscribers who have permission to view the file.
- Determine if a subscriber has opened the file. The View Alert icon
 in the Status column indicates whether or not the file has been opened. If this is not visible, it means that the subscriber has opened the file.
View a file
You can view files that you uploaded and those that were uploaded by portal subscribers. When a subscriber uploads a file, you receive an e-mail notification as per your settings.
To quickly access your unread (unopened) files within a portal, click the Unread Files tab. Alternatively, on the Documents tab, if you have not opened a file yet, its name displays in bold font. Once you open the file, its name displays in regular font.
- Click Portal.
- Under the Active Portals tab, click the required portal.
- Click either the Documents or Unread Files tab, as applicable.
-
Select one of these options:
- To view a single file, click it - the file downloads to your computer.
- To download multiple files at the same time, select the check boxes for those files and click Download.
- Open the downloaded file. If multiple files were selected, the downloaded file is a .zip file.
Cut, copy and paste files
You can cut or copy and paste files from directory to directory or from portal to portal. This works in the same way as Microsoft Word's cut/copy/paste feature, so remember that when you click Cut, the folder or file(s) selected are deleted.
- Click Portal.
- Under the Active Portals tab, click the required portal.
- Click either the Documents or Unread Files tab, as applicable.
- Select the check box(es) of the file(s) you want to cut or copy and paste.
- Click Cut or Copy as required. The Paste button appears.
- Navigate to where you want to paste the file (another folder).
- Click Paste.
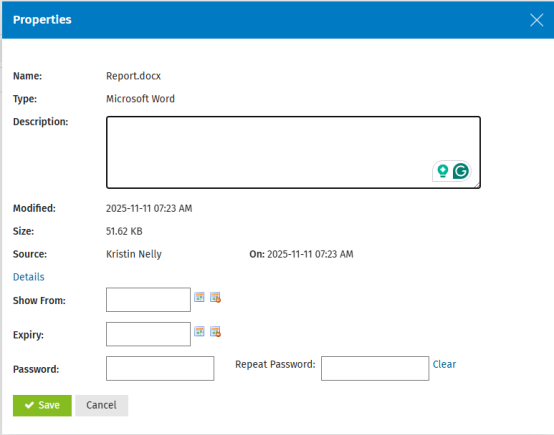
View and edit the file properties
The properties of a file include the description, size, expiry date and more. You can also view the details (history) of the file, which may be useful for auditing purposes.
- Click Portal.
- Under the Active Portals tab, click the required portal.
- Click either the Documents or Unread Files tab, as applicable.
- Click the Properties button
 .
. - Type a Description for the file.
- Click the Details link to view the upload and download history of the file, if required.
- Complete the Show From and Expiry fields.
- Type the password that needs to be entered before the client can download the file, if required.
- Click Save.
View the space used by folders and documents
On the Documents tab, select the Show Space Usage check box. This enables the Size column to be displayed in the grid, which identifies the amount of storage spaced used by each folder or document in the portal.
See also the Portal Space Usage report.
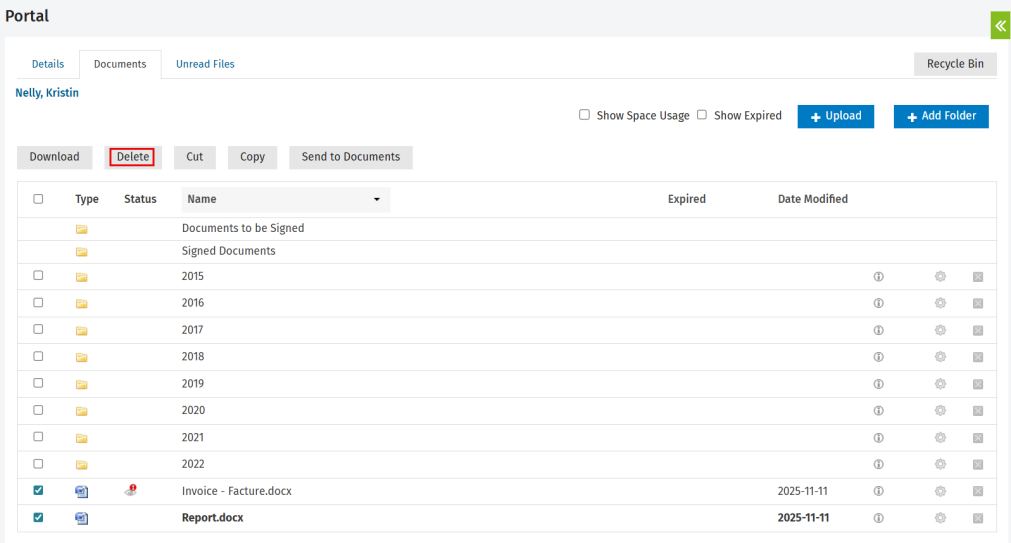
Delete a file
- Click Portal.
- Click the required client.
- Click either the Documents or Unread Files tab, as applicable.
-
To delete an individual file, click the Delete button
 at the end of the row, then click Yes to confirm
 - To delete files in bulk, select the related check boxes and click the Delete button, then click Yes to confirm.