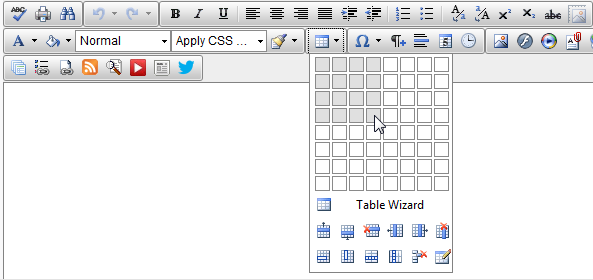
Insert or delete a table
Intranet - Add and Edit Content
Insert a table
- Open the required HTML page in editing mode.
- Position your cursor where you want to insert the table.
- Click the Insert Table button, hover on the blank squares to select the required number of rows and columns (you can adjust this later), then click the selection.
- Click the table to select it and display the resize cursor.
- Select the edge of the table and drag the resize handle to enlarge the table - all cells will be equal in width and height.
- Adjust the width and height of individual rows and columns.
- Adjust the number of table rows and columns, and cells as required.
- Click Save as Draft or Save & Publish.
Delete a table
Click the table border to select it, then right-click and click Delete Table.
