Import WIP
Settings- Installation
To import your WIP records into CCH iFirm, you need to prepare a .csv file using the template provided in CCH iFirm. If you have several jobs on the go for a client, you can import the total WIP as a lump sum in one .csv file, and then use the WIP transfer feature in CCH iFirm to create the individual jobs. Alternatively, you can import the individual jobs but this requires multiple .csv files.
If you are planning to import WIP balances, we recommend that you invoice as much as you can from your current system.
When importing WIP, jobs are automatically created. Do not create jobs first and then import WIP, this will result in duplication of jobs.
Contents
Download the .csv file template
You can prepare a .csv (comma-delimited) file of your WIP records using the template provided in CCH iFirm.
- Click Settings > Installation.
- On the Installation page, click Import WIP.
- Click the Click here for a template CSV file. link to download the sample .csv file to your computer.
- Save the .csv file to your computer - it will open with Microsoft® Excel®.
Prepare the WIP .csv file
Next, you need to populate the .csv file template with your data.
You can use this table as a guide for preparing the .csv file of your WIP records. You do not need data for all the column headings.
|
Column Description |
Data Format |
Information |
|---|---|---|
|
ClientCode |
|
This is required field. The client code must match the code of a contact in the system. You can only have one row per client code in the file. |
|
WipAmount |
Example: 1234 |
Data must be numeric. This column cannot be left empty. |
|
JobType |
Example: TAX |
Enter the short code of a valid job type (available under Settings > Jobs & Billing> Job Types). |
|
PeriodEnded |
Use the Mmm dd yyyy date format |
Any job types (for example an AUD or T2 job) that require a period ended date have a valid date included on the spreadsheet. |
The data you enter depends on which import method you have chosen:
Method 1: import lump sum
This requires one .csv file and one record per client with the total WIP balance, regardless of the number of jobs that have been combined. Follow these steps to ensure that your import is successful:
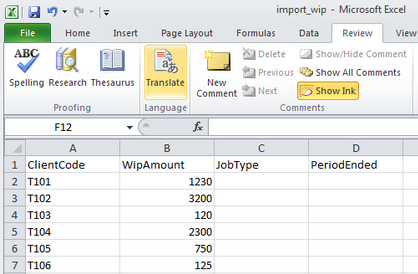
- Only a client code and a WIP amount are required. A job type and a period ended are not required in this .csv file.
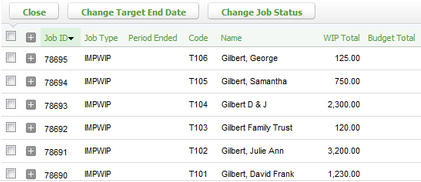
- An IMPWIP job will automatically be created for each client.
- WIP transfer the lump sum imported into the individual jobs that make up the lump sum.
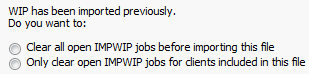
- If you want to re-import WIP for one or more clients you can either:
- Clear all open IMPWIP jobs before reimporting.
- Only clear open IMPWIP jobs for clients included in the new spreadsheet.
Here is the sample .csv file for a lump sum import:
Here is an example of a WIP job generated by a lump sum import:
Method 2: import individual jobs
This requires multiple .csv files, and in each .csv file, one record per client with the total WIP balance for a particular job type. Follow these steps to ensure your import is successful:
- Client code, WIP amount, and job type is required in the .csv file. Period ended is optional.
- Create a separate .csv file for each job type, otherwise the .csv file will not import due to a duplicate client code error.
- Jobs with the corresponding job types will be created for each client. You do not need to transfer WIP for this import type.
- If you want to re-import WIP for one or more clients, close the previously imported jobs and create the write-off. We recommend you set the close at date and write-off date to be prior to your installation date so that this WIP does not appear on your reports.
Import the WIP .csv file
When WIP is imported, a new job is created for each WIP balance that needs to be imported.
- Click Settings > Installation.
- On the Installation page, click Import WIP.
- Click Browse to locate and select the .csv file containing your WIP records.
- Select either one of these options, depending on which records you want to override IMPWIP jobs (this does not apply to individual jobs import, only to lump sum imports):
- Clear all open IMPWIP jobs before importing this file
- Only clear open IMPWIP jobs for clients included in this file
- Click Import..
- Check the import notification to confirm that your data was imported successfully.