Transfer WIP within a job
- Jobs - View, Add and Edit Jobs;
- Jobs - Transfer WIP
Contents
Access the WIP Transfer feature
You can access the WIP Transfer feature from the Job Details page, Work in Progress Centre or the Work In Progress Client Breakdown Report. There are three methods of WIP transfer to choose from.

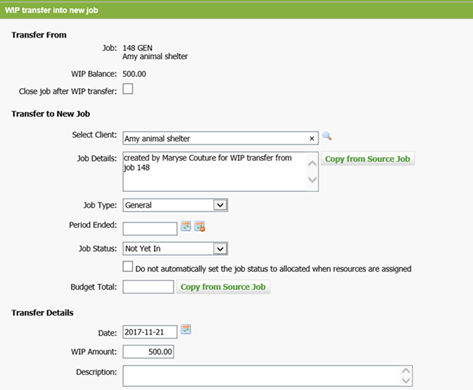
Transfer the WIP from the current job to a new job
As WIP starts to build up on a particular job, you can transfer all or some of it across to a new job.
- Click Jobs & Billing > Jobs.
- Click the job from which you want to transfer WIP.
- On the Job Details page, click WIP Transfer.
- Click From current job into new job.
- Select the Close job after WIP transfer check box, if required.
- Edit the Transfer to New Job fields, as required.
-
Edit the default date for the transfer, if required.
- The WIP balance and the total WIP cost amounts are displayed: edit the WIP amount that you want to transfer to the new job, if required. The WIP cost will be adjusted based on the WIP amount transferred, if required.
- Type a description about the WIP transfer, if required.
- Click Save.
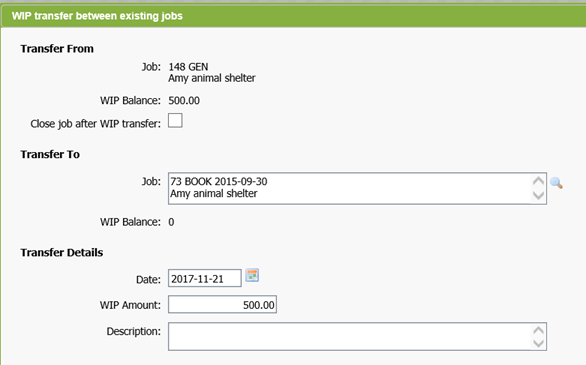
Transfer the WIP from the current job to an existing job
- Click Jobs & Billing > Jobs.
- Click the job from which you want to transfer WIP.
- On the Job Details page, click WIP Transfer.
- Click From current job into existing job.
- Select the Close job after WIP transfer check box if you want to close the existing job once you have transferred the WIP.
- Click the search
 icon to locate and select the existing job to which you want to transfer the WIP.
 -
Edit the default date for the transfer, if required.
- The WIP balance and the total WIP cost amounts are displayed: edit the WIP amount that you want to transfer to the existing job, if required. The WIP costs will be adjusted based on the WIP amount transferred. You can edit the WIP cost amount, if required.
- Type a description about the transfer.
- Click Save.

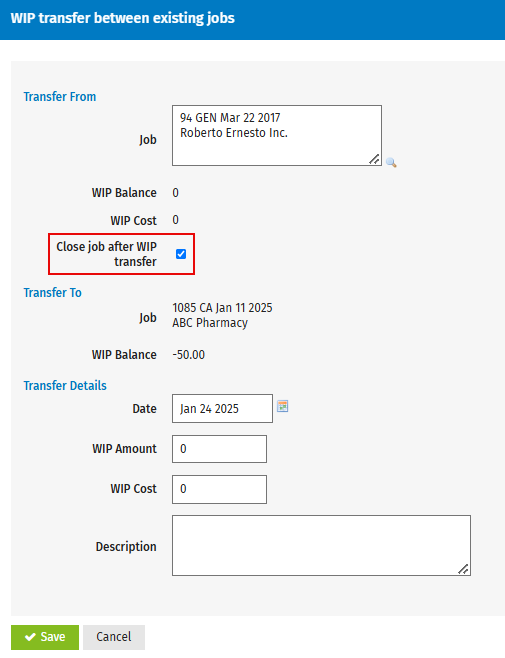
Transfer the WIP from an existing job to a current job
- Click Jobs & Billing > Jobs.
- Click the job to which you want to transfer WIP.
- On the Job Details page, click WIP Transfer.
- Click From existing job into current job.
- Click the search
 icon to locate and select the existing job from which you want to transfer the WIP.
 - Select the Close job after WIP transfer check box, if you want to close the source job once you have transferred the WIP.
-
Edit the default date for the transfer, if required.
- Type the WIP amount.
The WIP balance and the total WIP cost amounts are displayed: edit the WIP amount you want to transfer to a current job, if needed.The WIP cost will be adjusted based on the WIP amount transferred. You can edit the WIP cost amount, if required. - Type a description about the transfer.
- Click Save.

If a job has a draft invoice, the WIP balance will include the pending credit (see above).
Cancel a WIP transfer
If you make a mistake when transferring WIP, you can cancel the transfer. A reference of the WIP transfer will be listed under WIP Transfer Log.
- Click Jobs & Billing > Jobs.
- Click the job on which you made the WIP transfer.
- On the Job Details page, click WIP Transfer.
- Click the delete
 icon on the row of the WIP transfer you want to cancel in WIP Transfer Log. The delete option will only show if the WIP Transfer Debit is not allocated (fully or partially) to a WIP Credit. Otherwise it will not be available until the allocation is removed via the View WIP screen.
