Set up clients for FPA
Identify the clients that will require FPA jobs, and add the necessary settings in the Contacts area.
Contents
Add automatic fees
Workflow and Resource Manager
We recommend that you set up agreed and interim fees to manage the invoicing of the FPA job.
- Click Contacts > Clients.
- Locate and click the required client.
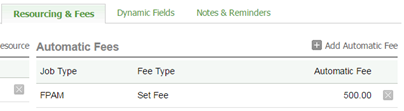
- Click the Resourcing & Fees tab.
- Click Add Automatic Fee in the Automatic Fees panel.
- Select Set Fee as the Fee Type.
- Select FPA Master as the Job Type for the interim fee.
- Enter the required amount.
- Click Save.
Update the FPA dynamic field (optional)
Contacts - View, Add and Edit Contacts
If you chose to add the FPA dynamic field, you need to set this field to Yes for each FPA client, so that they can be included in the bulk job creation.
- Click Contacts > Clients.
- Locate and click the client with whom you have a fixed price agreement.
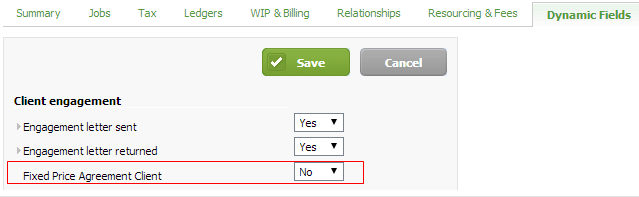
- Click the Dynamic Fields tab.
- Click Edit details.
- Select Yes in your fixed price agreement field.
- Click Save.
Create fixed price agreement master (FPAM) jobs
Jobs - View, Add and Edit Jobs
Manually create an FPA
If you only have a few FPA clients, then it may be quick to create them manually.
- Click Jobs & Billing > Jobs.
- Click Add Job.
- Proceed to create an FPAM job for an FPA client - any agreed fees, automatic disbursements and automatic resource allocations will show in the job details page once the job has been created.
- Repeat the steps for all FPA clients.
Create FPAs in bulk
In order to create these jobs in bulk, you must set up an FPA dynamic field in Contacts, and set this flag to Yes for all relevant FPA clients.
- Click Jobs & Billing > Jobs.
- Click Add Jobs in Bulk.
- Select FPA Master for the Job Type.
- Enter the Period Ended.
- Enter the Location, Division, Job Partner, Job Manager if applicable.
- Enter the Target Start Date and Target End Date - do not enter an Agreed Fee or Budget Total, as this is obtained from the contact's details.

- Click the arrow beside your FPA dynamic field and select Yes in the Dynamic Field Filters.
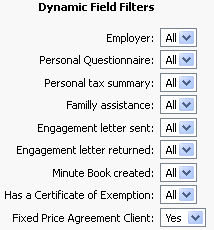
- Click Next.
- Clear the check boxes of any clients you do not want to create jobs for (if applicable).
- Click Create Jobs to proceed with the bulk job creation.