View your WIP and edit WIP items
- WIP Centre - View Only, or
- WIP Centre - View, Add and Edit Transactions
Contents
View your WIP
- Click the View WIP button on a Job Details page.

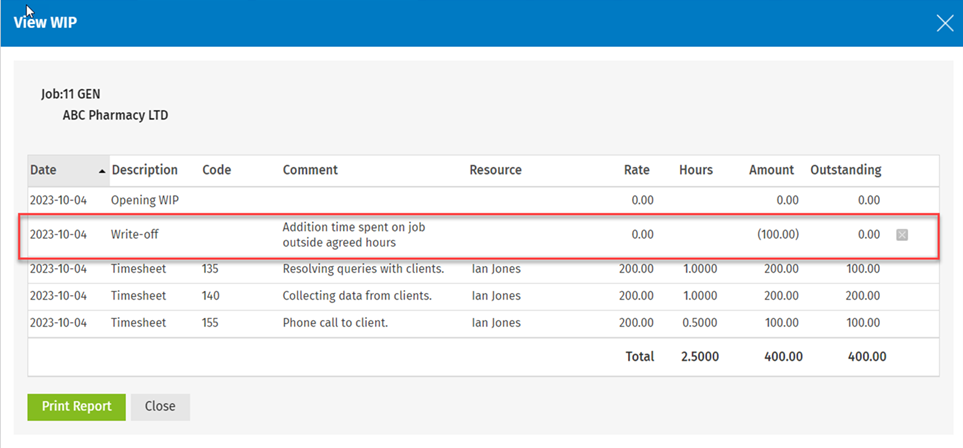
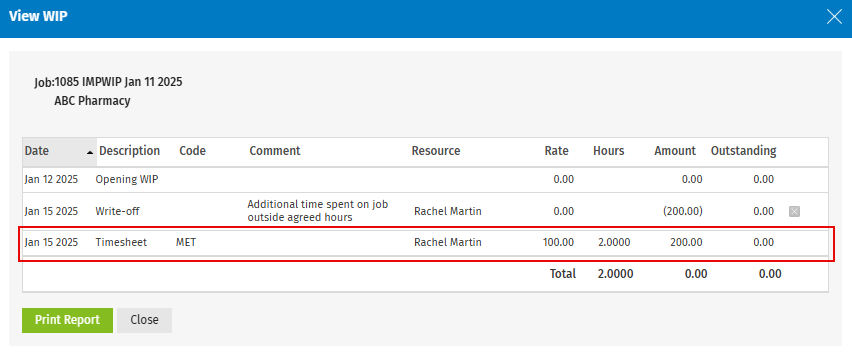
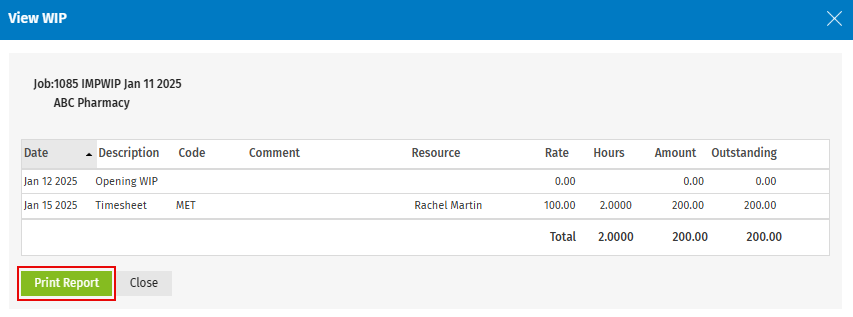
The View WIP window shows the job details and a grid listing the WIP items for the job, e.g., Timesheets, Invoices, etc. From here, you can:
- Delete a WIP item (write-on or write-off transaction) that you have added. (requires the WIP Centre - Delete Transactions security role)
- Edit a WIP item, including the resource and reason, add or delete allocations and edit invoice WIP items. (requires the WIP Centre - View, Add and Edit Transactions security role)
- Print the Work in Progress Job Breakdown report.
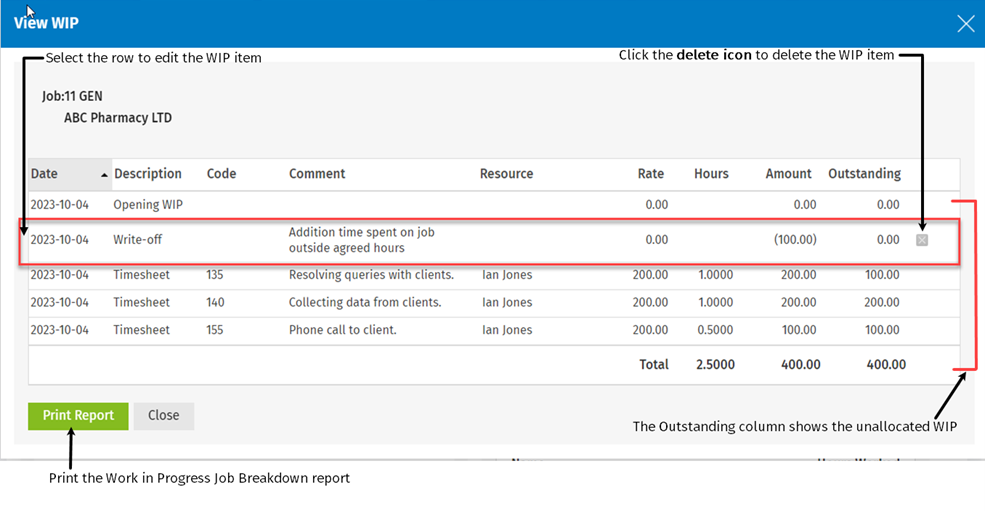
Delete a WIP item
WIP Centre - Delete Transactions
You can only delete the write-on or write-off WIP transactions on this window.
- Click the View WIP button.
- Click the Delete button
 at the end of the required row.
 - Click Yes to confirm.
Edit a WIP item
WIP Centre - View, Add and Edit Transactions
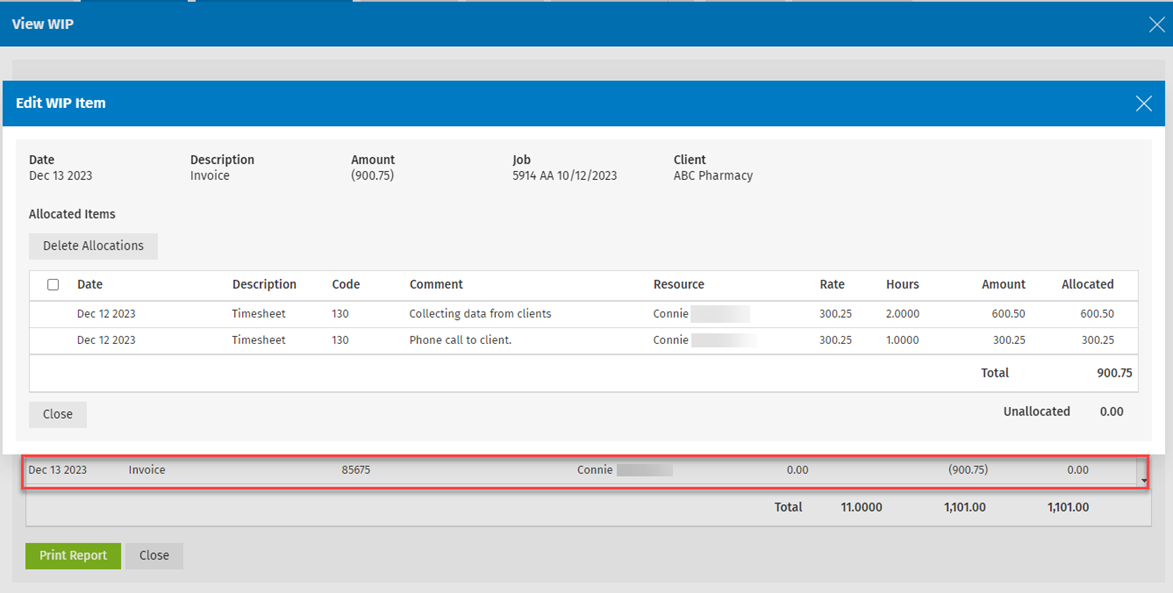
- Click the row of the required WIP item - the Edit WIP Item window displays.
- What you see and can edit depends on how the WIP item was created.
- You may be able to delete a WIP item, edit the resource and reason, add or delete allocations and edit invoice WIP items.
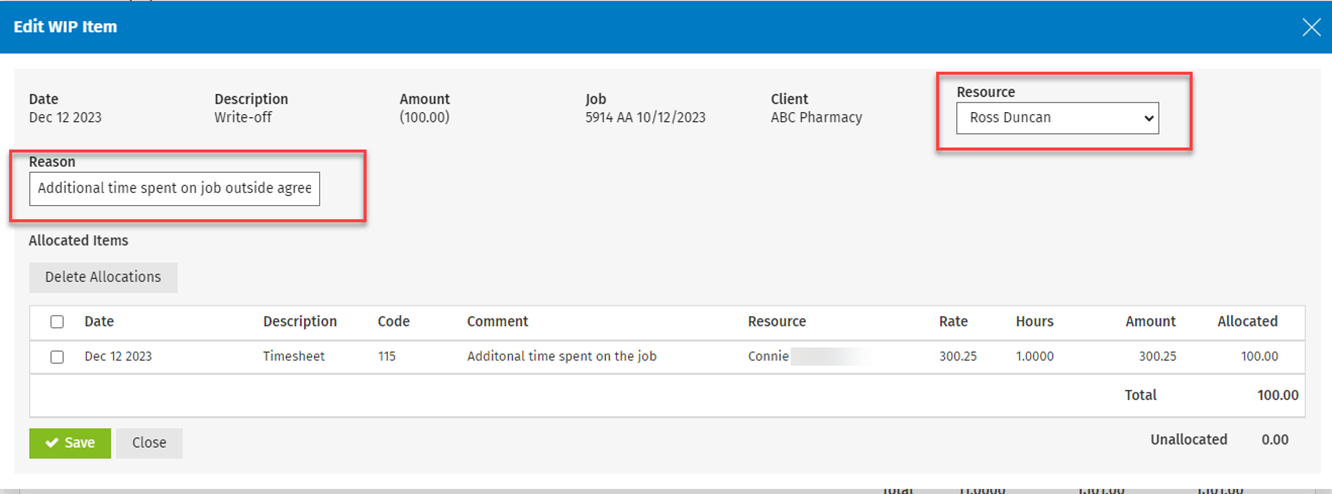
Edit the resource or reason
You can edit the resource assigned to the write-off or write-on transaction.
On the Edit WIP Item window:
- Select the required resource (user) from the Resource drop-down list.
- By default, the resource currently assigned to the transaction is selected. If the transaction is assigned to the firm, the resource selection is None.
- The alphabetical list displays all active users.
- Edit the Reason assigned to the transaction, if required.
- Click Save; the View WIP page updates the changes made.
Add allocations
You can add an allocation to a WIP item if it has an unallocated amount. If the amount is $0.00, the Add Allocations button will not display.
On the Edit WIP Item window:
- Click Add Allocation.
- The Add Allocation window displays, showing the available WIP items (debit or credit, depending on the item being edited) that can be allocated to the WIP item.
- At the top right of the window is the Amount still to allocate. This will start at the total unallocated from the previous window and reduce as the rows are selected.
- You can use the shortcut provided by the Allocate Automatically to drop-down list or manually select the WIP items to allocate to the unallocated amount.
- Once the unallocated amount reaches $0.00, no more rows will be allocated, unless you clear a check box and select another.
- Use the Allocate Automatically to drop-down list to automatically allocate the amount to the Oldest WIP items or Newest WIP items, then click Apply.
- Click Save.
- You can save the modifications even if the unallocated total is not $0.00.
- You are taken back to the Edit WIP Item window, where the new allocations appear in the grid.
- Click Save to return to the View WIP window.

Delete allocations
On the Edit WIP Item window:
- Select the allocation(s) you want to delete.
- Click Delete Allocations. The WIP item will now show an unallocated amount, which can be allocated to other WIP items.

Editing Invoice WIP items
When WIP items are included on an invoice, they are allocated to the invoice transaction, and these allocations cannot be deleted (see below). The allocation is only removed when the job is removed from the invoice.
If the WIP item or invoice transactions have an unallocated amount left, that amount can be allocated manually as detailed under Add Allocations.
Print the Work in Progress Job Breakdown Report
-
In the Job Details page, click the View WIP button.
-
Click Print Report in the View WIP window.
You can use this report to view a detailed breakdown of the all the WIP items on a job and what WIP is available to invoice. You can filter the report up to a particular Period Ending date, then use the Sort By list to sort the data that displays in the report. The header of the report reflects any filter selections you make.
You can use the Outstanding column to quickly see how much is left to be invoiced at a WIP transaction level.
You can click the job link to return to the Job Details page.