Use the Work in Progress Area
Click Jobs & Billing> Work in Progress to access the Work in Progress area. Here you can view the WIP Summary, WIP organized by contact group or WIP by individual client. You can also perform various actions, as outlined below.
Contents
View WIP Summary
WIP Centre - View Only
The Work in Progress page opens by default on the Summary tab, where you can see a dashboard containing widgets displaying WIP data in various ways. You can click the items in the widgets to drill-down the WIP data on the next tabs.

If you click Filter Dashboard, you can use the filters to make the dashboard show specific WIP data.
View your WIP by contact group
WIP Centre - View Only
Click the By Contact Group tab where you can display a grid containing a list of your contact groups that have WIP balances. Beneath this list there is an All Other Clients section that displays the WIP for clients that do not belong to a contact group.
- Click the
 button beside a group name to view the clients in that group, along with their individual WIP balances.
 - Click the button beside a client code to view the jobs that make up the WIP total for the client.
- Jobs that have negative or positive WIP balances are displayed but jobs with 0.00 WIP are not displayed.
- Closed jobs are identified by grey font.
The job details you can see are:
- Job - The job code, job type code and period end combined. Click the green code link to open the job in a new tab.
- Status - The current status of the job.
- Budget - The budget set for the job. The field under that column will be blank if there is no budget set for the job.
- Invoiced - The amount already invoiced for the job. Only finalized invoice totals are included and the field under that column will be blank if no invoiced amount exists for job.
- Current WIP - The current WIP balance for the job. Click the green link to open the View WIP window. If there are any jobs with unallocated WIP credits, a red asterisk * displays next to the WIP balances of the job WIP, and the associated warning message displays in the information banner at the top of the page. This warning displays so you do not create an unwanted invoice if an unallocated credit already exists on the job.
- Hrs Alloc. - The hours allocated to the job. The field under that column will be blank if there are no allocated hours.
- Hrs Work. - The hours worked so far on the job. The field under that column will be blank if there are no hours worked.
- Variance - The difference between the allocated and worked hours on the job. The field under that column will be blank if there are no allocated hours set for the job. Negative variances will display in red font.

View your WIP by billing group
WIP Centre - View Only
To review a grid containing a list of your billing groups with that have WIP balances, click the By Billing Group tab. Beneath this list an All Other Clients section displays the WIP for clients that do not belong to a billing group.
- Click the button beside a group name to view the clients in that group, along with their individual WIP balances.
- Click the button beside a client code to view the jobs that make up the WIP total for the client.
- Jobs that have negative or positive WIP balances are displayed but jobs with 0.00 WIP are not displayed.
- Closed jobs are identified by grey font.
- The job details you can see are explained above in the By Contact Group section.

View your WIP by individual client
WIP Centre - View Only
- Click Jobs & Billing> Work in Progress.
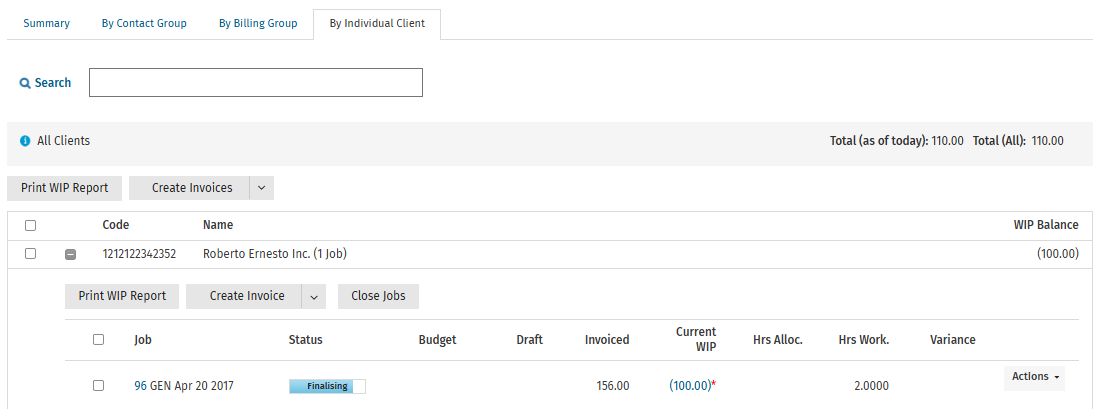
- Click the By Individual Client tab to see a grid containing a list of your clients that have WIP balances.
- Click the button beside a client code to view the jobs that make up the WIP total for the client.
- Jobs that have negative or positive WIP balances are displayed but jobs with 0.00 WIP are not displayed.
- Closed jobs are identified by grey font.
- The job details you can see are explained above in the By Contact Group section.
View your total WIP
WIP Centre - View Only
Click Jobs & Billing > Work in Progress. At the top of each tab, below the search box, you can see a banner showing the total WIP for the rows that are currently showing in the grid. If the grid changes due to a search, the total will update to reflect the search result.
Here is an example of the banner you see in the By Contact Group tab when no search has been applied:

Here is an example of the banner you see in the By Billing Group tab when no search has been applied:

Here is an example of the banner you see in the By Individual Client tab when no search has been applied:

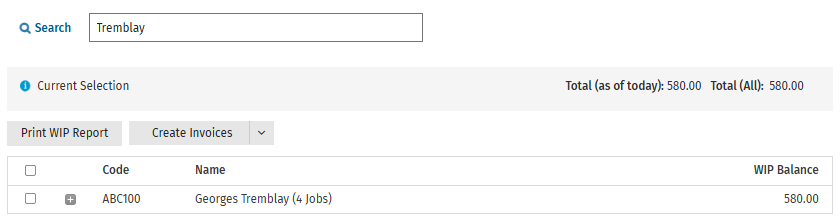
Here is an example of the banner you see on either tab when a search is applied to the grid and the rows are reduced:

Search for WIP
WIP Centre - View Only
You can perform a quick or detailed search of your WIP from either tabs in the Work in Progress area.
- Click Jobs & Billing> Work in Progress.
- Click the required tab: By Contact Group, By Billing Group or By Individual Client.
- Perform a quick search:
- Enter text in the search box.
- Press Enter - rows that match your search are displayed.
- Perform a detailed search:
- Click Search to open the expanded search options.
- Filter your search by Contact Partner, Contact Manager, Job Type, and more.
- Click the Search button - rows that match your search are displayed.

Print WIP Reports
WIP Centre - View Only
You can print three different WIP Reports from within the Work in Progress area.
Print a Grouped Work in Progress Report
- Click Jobs & Billing > Work in Progress.
- Click the By Contact Group or the By Billing Group tab.
- Select the check box of the required group(s) - by default, this will select all clients and all jobs in that group.
- Use the buttons to expand the data in the grid and deselect some clients or jobs, if required.
- Click Print WIP Report.
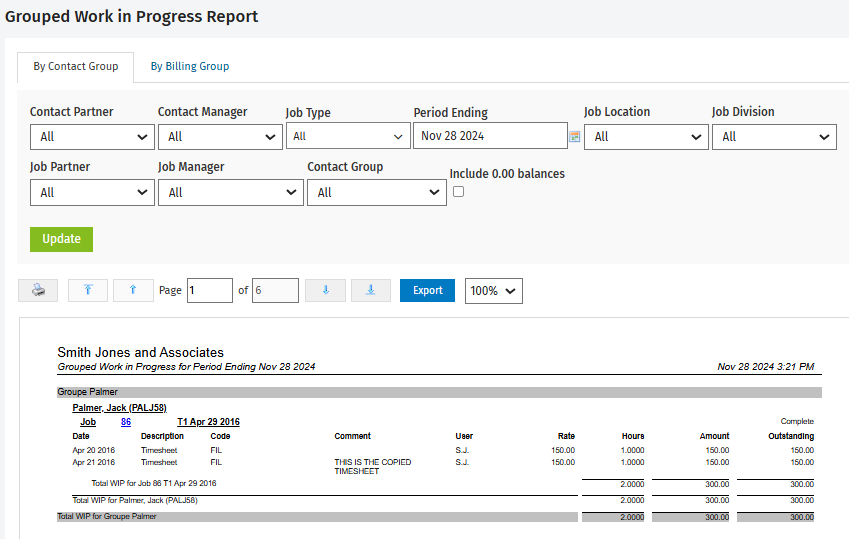
- The Grouped Work in Progress Report opens.
- The report has no filters available because the data is determined by the WIP grid contents and your selections.
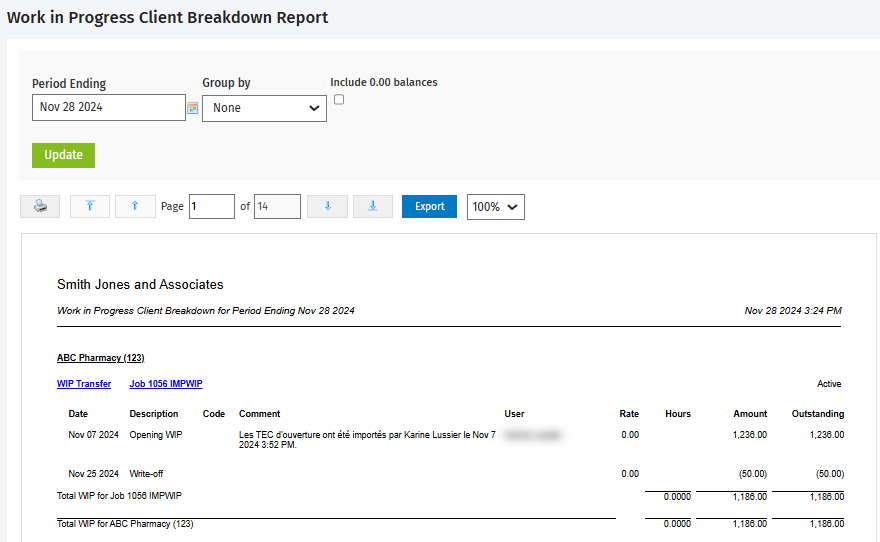
Print a Work in Progress Client Breakdown Report for a client
- Click Jobs & Billing> Work in Progress.
- Click the By Individual Client tab.
- Select the check box of the required client(s).
- Click Print WIP Report.
- The Work in Progress Client Breakdown Report opens, showing the WIP for all selected clients.
- The report is relevant only to the client row grid on the By Individual Client tab, not the job grid (which has its own report).
- You can select the Activity Code in the Group by, then click Update to rearrange the way data is displayed.
Print a Work in Progress Client Breakdown Report for a job
- Click Jobs & Billing > Work in Progress
- Click the required tab: By Contact Group, By Billing Group or By Individual Client.
- Use the buttons to expand the data in the grid and select the check box of the required job(s).
- Click the Print WIP Report.
- The Work in Progress Client Breakdown Report for the client to whom the job grid belongs to is displayed.

Use the Actions menu
- WIP Centre - View, Add and Edit Transactions;
-
Jobs – Transfer WIP
- Click Jobs & Billing> Work in Progress
- Click the required tab: By Contact Group, By Billing Group or By Individual Client.
- Use the button beside the required group or client to expand data in the grid and view the jobs for that client.
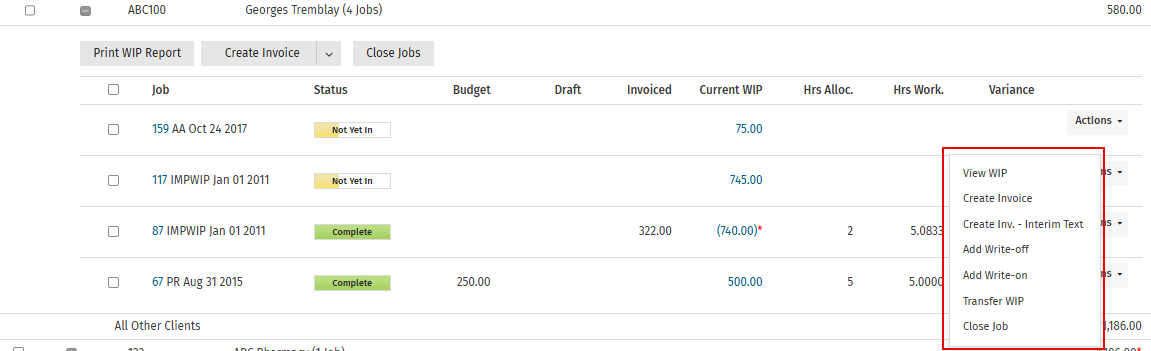
- Click the arrow beside Actions at the end of the required job row.
- Proceed with one of the following:
- View WIP
- Add Write-off
- Add Write-on
- Transfer WIP (Jobs – Transfer WIP security role is required)
- Close Job