Custom filter
Tax - Returns - Review - Custom Filters - Add, Edit
In CCH iFirm Taxprep, you can add Custom Filters that appear under the REVIEW tab. These filters help simplify the review process by highlighting key fields in the return.
You can export the custom filters data using the Export to CSV feature. This is especially useful when collaborating with external parties who need to complete certain sections of the return outside of CCH iFirm Taxprep.
Content
Create a custom filter
To create custom filters, proceed as follows:
-
Choose the relevant product, then select a return.
-
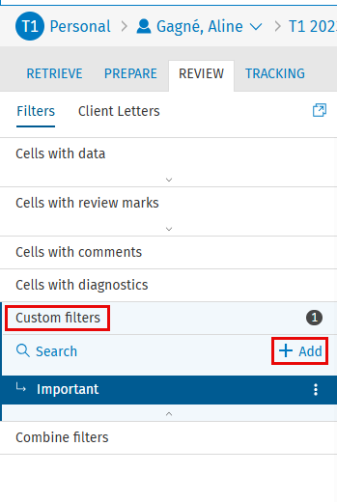
From the REVIEW tab, under the Filters option, click Custom filters.
-
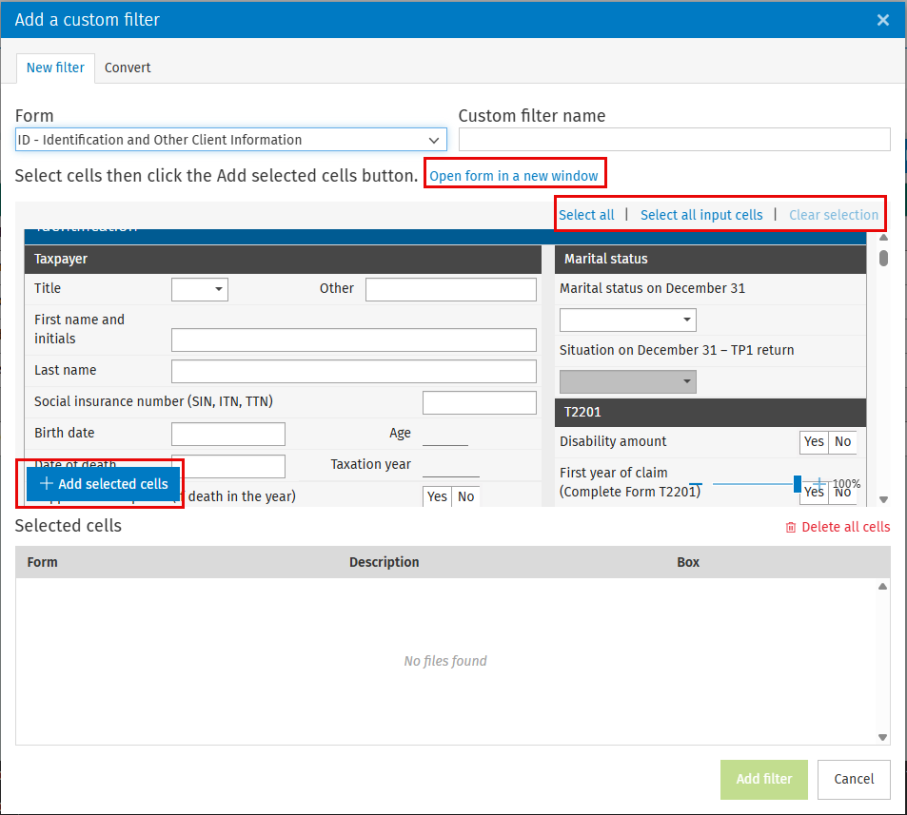
Click + Add. The Add a custom filter dialog box will open.
-
In the Custom filter name field, enter a name for your filter.
-
Under the Form drop-down list, select the form that contains the cells you want to include in the custom filter. You can select cells from multiple forms if needed.
Note: The form can be displayed in a separate window by clicking Open form in a new window.-
Select the fields you want to add to the filter using one of the following methods:
-
Click Select all in the toolbar to select all cells in the form.
-
Click Select all input cells to select the input cells only.
-
Click Clear selection to remove any current selection.
-
To select adjacent cells, click the first cell, hold down the Shift key, then click the last cell. To select non-adjacent cells, click the first cell, hold down the Ctrl key, then click each cell.
-
-
Click Add selected cells to include the selected fields in the Selected cells table.
-
-
Click Add filter to add this filter.
Edit a custom filter
-
Choose the relevant product, then select a return.
-
From the REVIEW tab, under Filters, click Custom filters.
-
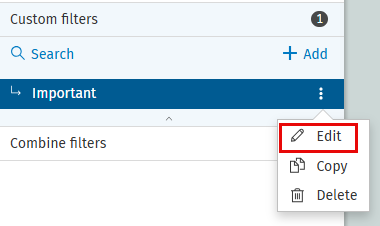
Click the three vertical dots next to the filter name, then select Edit from the menu.
-
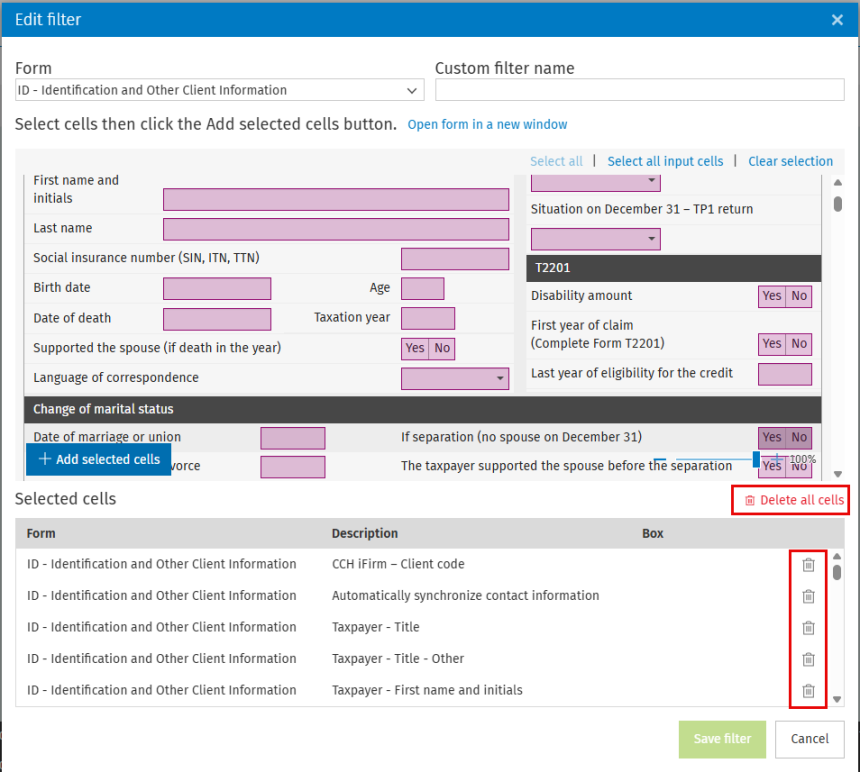
To add cells, follow step 5 from the Create a custom filter section.
-
To remove a cell, click the recycle bin icon next to it. To remove all cells, click Delete all cells.
-
Copy a custom filter
To copy custom filters:
-
Choose the relevant product, then select a return.
-
From the REVIEW tab, under Filters, click Custom filters.
-
Click the three vertical dots next to the filter name, then select Copy from the menu.
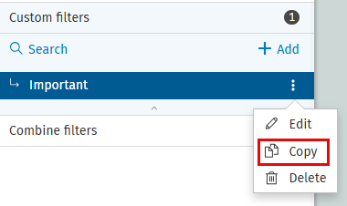
-
Enter a name for the copied filter in the Custom filter name field, then click Save.

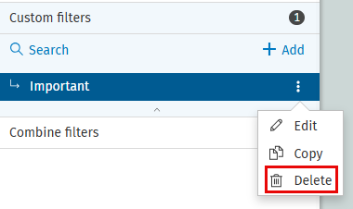
Delete a custom filter
To delete custom filters:
-
Choose the relevant product, then select a return.
-
From the REVIEW tab, under Filters, click Custom filters.
-
Click the three vertical dots next to the filter name, then select Delete from the menu.
-
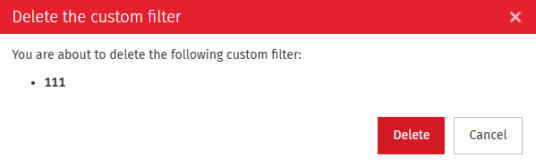
In the Delete the custom filter pop-up window, click Delete.
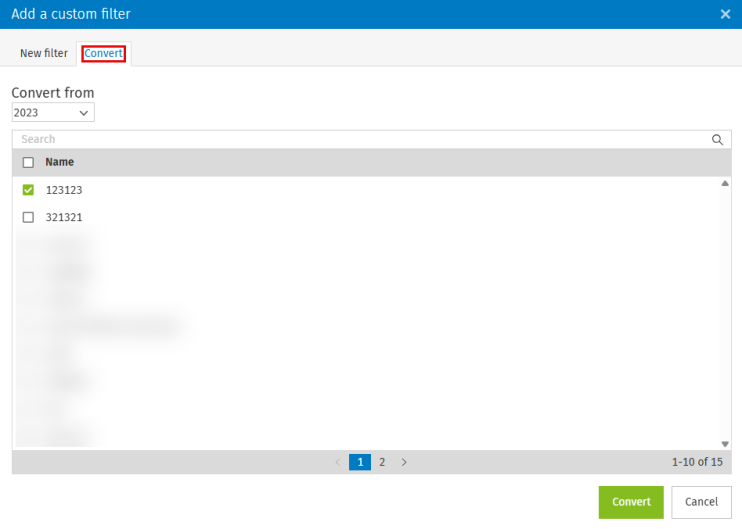
Convert a custom filter
To convert a custom filter from another tax year:
-
Choose the relevant product, then select a return.
-
From the REVIEW tab, under Filters, click Custom filters.
-
Click + Add. The Add a custom filter dialog box will open.
-
Click the Convert tab.
-
Select the tax year from which you want to convert the filter and choose the custom filter you want to reuse.
-
Click Convert to apply the filter to the current tax year of the same product.