Invoicing in Advance and Allocating Credits
Certain elements are to be taken into account when creating an invoice. One of these elements is the write-on (or gain on WIP). When an amount is changed so as to increase the original WIP amount, two options are possible: the addition of a write-on or an amount invoiced in advance.
- Write-on: With this option, the amount is added to the Write-on section of the invoice.
This option is suitable in cases where the invoicing is done when the job is completed. - Invoicing in advance: With this option, a credit is added to the invoice. The credit will be used after the invoice is issued when adding extra time or disbursements to the job in progress.
This option is suitable if invoices are usually created at the start or during the execution of the job.
Invoicing in advance
Invoicing in advance consists of, when creating an invoice, adding an amount to the current total WIP to create a credit that will be reduced as time and disbursements are added to the job. To invoice in advance, proceed as follows:
- Create an invoice.
- In the Preparation View tab, click a WIP line to go to the edit mode.
- Click the Change Amount button.
The Change Amount dialog box displays. - Under the Simple Amount Edit section, enter an amount on the Total line:
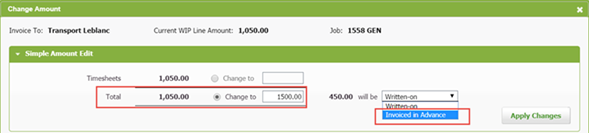
- Press the tab key to confirm the amount, then select Invoiced in Advance from the list.
- Click Apply Changes.
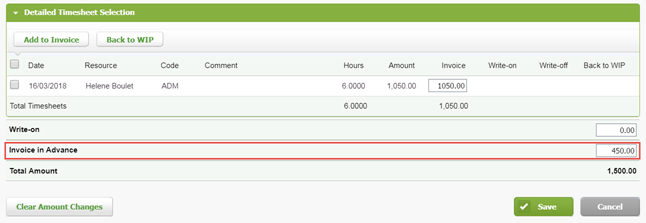
The amount invoiced in advance will be displayed on the line Invoice in Advance. - Click Save.
- Click Finalize Invoice to finalize the invoice.
The invoice is finalized and ready to be sent to the client. The current WIP now displays a credit of $450.

In the above example, the number of hours totalling $1,050 represents the WIP associated with the invoice. Timesheet entries made after the invoice is sent will be allocated to the $450.00 credit. The credit amount decreases as entries are added, until it becomes positive.
Allocation of the credits
If you try to edit one of the timesheet entries, the following message displays:
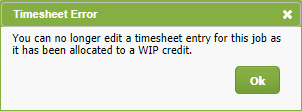
It is not possible to edit one of these timesheet entries, because the recently-entered time is allocated to the credit created by the invoicing in advance. If the timesheet entry has to be edited, you have to delete the WIP allocation, and reallocate the WIP credits.
To delete the WIP allocation, proceed as follows:
- Select the job and click the View WIP button.
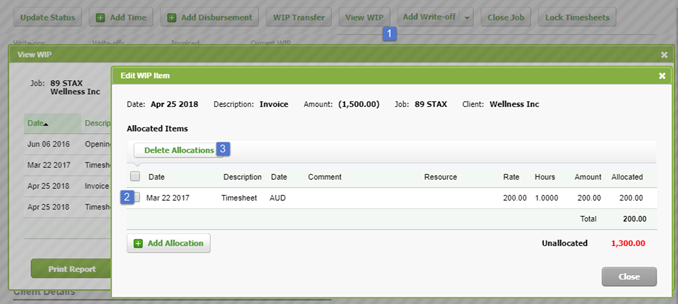
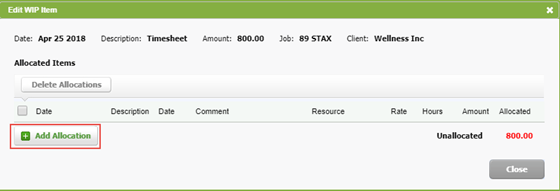
- Click the timesheet entry that you want to edit.
The Edit WIP item dialog box displays. - Select the box preceding the latest invoice sent to the client, then click the Delete Allocation button.
- Click Close twice to close the dialog boxes.
Once the allocation is deleted, a message indicating that certain WIP credits can be allocated to WIP debits will display in the View WIP dialog box.

Edit the timesheet entry before allocating it again.
Reallocate the WIP credits
To reallocate the edited timesheet entry, proceed as follows:
- Select the job and click the View WIP button.
- In the View WIP dialog box, click the timesheet entry added after the final invoice was sent, i.e. the edited time entry.
The Edit WIP item dialog box displays. - Click the Add Allocation button.
- In the Add Allocation dialog box, select the invoice to which you want to add an allocation.
- Click Save.
In the above example, there is no WIP credit left to allocate.