Create a draft invoice
Invoicing - View, Add and Edit Invoices
Learn about creating invoices
There are a variety of ways to create a draft invoice, as outlined below.
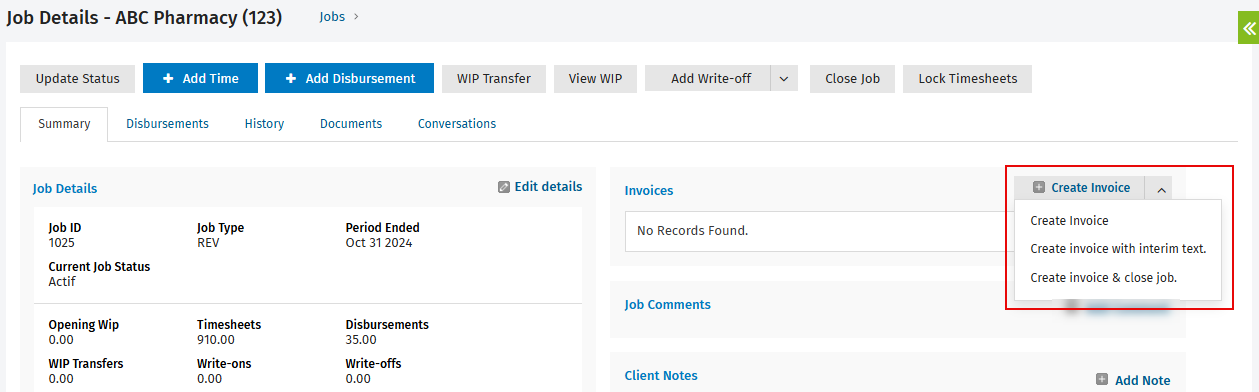
- Click Jobs & Billing > Jobs and open the required job, then choose one of the following options:
- Click Create Invoice - The job is added as a WIP line to the invoice.
- Click Create Invoice with interim text. - The default interim invoice text related to the job type is added to the invoice. This option is only available if you have enabled the Use interim/progress text on job types setting.
- Click Create invoice & close job. - The job is closed and added as a WIP line to the invoice.
Note: If the contact for that job belongs to a billing group and is not the main client for that group, the draft invoice will be created with the main client information to invoice.
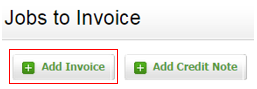
- Click Jobs & Billing > Invoices. In the Draft Invoices tab, click Add Invoice.
- Unlike the above method, no details are pre-populated for you. Therefore, you have to enter the invoice details.
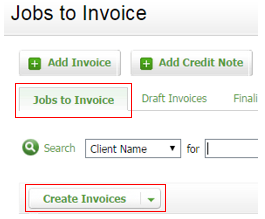
- Click Jobs & Billing > Invoices. In the Jobs to Invoice tab, click Create Invoices.
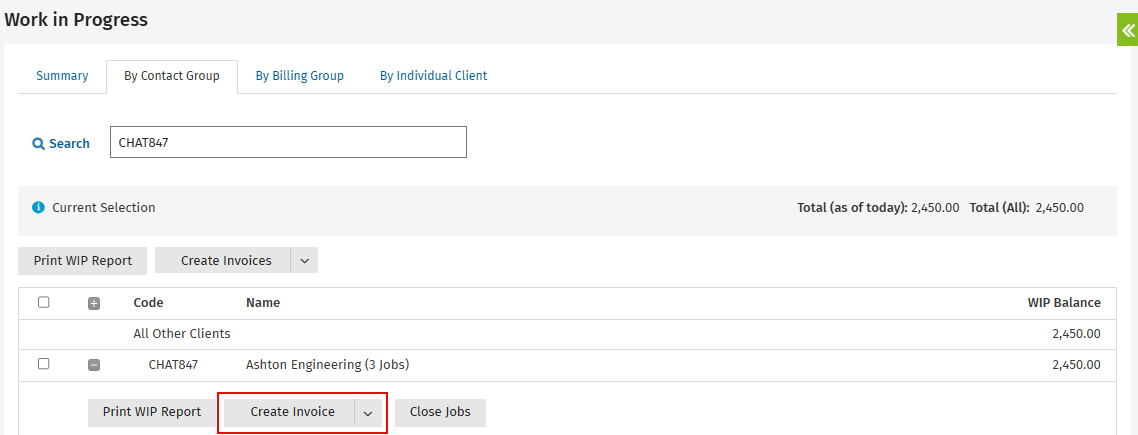
- Click Jobs & Billing > Work in Progress and select the relevant clients and jobs, then click the Create Invoice button in the grid.
Enter the invoice details
- Click Jobs & Billing > Invoices.
- Click Add Invoice.
- Select the client that you want to invoice, start typing the client name, then select the required client from the list that appears or use the Search
 button to look up and select the required client.
 - Select the required address:
- Postal Address - The clients' mailing address as recorded in Contacts.
- Physical Address - The clients' physical address as recorded in Contacts.
Note: If you use billing groups and the selected client is not the main contact for that group, a confirmation message displays. You can continue with this client, change to the main billing group client or cancel the invoice for that client.
- Adjust the dates:
- Date - The date of the invoice set by default to today's date.
- Due Date - As defined in the billing entity settings.
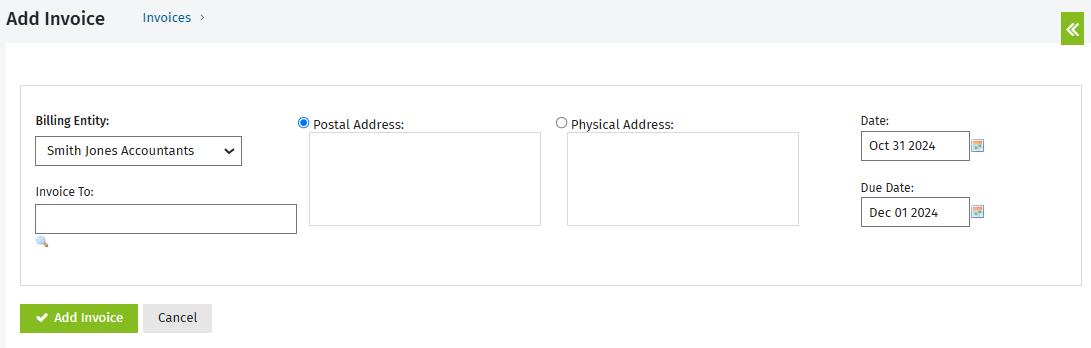
- Click Add Invoice.
- Proceed to: