Reassign or deactivate a user account
To remove a staff member from CCH iFirm you can deactivate (archive) their user account from CCH iFirm. You will most likely only be able to deactivate user accounts. If you run out of user accounts (CCH iFirm license limitation), you can reassign a user account from one staff member to another. This is the process you should follow when a staff member leaves your firm.
Contents
Reassign a user account
If you want to reassign a CCH iFirm user account from one staff member to another, you need to carry out the tasks below to remove the current user from the system before adding a new user account.
For example, if you use up all of your CCH iFirm user licenses, you need to deactivate a user account before you can add a new one. This is common in the case of a staff member leaving your firm and being replaced by someone else. This simple process can get complicated if the user you want to deactivate is allocated any jobs in Jobs & Billing.
- Remove a user from Jobs & Billing. This is only applicable if you use the Jobs & Billing module and may involve changing resource allocations, changing the job owner, and the recipient of automated e-mails.
- Change the Contacts manager. If the user was set as the manager for any clients, a new manager must be allocated to those clients.
- Edit the user's CCH iFirm account details. This stops the user's name from appearing in the system, prevents new timesheets from being created for the user, and ensures that the user can no longer access CCH iFirm modules.
- Deactivate a user account of the staff member so they can no longer log in to CCH iFirm. This frees up an active account that you can use for a new staff member.
- Add a new user account for the new staff member.
Edit the user's CCH iFirm account details
Security - View, Add and Edit Users
- Click Settings > Users .
- Click the user's name to open their account.
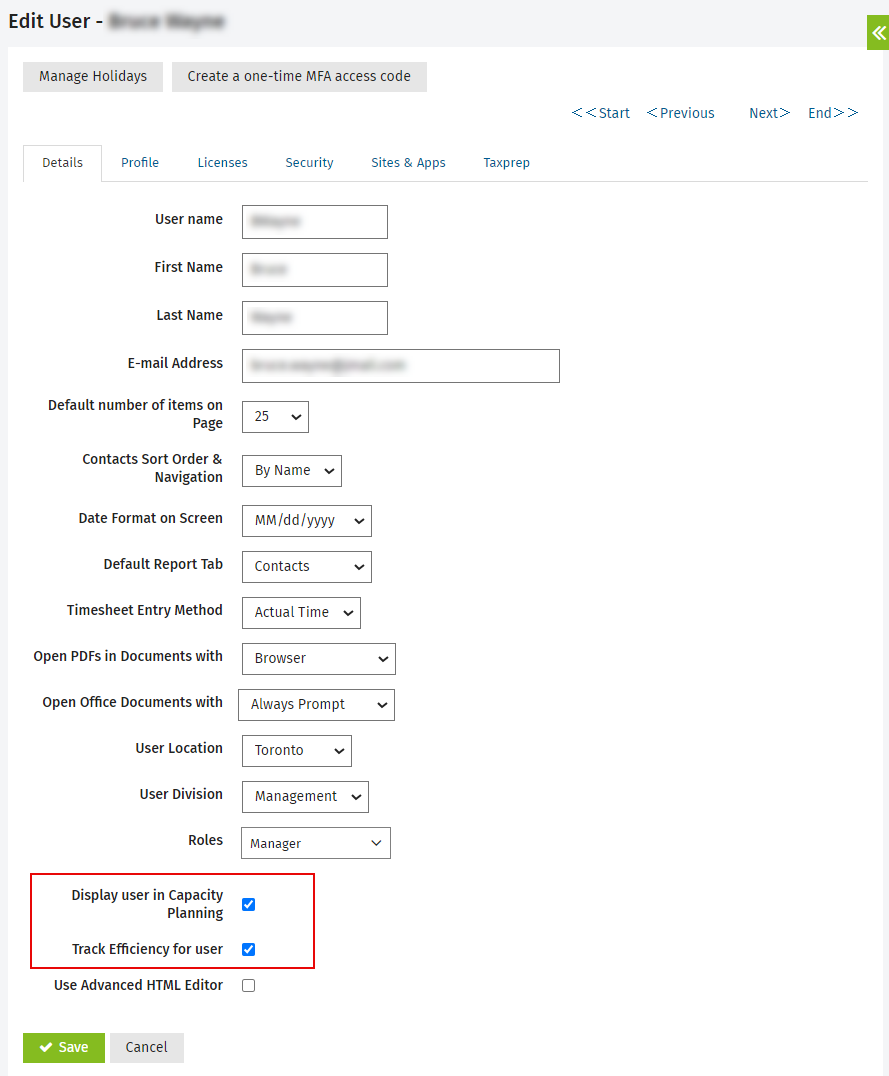
- Clear the Display user in Capacity Planning and Track Efficiency for user check boxes.
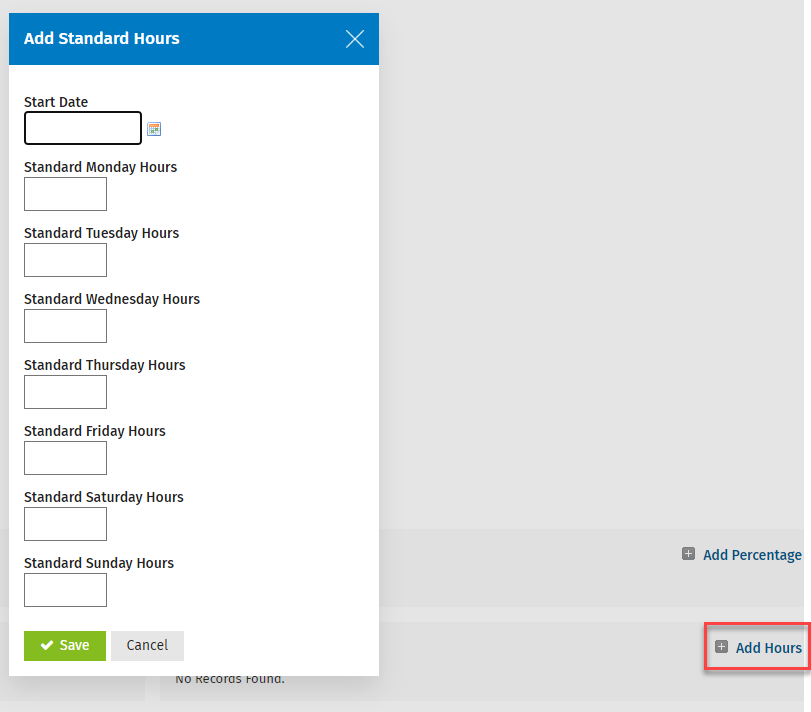
- Add zero hours from the date the user is leaving, to stop timesheets from being created (if you use Jobs & Billing):
Security - View and Edit Budgets, Rates and Hours for User
- Click Add Hours in the Standard Hours panel.
- Use the calendar
 icon to set the user's leaving date as the Start Date.
 - Enter 0 as the standard hours for every day.
- Click Save.
- Remove the profiles and security roles assigned to the user:
Security- Manage User Security
- Click the Security tab.
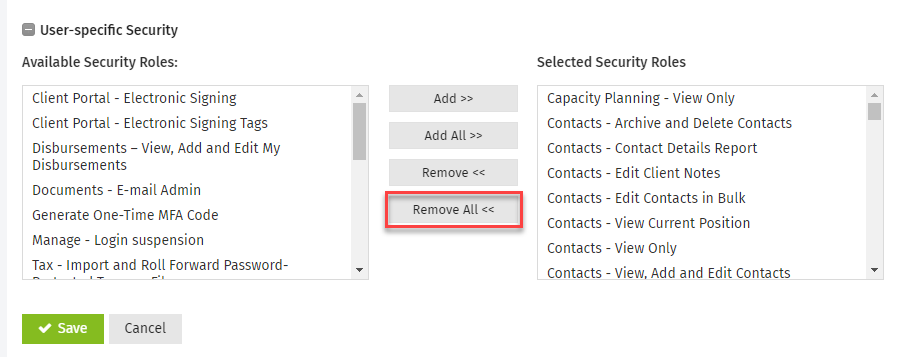
- Click all of the profiles that were added to the user's account, then click Remove.
- Click Remove All in the User Specific Security area.
- Click Save.

Deactivate a user account
Security - View, Add and Edit Users
- Click Settings > Users. The User Manager page displays.
- Click the Active tab.
- Select the check box for the user.
- Click Deactivate.
Reactivate a user account
Security - View, Add and Edit Users
- Click Settings > Users. The User Manager page displays.
- Click the Inactive tab.
- Select the check box for the user.
- Click Activate.


