Edit general job settings
Settings - Jobs & Billing
Contents
Access the job settings
There are a few global settings that need to be set. They affect how jobs function in Jobs & Billing.
- Click Jobs & Billing if using your Admin login, or
Click Settings > Jobs & Billing if using your User login. - On the Jobs & Billing page, click General Settings.
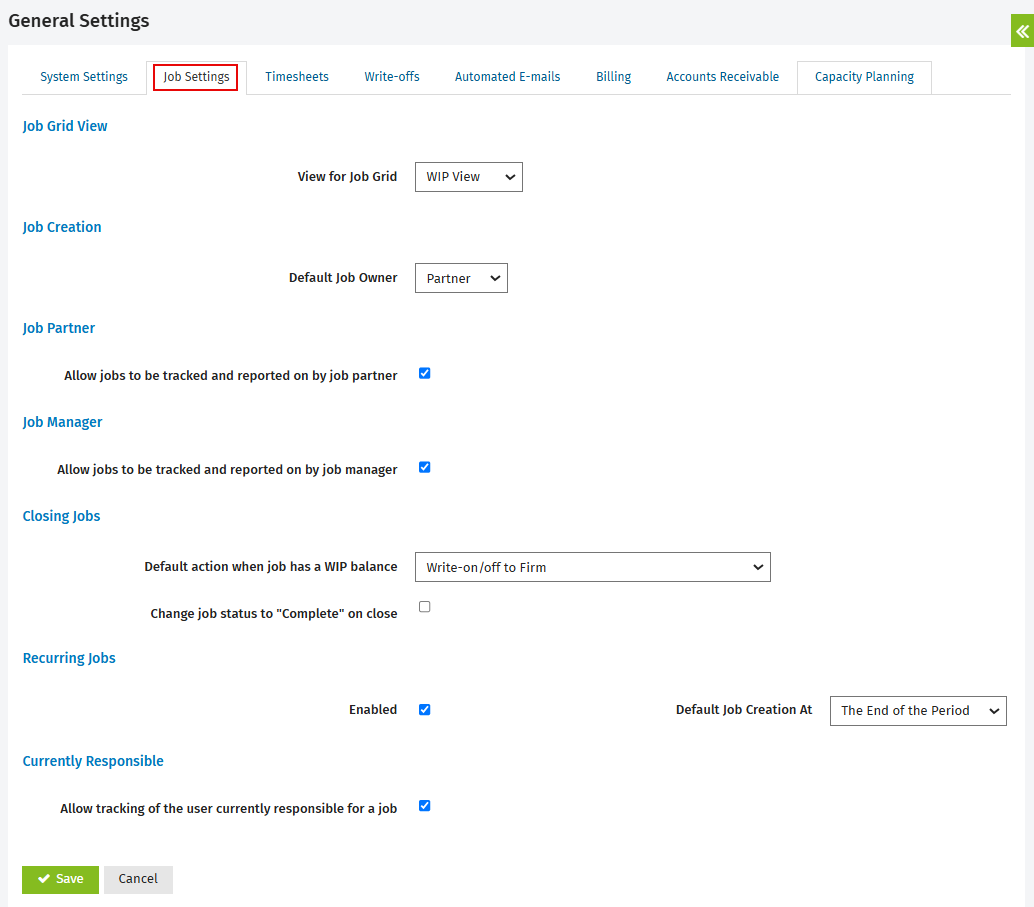
- Click the Job Settings tab.
Assign a job owner
You can select the job owner of a newly created job to be the client partner or client manager. You have to define the meaning of job ownership in your firm, and communicate the job owner responsibilities to the team members.
- Click Jobs & Billing if using your Admin login, or
Click Settings > Jobs & Billing if using your User login. - On the Jobs & Billing page, click General Settings.
- Click the Job Settings tab.
- Select the default job owner from the drop-down list in the Job Creation area.
- Click Save.
A job ownership can be overridden when adding automatic resource allocations in the client record or manually once a job has been created.
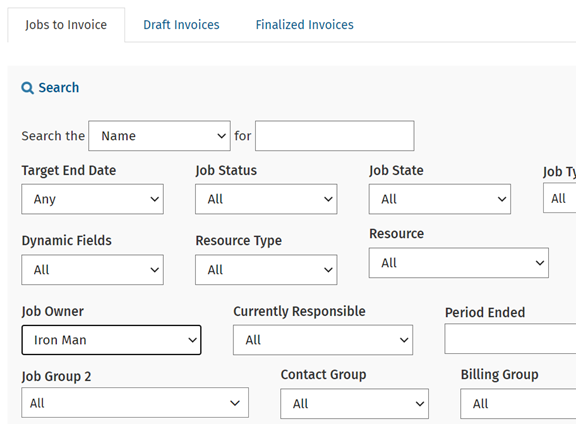
There are many places in the system where you can filter for job owner, such as in the Jobs or Invoices areas, and in some reports. For example, you can filter all three of the tabs in the Invoices area.
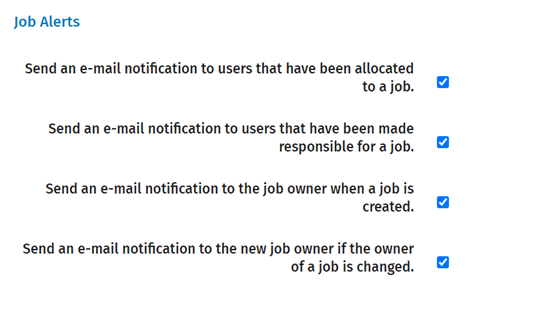
There are also e-mail notifications that can be setup to be sent to the job owner.
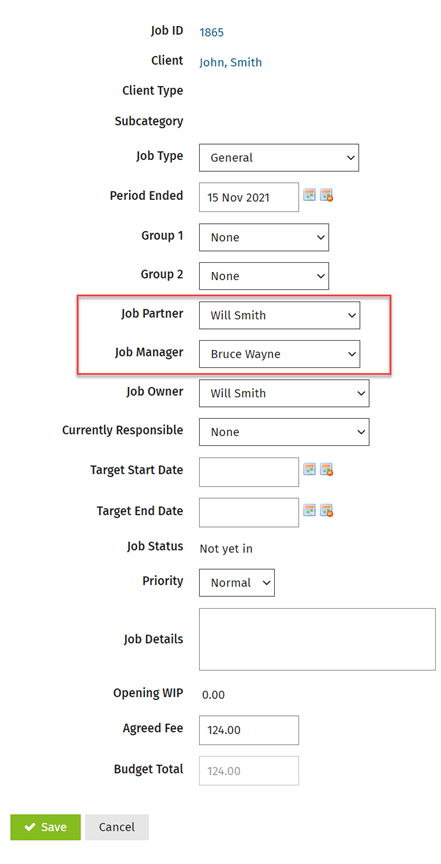
Enable Job Partner and Manager
- Click Jobs & Billing if using your Admin login, or
Click Settings > Jobs & Billing if using your User login. - On the Jobs & Billing page, click General Settings.
- Click the Job Settings tab.
- Select the Allow jobs to be tracked and reported on by job partner and/or the Allow jobs to be tracked and reported on by job manager check boxes.
- Click Save.
Once these settings are enabled, you can record the partner and manager at a job level. .
The Job Partner and Job Manager fields can then be used to filter a number of reports and grids throughout CCH iFirm.
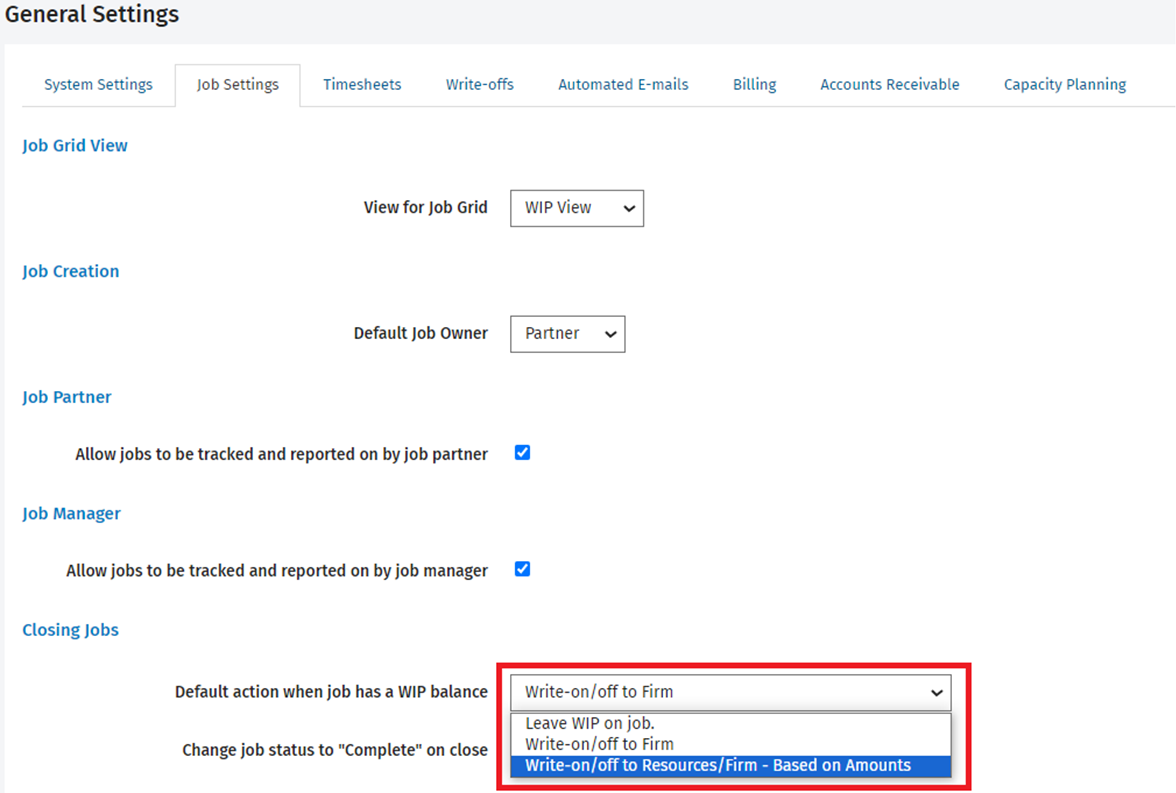
Set the default action for WIP balances when closing a job
You can set what CCH iFirm does with the WIP when a job is closed. You can choose to either leave the WIP on the job or write the WIP on or off to the firm.
- Click Settings > Jobs & Billing.
- Click General Settings.
- Click the Job Settings tab.
- In the Default action when job has a WIP balance box, select the default behaviour for remaining WIP balances when a job is closed, either Leave WIP on job, Write-on/off to Firm or Write-on/off to Resources/Firm - Based on Amounts.
- Click Save.
Set the job status to Complete when closing a job
You can allow CCH iFirm to automatically update the job's status to Completed when jobs are closed.
- Click Jobs & Billing if using your Admin login, or
Click Settings > Jobs & Billing if using your User login. - On the Jobs & Billing page, click General Settings.
- Click the Job Settings tab.
- Select the Change job status to "Complete" on close check box.
- This setting is not selected by default.
- When activated, this setting updates the job status to Complete when the job is closed individually or in bulk from within the Jobs or Jobs to Invoice areas or the WIP Centre.
- The job history is updated accordingly.
- Any jobs that are set to be created automatically once the status changes to Complete are created as usual.

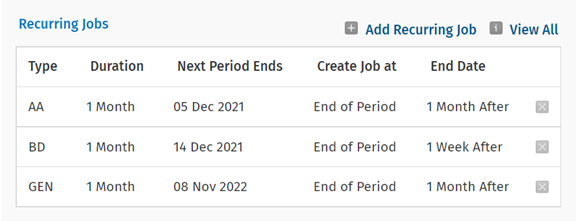
Enable recurring jobs
If you are ready to create jobs in Jobs & Billing and you want to make use of the recurring jobs feature, you have to enable it first.
- Click Jobs & Billing if using your Admin login, or
Click Settings > Jobs & Billing if using your User login. - On the Jobs & Billing page, click General Settings.
- Click the Job Settings tab.
- Select the Enabled check box in the Recurring Jobs area.
- Select the default job creation period.
- Click Save.
You can now proceed to create and manage your recurring job.
Enable tracking of the user currently responsible for a job
If you want to make use of the Currently Responsible feature, you must activate it first.
- Click Jobs & Billing if using your Admin login, or
Click Settings > Jobs & Billing if using your User login. - On the Jobs & Billing page, click General Settings.
- Click the Job Settings tab.
- In the Currently Responsible section, select the Allow tracking of the user currently responsible for a job check box.
- Click Save.
- Now anyone in your firm can change the currently responsible name when necessary. For example, when Mary finishes her part of a client's job, she can change the name of the person currently responsible to John, so that he can start his part of the job. This field helps you and your team members better manage the workflow, and passing jobs from one user to the next takes just one mouse click.
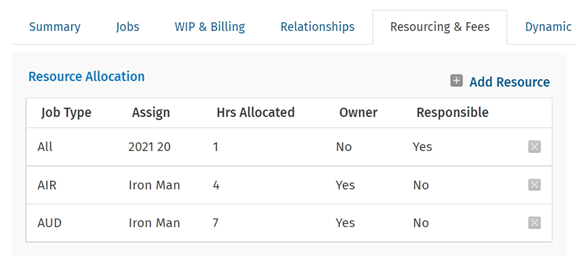
- The Resource Allocation panel available under the Contacts > Resourcing & Fees tab of the Contact Details page has an additional column entitled Responsible. This column allows you to know if the job owner is responsible or not (Yes or No).
