Set up recurring jobs
Jobs - View, Add and Edit Jobs
If you have jobs that repeat on a regular basis, such as Annual Accounts and Wages jobs, we recommend that you create recurring jobs in Contacts, so these jobs can be automatically created for you. You determine the cycle of the job, when it will be created, and the period ended and target end dates. This ensures that you always have relevant jobs open and ready for your clients, and saves you the time and effort to remember to create them manually.
Add a recurring job
The following applies to all recurring jobs:
-
You can only create one entry per job type, for example only one recurring AA job can be created per client.
-
Recurring jobs will not be created if another job with the same job type exists and shares the same period end date. However, it will create the recurring job for the next period.
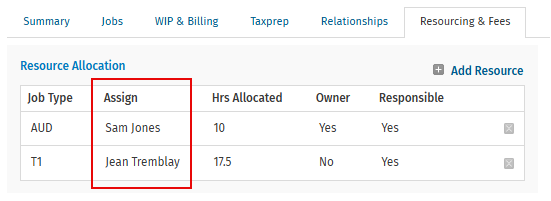
Tip: If you want your future jobs to appear in Capacity Planning, ensure that you also set up automatic resource allocations.
- Click Contacts > All Contacts.
- Click the row of the desired contact to open his or her profile.
- Click the Jobs tab.
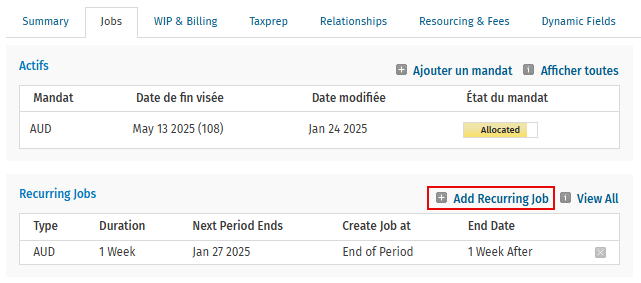
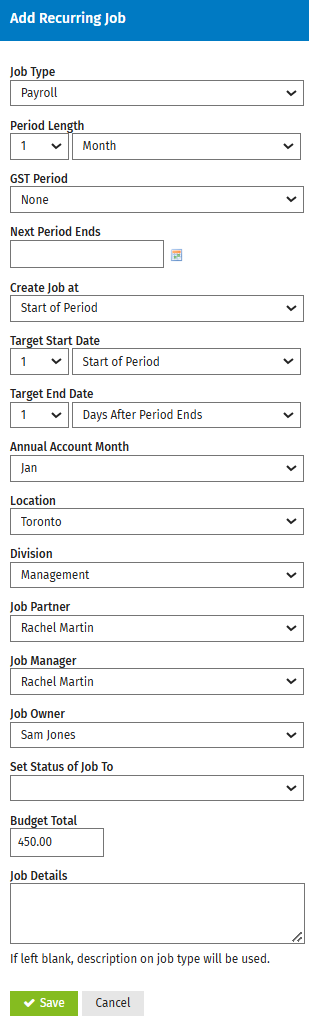
- Click Add Recurring Job in the Recurring Jobs panel.
- Select a job type from the Job Type drop-down list.
- Select the Period Length from the drop-down list:
- The possible values are: Day, Week, Month and Year.
- Use the calendar
 icon to select the Next Period Ends.
- This field will determine what day, for example every month, the recurring job ends and therefore, when the next one starts (see example below).
- This date is automatically updated every time a new job is created.
If you create a recurring job for the current period, the job will not appear in CCH iFirm until the daily task is run overnight. You will see it the following day.
- In the Create Job at drop-down list, select either Start of Period or End of Period.
Example
Explanation
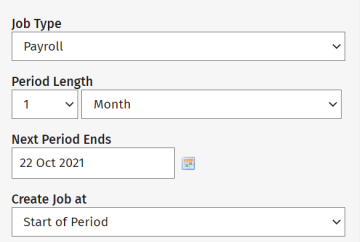
The period length is one month and the next period ends on October 22. That means the job period started a month before, on September 23.
So the job period starts on the 23rd of one month and ends on the 22nd of the next month.
Because Start of Period is selected, this recurring job will be created at the start of the period, which is on September 23. This is used in the scenario where you want to work on the job during the period.
First instance of recurring job in Jobs & Billing: September 23 - October 22.
Next recurring job: October 23 - November 22.

Again, the period length is one month and the next period ends on October 22, so the job period started a month before, on September 23.
The job period is the same as the example above: it starts on the 23rd of one month and ends on the 22nd of the next month.
However, End of Period is selected. The end of the current period is midnight on October 22, so this recurring job will be created the next day, on October 23. This is used in the scenario where you want to work on the job after the end of the period.
First instance of recurring job in Jobs & Billing: October 23 - November 22.
Next recurring job: November 23 - December 22.
-
Where applicable, specify the Target Start Date:
-
The possible values are: None, Sart of Period, Days/Weeks/Months After Period Starts.
-
- Where applicable, specify the Target End Date.
- The possible values are: days/weeks/months after period ends, end of AA month.
- This is used for capacity planning. For example, you may specify a WAGES job period to end on the 22nd of the month, but give your staff member a target end date of the 29th of the month, so he or she has an additional week to finish that job.
- If you select end of AA month, the Annual Account Month option will appear - the AA (annual accounts) month is the month you have set aside to work on the client's Annual job. It will default to the setting in the client's Profile tab, but you can select another period from the drop-down list, if required.
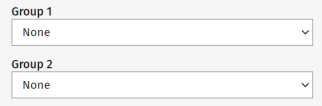
- Select the relevant options for any custom firm groups you may have enabled.
-
Select a Job Partner and Job Manager, if applicable.
- Select the Job Owner
- The default is Automatic, which means the job owner will be selected based on other factors, such as:
- the settings in jobs, for whether a partner or a manager should be used as a job owner;
- or the automatic resource allocation, where the resource can be assigned as the job owner for the job. This will override the partner / manager setting.
- If you select a user name from the list, that user will become the job owner and this will override the automatic job owner.
- Select the status you want the job to start at.
- Enter a Budget Total, if required.
- A budget is useful for future earnings reporting in the Jobs Due Report.
- Do not enter a budget if you have set up an agreed fee for this job
-
Where applicable, enter a job description in the Job Details section.
- Click Save.
Add recurring jobs in bulk
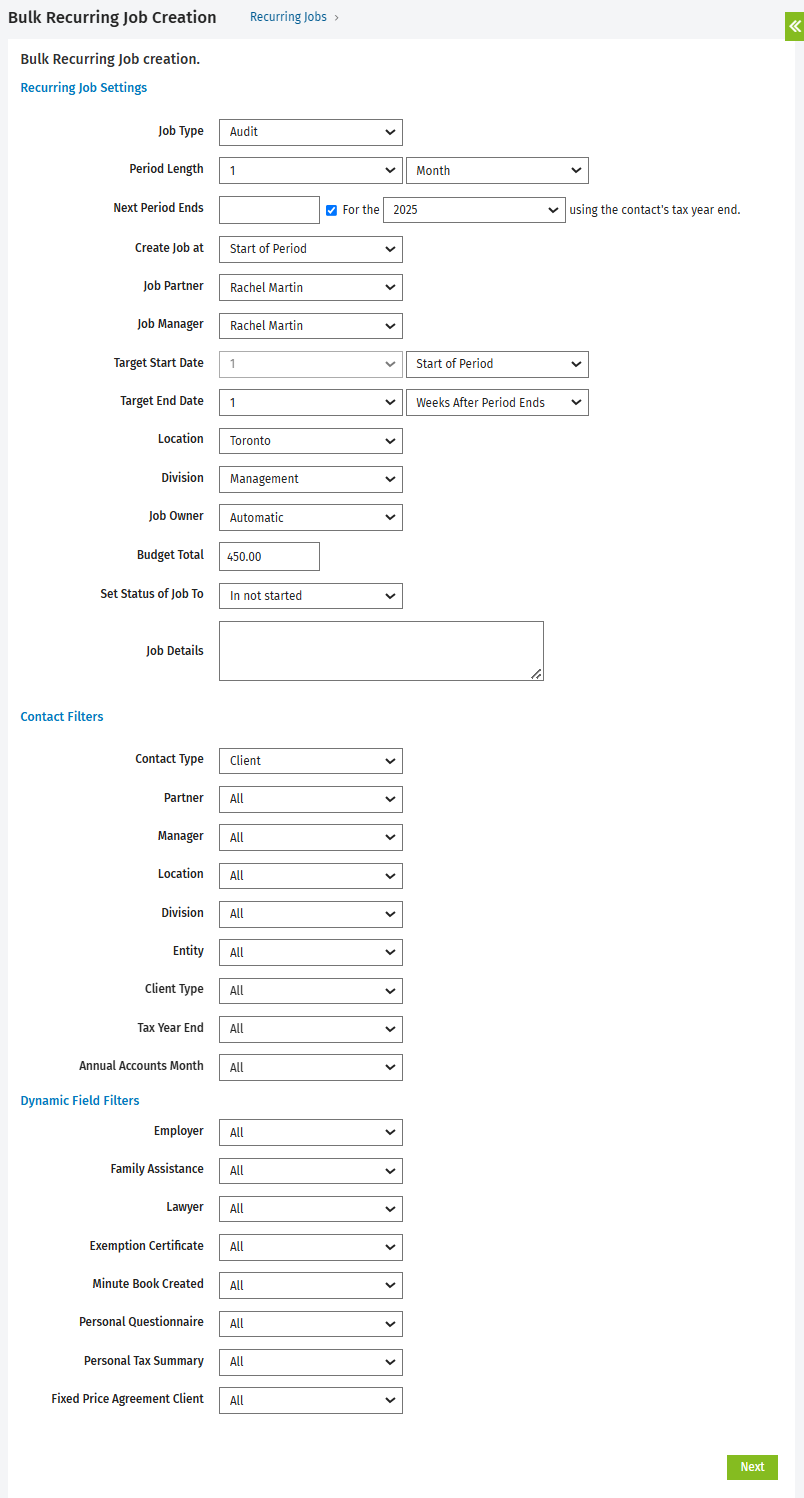
You can bulk-create recurring jobs and use a range of filters to select which clients the recurring jobs apply to.
A new recurring job will not be created for a client if a recurring job for the same job type was previously created in the contacts area.
- Click Jobs & Billing > Recurring Jobs.
- Click Add Recurring Jobs in Bulk.
- Specify the settings for the recurring jobs.
- Use the Contact Filters and Dynamic Field Filters to specify which clients will receive these recurring jobs.
- The Tax Year End date represents the financial year end for the client and the Annual Accounts Month is the month you have set aside to work on the client's AA job, as set in the client's record.
- Click Next.
- In the Bulk Recurring Job Creation page, confirm or edit the selection of clients .
- Click Create Recurring Jobs.
- Click Finish.
Manage recurring jobs
You can use the Recurring Jobs Report to view all recurring jobs that have been set up for your clients.
To manage your recurring jobs:
- Click Jobs & Billing > Recurring Jobs - you will see a list of settings, not a list of actual jobs (to view a list of jobs click Jobs & Billing > Jobs).
- In the Recurring Jobs page, you can:
- Click the row of the required recurring job setting to view and edit the details in the Contacts module.
- Use the search and filtering options to search for specific information, for example filter for Audit jobs.
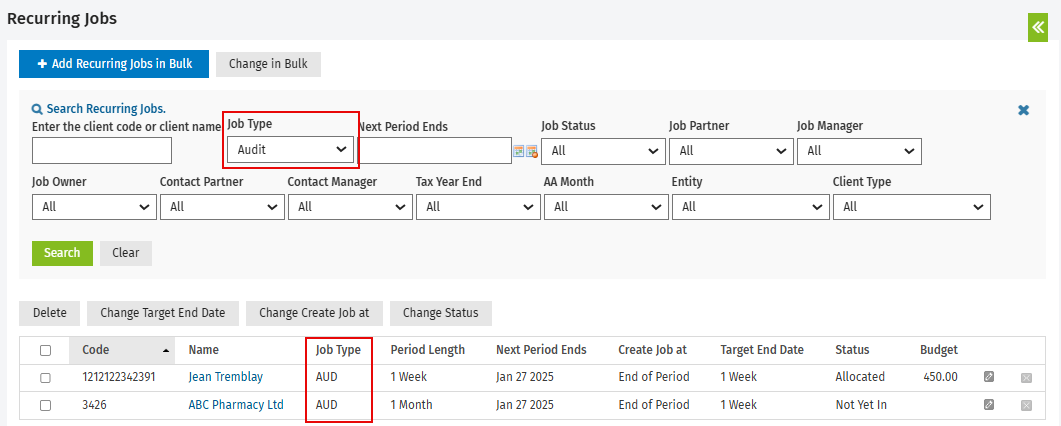
- Manage the recurring jobs as required:
- Add Recurring Jobs in Bulk - create recurring jobs for more than one client, where the settings are the same.
- Delete - permanently remove one by clicking the delete
 icon, then click Yes to confirm. Or select the required entries using the check boxes, click the Delete, then click Yes to confirm deletion.
 - Change Target End Date - select the required entries using the check boxes, click Change Target End Date, select the new target end date and click Yes to confirm the change.
- Change Create Job at - select the required entries using the check boxes, click Change Create Job at, select the new value and click Yes to confirm the change.
- Change Status - to bulk change the job status value, select the required entries using the check boxes, click Set Job Status to, enter the new status and click Yes to confirm the change. The recurring jobs selected must all be the same, otherwise you will see an error.