Learn about retainer fees
How do we process retainer fees on behalf of a client who entrusts us with a job? In CCH iFirm, a retainer fee is recorded either by issuing an interim invoice for an amount invoiced in advance or by adding a transaction to the accounts receivable.
If the client's contact has not yet been added, add it. For more details on adding a contact, click here: Manually add a contact.
Two methods are provided: with or without taxes.
Content
With taxes
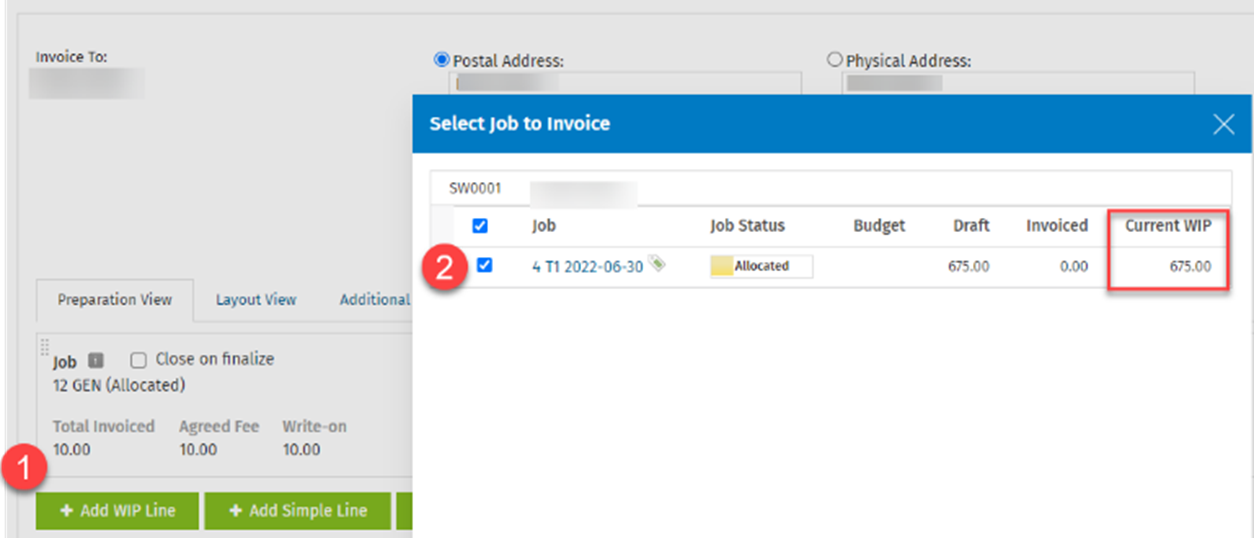
First step – Add the job to the contact.
Second step – Issue an interim invoice to the contact, making sure to include the job for which the work has not yet begun. You can consult the Create a draft invoice article.
In the Description box of the Preparation View tab, enter the text relating to the retainer fee.
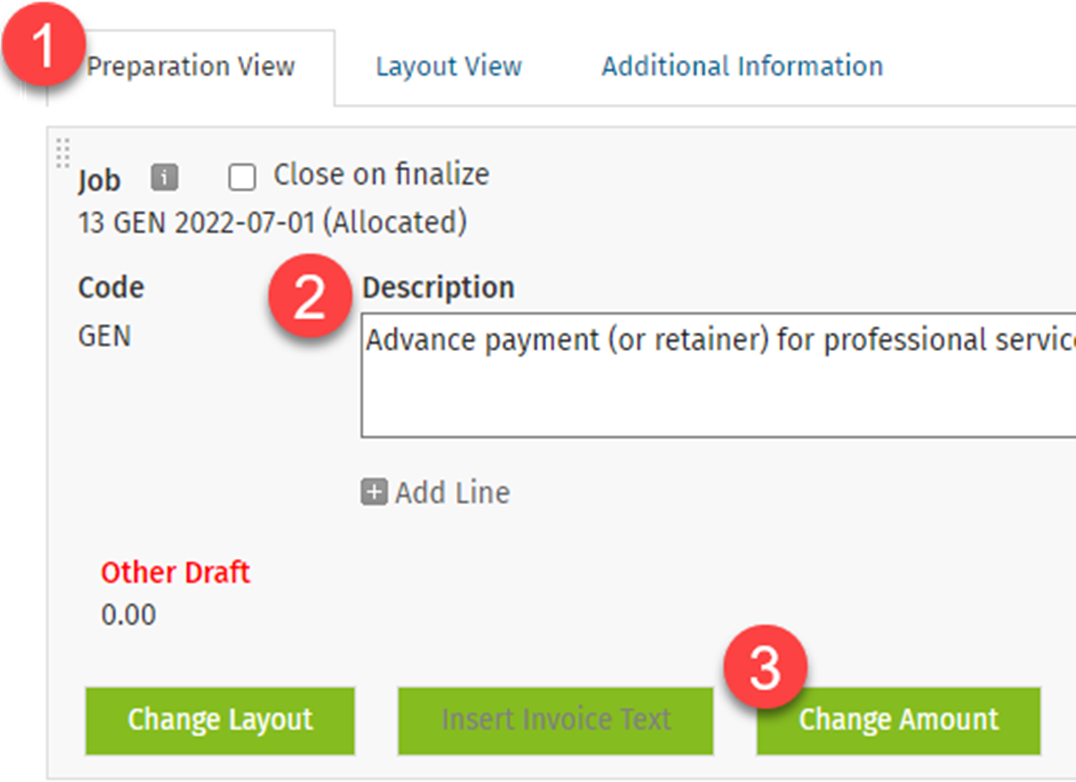
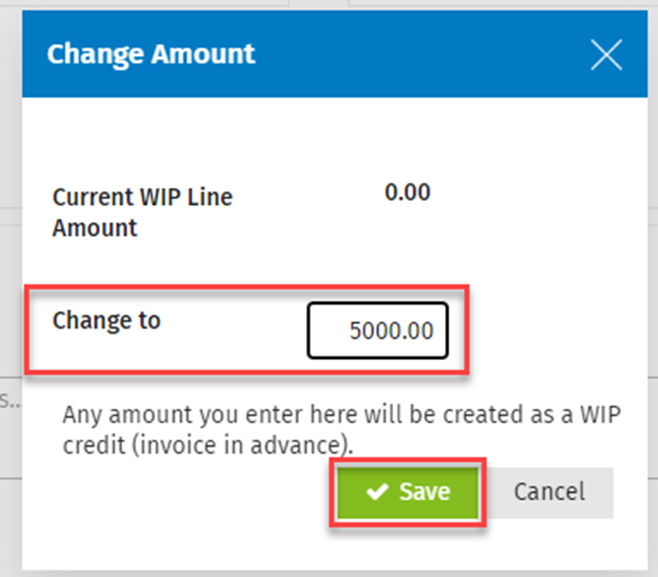
Then, click the Change Amount button. Enter the amount of the retainer fee and save.
Finalize the invoice and send it to the contact. This invoice will add a debit transaction to the contact’s account receivable.
Third step – As resources input time into the contact's job, the amount of the retainer will decrease.

This means that timesheet entries cannot be modified unless the resource is granted the security role to do so (WIP Centre – View, Add and Edit Transactions).
If allocations must be modified, please consult the following article: Invoicing in Advance and Allocating Credits.
Without taxes
First step – Add a payment transaction to the client’s account receivable.
Select Jobs & Billing > Accounts Receivable > Add Transaction.
- In the Add Transaction window, modify the date, if applicable.
- In the Transaction Type field, select Payment.
- In the Payment Type field, select the type.
- In the Receivable field, search for and select the client.
- Enter the amount, the reference and a comment.
- If the amount is deposited in a trust account, enter the details.
If debit transactions are already posted to the account receivable, CCH iFirm will allocate the retainer to those transactions. Deselect the allocations.
If no debit transactions are posted to the customer's account, the Total Due column will show a negative amount. - Save the transaction.
Second step – Deduct the retainer from the final invoice.
When the final invoice is issued, proceed as follows.
- Create and finalize the invoice. Do not send it to the client.
- In the right-hand pane of the Finalized Invoices window, click Receivables – View receivable transactions for the current client.
- The account receivable will display on the screen.
- Click the Receivable Transactions tab and select the invoice that was just finalized and allocate it to the invoice
- Save the transaction. The amount of the retainer will be deducted from the invoice.
- Send the invoice along with a statement of account to the client.