Print and send invoices
Invoicing - View Only
Contents
Learn about printing and sending (e-mailing) invoices
You can print (download as PDF) your invoices and then send them in the mail or you can e-mail them directly to your clients.
You have a choice of invoice templates to use. If you plan on printing your invoices, we recommend the Invoice or Invoice Full templates because they have an enhanced layout, are in PDF format, and are designed for window envelopes. You can also customize your own invoice templates. Click here to learn more about how to customize invoice templates.
When you print a finalized invoice, you will be prompted to mark it as sent. This feature is designed to help you keep track of which invoices you have printed and mailed to clients. However, you can decline this offer and mark it as sent later. When you open an invoice, in the Additional Information tab, you will see who finalized it and when.
When you e-mail an invoice, it is automatically marked as sent and is moved to the Invoices > Finalized invoices > Sent tab. You can view the status of the e-mail in the E-mail Centre.
These are some scenarios to consider when printing and sending invoices:
- If your team members are drafting and finalizing their own invoices, but another team member is responsible for printing and sending invoices, they can do this in bulk.
- If you have finished bulk finalizing invoices, and you are responsible for the printing and sending, proceed to the Finalized Invoices tab.
- If you are printing individual invoices from the job area, you should regularly monitor the Finalized Invoices > Unsent tab to ensure that all invoices processed have been printed and sent.
Print an individual invoice
- Click Jobs & Billing > Invoices.
- Click the Draft Invoices or Finalized Invoices tab, as required.
- Click the row of the required invoice to open it.
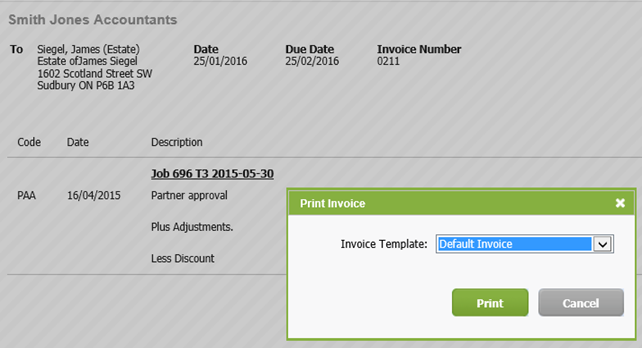
- Click Print.
- Select the required invoice template.
- Click Print.
- Click Yes if you want to mark the invoice as sent or click No if you prefer to do this later (this option is only available for finalized invoices).
The invoice will be printed in the communication language selected in the client's Client Details page.
Print invoices in bulk
You can print a batch of draft or finalized invoices. When you do this, they open as one PDF, which you can print to a printer and separate out into envelopes, as required.
- Click Jobs & Billing > Invoices.
- Click the Draft Invoices tab or Finalized Invoices > Unsent tab, as required.
- Click the Search icon to open the expanded search filters and use the different criteria to create a list of the invoices you want to print, then click Search. If applicable, we suggest that you use the Communication Language filter as a search criteria to avoid printing invoices in a language different from the communication language selected in the clients' Client Details pages.
- Select the check boxes of the required invoices.
- Click Print.
- Select the required Invoice Template. If applicable, select the invoice template corresponding to the language selected above.
- Click Print.
- Click Yes if you want to mark the invoice as sent or click No if you prefer to do this later (this option is only available for finalized invoices).
E-mail an individual invoice
- Click Jobs & Billing > Invoices.
- Click the Finalized Invoices > Unsent tab.
- Click the row of the required invoice to open it.
- Click E-mail.
- Select the required invoice template.
- Click Next.
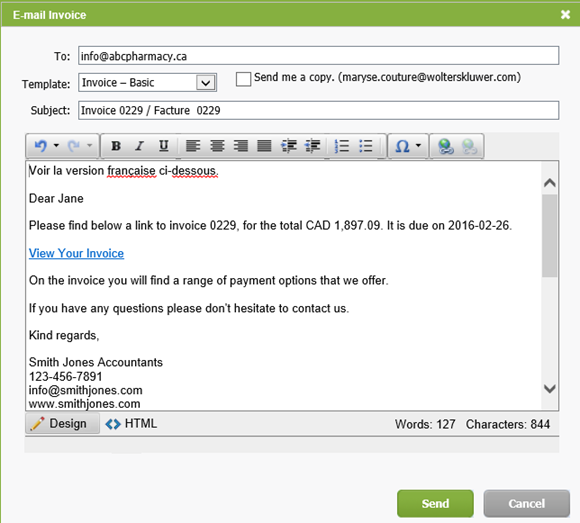
- Select the required e-mail template.
- Select the Send me a copy check box, if you would like to receive a copy of the invoice.
- Edit the To address, Subject or e-mail content, if required.
- Click Send.
Email invoices in bulk
- Click Jobs & Billing > Invoices.
- Click the Finalized Invoices > Unsent tab.
- Click the Search icon to open the expanded search filters and use the different criteria to create a list of the invoices you want to send, then click Search. If applicable, we suggest that you use the Communication Language filter as a search criteria to avoid sending invoices in a language different from the communication language selected in the clients' Contacts pages.
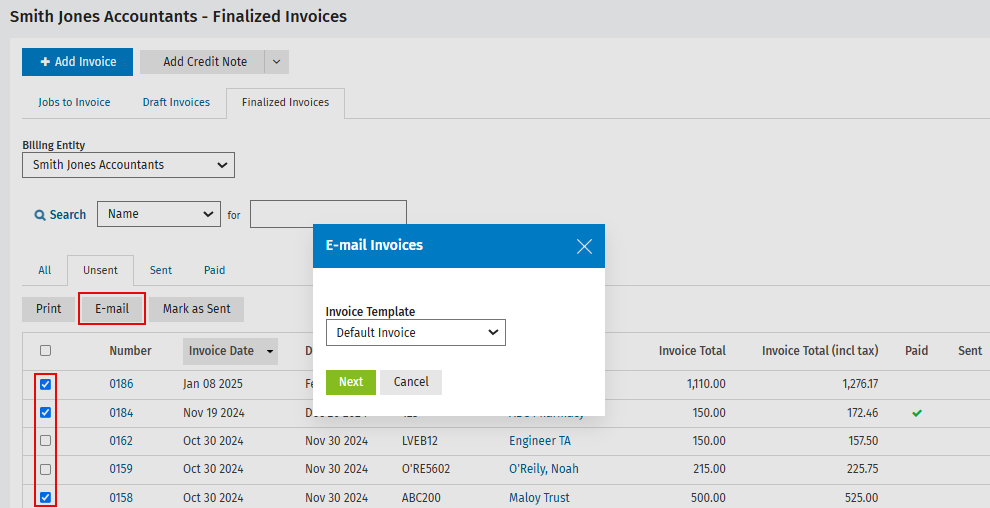
- Select the check boxes of the required invoices.
- Click E-mail.
- Select the required Invoice Template. If applicable, select the invoice template corresponding to the language selected above.
- Click Next.
- Select the required e-mail template.
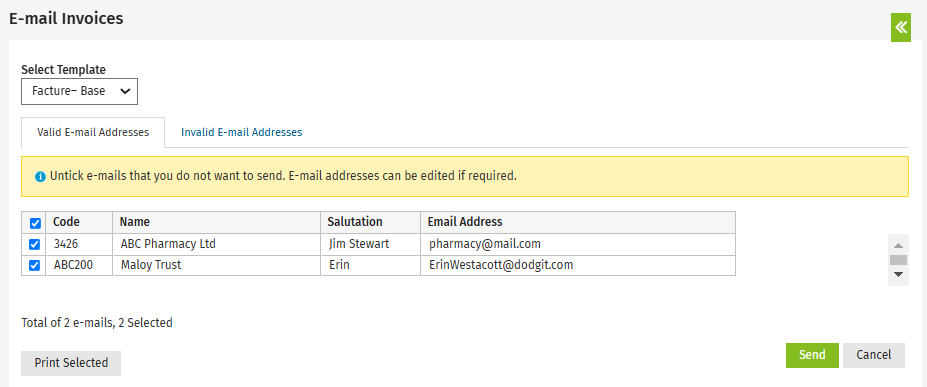
- Update any invalid e-mail details, if required, on the Invalid E-mail Addresses tab.
- Click the Valid E-mail Addresses tab (if it is not already open by default).
- Clear the check boxes of any e-mails that you do not want to send.
- Edit the e-mail addresses, if required.
- Click Send.
- Click Yes to send the e-mails.
- Click OK to acknowledge the confirmation message.
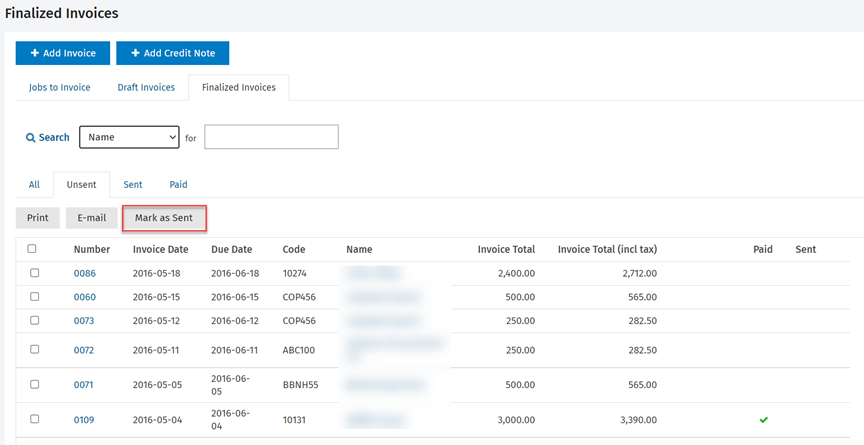
Mark invoices as sent
You can use the Mark as Sent and Mark as Unsent buttons to keep a record of the invoices you have sent to clients, and ensure that you do not print and send the same invoice twice.
- Click Jobs & Billing > Invoices.
- Click the Finalized Invoices > Unsent tab.
- Select the check boxes of the invoices you want to mark as sent.
- Click Mark as Sent - the invoices can now be seen in the Sent tab.
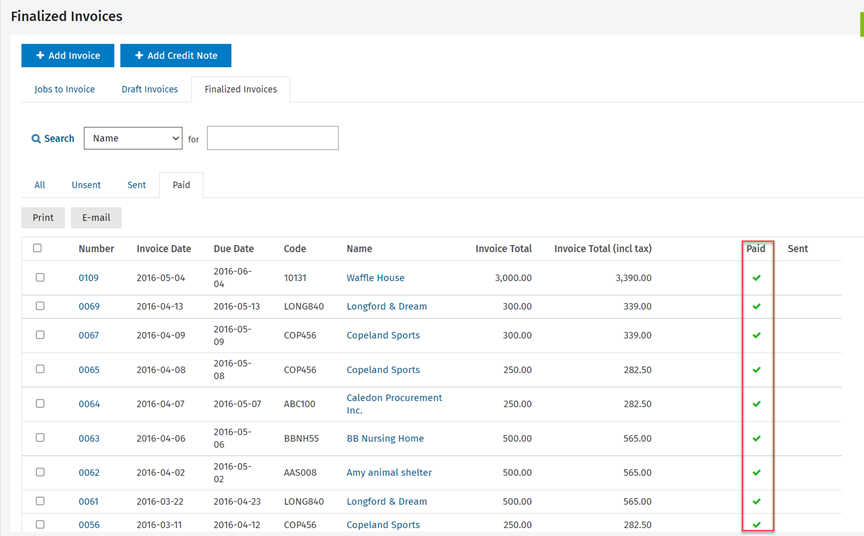
View paid invoices
You can easily identify which invoices have been paid on the Finalized Invoices tab using the Paid column or from the Paid tab (Jobs & Billing > Invoices > Finalized Invoices tab). The Paid tab lists all invoices for which payments have been received.
An invoice is considered paid when it has a $0.00 balance and includes payments, credits, and write-offs.
The Paid column displays a check mark when an invoice has been paid and is visible on all four Finalized Invoice tabs (All, Unsent, Sent and Paid).
You can also e-mail or print invoices from the Paid tab.