Manage Files
You can upload files (documents) against a contact or a job. Once uploaded, users can open, edit, download, rename and delete the files.
See also Manage previous versions of files.
Contents
Upload files
Documents - View and Upload
You can upload one file (document) at a time or multiple files in bulk to a contact or a job. Documents accepts most file types, except for executable files (i.e. .exe, .bat and .cmd files). There is no file size limit.
If you upload a file that has the same name as a file already stored in Documents, the file will behave as the new (latest) version of the existing file.
- Open the relevant Contact Details or Job Details page, then click the Documents tab.
- Click the Upload Documents button.
- Select Contact or Job from the Upload to list, then select the required contact or job.
- Optional: Change the default folder in which the file will be uploaded:
- Click the Change Folder button.
- Browse the available folders and click the required folder to select it.
- Click the Select Folder button.
- Use one of these methods to select the files to upload:
- Click Select Files > browse to the file(s) that you want to upload > select the file(s) > click Open.
- Drag and drop the file(s) into the area indicated.
- Repeat the previous step until you have selected all of the files that you want to upload.
- Click the Upload Files button.
- Open the relevant folder to view the uploaded files.
Create documents
- Documents - View and Edit
- Documents - View and Upload
It is now possible to create Word, Excel and PDF files directly from Documents.
-
Open the relevant Contact Details or Job Details page, then click the Documents tab, or access Documents from the left-sided menu.
-
Click the Create Documents drop-down list.
-
Select Microsoft Word, Microsoft Excel or PDF from the list.
-
Select Contact or Job from the Save to list, then select the relevant contact or job.
Note: The user can create documents in the firm documents provided the Documents – Internal Documents View and Edit security role has been granted.
-
Optional: You can change the default folder in which the file will be uploaded.
Click the Change Folder button.
Browse the available folders and click the desired folder to select it.
Click the Select Folder button.
-
Enter a file name. The extensions are not required (.xlsx, .docx or .pdf).
-
Click the Save File button.
Depending on your user setting for the Open PDFs in Documents with and Open Office Documents with options, you may be prompted to open your file via the Document Sync tool, Microsoft 365 or the PDF cloud-based editing solution.
Once you click the Save File button, the file will be available in the selected location and can be opened, edited, downloaded, renamed and deleted, just like any other uploaded file.
Open and edit files
- Documents - View
or - Documents - View and Edit;
- Documents - View and Unlock
When you open a file (other than a file with the .msg. extension), the Documents Sync tool opens the file in the related application. When you edit the file, save your changes and close it; the tool overwrites the previous version of the file with your new version.
Alternatively, you can download a file to your computer, edit it, and then manually upload your edited version of the file. If the file name is the same, your new version will overwrite the previous version.
- Open the relevant Contact Details or Job Details page, then click the Documents tab.
- Locate the file that you want to open.
- Click the file name.
- Optional (additional security role required): Edit and save the file.
- Close the file.
View an e-mail saved with the Documents add-in for Microsoft Outlook
When you open an e-mail saved with the add-in (depicted by a blue envelope ), an overview of the e-mail displays.
The E-mail Preview box allows you to view the content of the e-mail and get some information about the latter. The content of an attachment cannot be displayed inside this box. To review the content of an attachment, open the e-mail with Outlook by clicking the arrow located to the right of the Open button and click Download. The e-mail will be downloaded in the Downloads folder of your computer and you can open it in Outlook to review the content of the attachment or perform other operations authorized by Outlook.
Opening locked files
Documents – View and Unlock
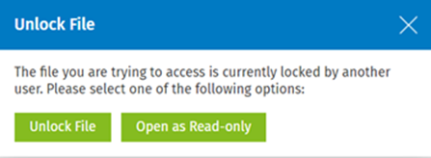
You will now be able to access locked files in read-only mode even if the file is being used by another user.
-
The following message will display when you click the lock (
 ) icon. Clicking the Open as Read-Only button will open the file in the PDF editor in read-only mode.
-
If you click the file and not the lock icon, the file will open in read-only mode.
-
-
The file will open in read-only mode if the Documents – View and Unlock security role has not been granted.
Download files and folders
- Documents - View and Edit (to download files one at a time)
or - Documents - View and Download in Bulk (to download multiple files at the same time)
Depending on your security role, you may be able to download a single file to your computer or download multiple files in bulk. When you download files in bulk, they are downloaded into a zip file with the following naming convention: "iFirm Documents Download" + the date and time.
- Open the relevant Contact Details or Job Details page, then click the Documents tab.
- Locate the file(s) and/or folder(s) that you want to download.
- Select the check box(es) of the file(s) and/or folder(s) that you want download.
- Click the Download button.
- Save the file(s) to your computer.
Rename a file
Documents - View and Edit
- Open the relevant Contact Details or Job Details page, then click the Documents tab.
- Locate the file that you want to rename and select the check box to the right.
- Click the Rename button.
- Type the new name.
- Click Save.
Delete a file
Documents - View and Delete
You can delete a file, which means it goes to the Recycle Bin, where it can be restored later or permanently deleted from the system (additional security roles are required).
- Open the relevant Contact Details or Job Details page, then click the Documents tab.
- Locate the file that you want to delete and click the Delete button
 .
. - Click Yes to confirm.
Copy a file link
Documents - View
You can copy a file link using the link symbol  on the document row. The link can be pasted into any document or email to be used as a direct hyperlink to access the file. The document will open via the Documents Sync tool in the related application. See Open and edit files for more information.
-
Open the relevant Contact Details or Job Details page, then click the Documents tab.
-
Locate the file for which you want to copy the link and click the
 symbol.
 -
Paste the link in a document or email.
Insert a hyperlink
Documents - View
You can insert a hyperlink in any folder of Documents. The hyperlink will display as the relevant file type and will be followed by the world icon  . When the name is clicked, a new tab will open, displaying the hyperlinked content.
-
Open the relevant Contact Details or Job Details page, then click the Documents tab.
-
If necessary, click a subfolder.
-
-
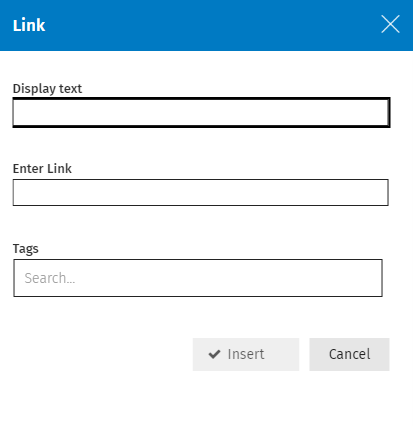
Click the Insert Link button.
-
Enter the name to be displayed in Documents in the Display text field.
-
Enter the hyperlink in the Enter Link field.
-
Add tags in the Tags field, if applicable.
-
Click the Insert button.