Learn about invoicing
There are five Invoicing security roles, click here for details.
Jobs & Billing enables your firm to generate invoices for jobs at any time, rather than waiting until the end of the month. You can create multiple invoices for a job, whether the job is open or closed.
Depending on the size of your firm and how you have defined the invoicing roles and responsibilities within your team, you may want to perform some of the invoicing tasks in bulk.
- Customize your tax types
- Create draft invoices
- Review and finalize invoices
- Print and send invoices
- View invoicing history
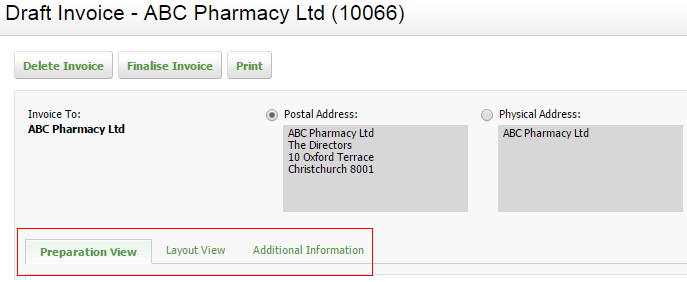
Learn about the tabs on an invoice
When working on an invoice you can change the view mode by clicking one of the tabs.

Preparation View
This is the default view that you see when you open an invoice. It is where you build the information that is to appear on the invoice. The invoice lines are condensed to focus on invoice items and amounts. You can click into them to see more information.

Layout View
This view expands the invoice lines with descriptions, so you can focus on the content that the client will see. This is the text that will appear on the actual invoice.

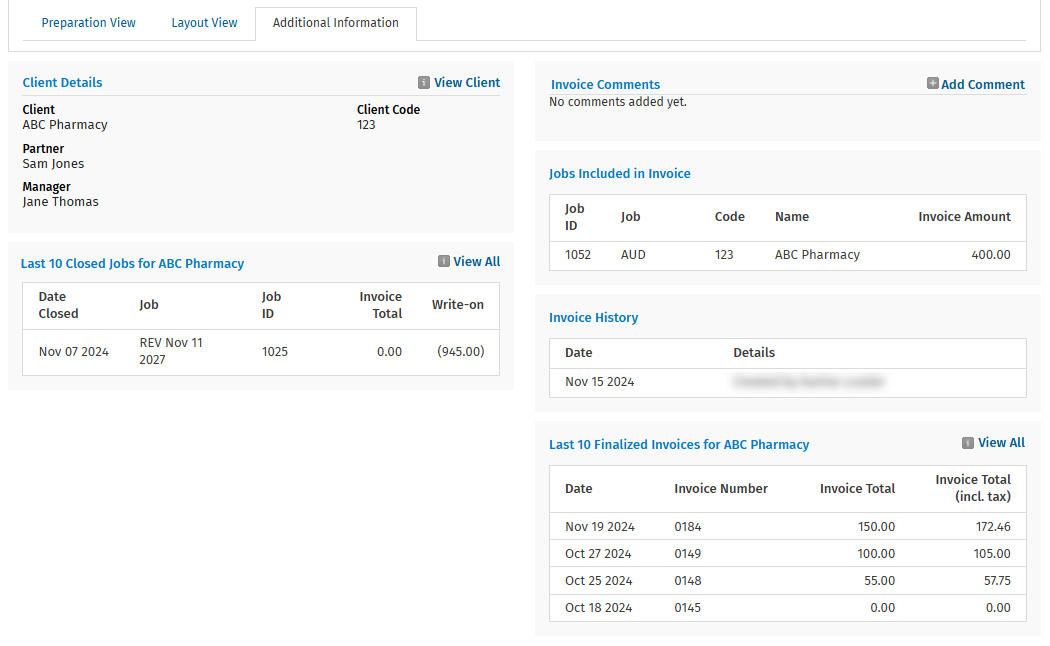
Additional Information
This view contains client details. You can view information about the jobs included on the invoice, including Client Details,Last 10 Closed Jobs for the client, Invoice Comments, Jobs Included in Invoice, Invoice History and Last 10 Finalized Invoices for the client. If you click into any finalized or closed jobs from here, they open in a new tab. Jobs that are included on this invoice display in the same tab if you click into them. If you make a change to a job, for example, adding time to it, the change will not be reflected in the invoice unless you update the invoice using either of the two methods outlined below.

Update an invoice - method 1
This method can be used for any WIP items (time, disbursement and so on).
- Click Change Amount - items that are new and not currently included on the invoice are displayed.
- Select the items you want to add.
- Click Add to invoice.
Update an invoice - method 2
This is a quick method, however, it is not suitable if you have made changes to the invoice text or layout, as it will cause you additional work. In that case, method 1 is the best option.
Delete the job line entry in the invoice and use Add WIP Line to add it again.