Manage FPA jobs
Contents
Learn about the FPA workflow
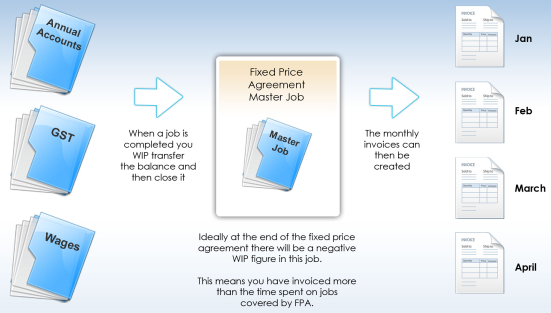
To manage FPA jobs in CCH iFirm, we recommend that you create a master job that you can use to send invoices on a monthly basis (using interim invoice text). The master job is set up in Contacts with a set fee. Each job that is part of the agreement is still created separately and processed as a normal job, with budgets, allocations and disbursements, and they can also be set up as recurring jobs.
The individual jobs are not invoiced upon completion, instead the total WIP is transferred to the master job, where it is invoiced. You can create invoices using interim text each month in bulk, and the invoice amount will default to any set fees you have in place for your FPA clients.
At the end of the agreement period, you can manage your write-up or write-off via the master job.
Create and work on jobs
Jobs - View, Add and Edit Jobs
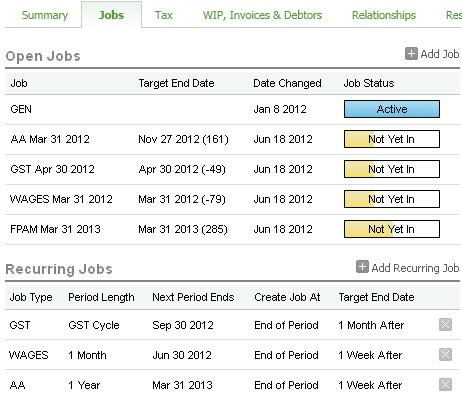
Create the jobs that are included in an FPA as normal, either manually, in bulk, or as recurring jobs. You can allocate budgets, automatic resources and automatic disbursements to monitor and manage each job individually.
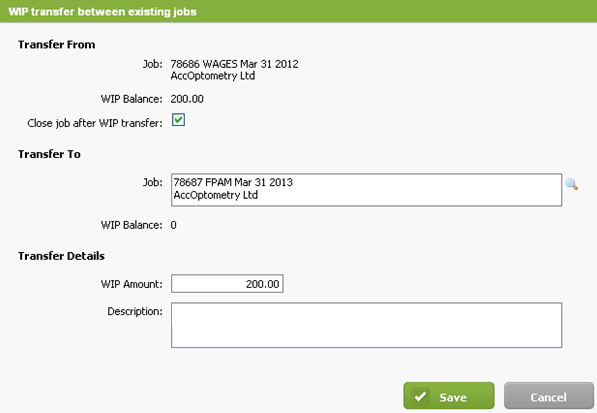
When each job is finished, you do not need to create an invoice for the job, instead you need to transfer all the WIP to the FPA master job. Do not forget to close the job after the transfer. If you have done work outside the scope of the FPA, we recommend that you invoice this work separately using the standard process.
Transfer WIP to the FPAM job
- Jobs - View, Add and Edit Jobs;
- Jobs - Transfer WIP
When a job that is part of a fixed price agreement is complete, transfer all the WIP to the FPAM job before you close the completed job.
- Click Jobs & Billing > Jobs.
- Locate and click the required job.
- Click WIP Transfer.
- Click From current job into existing job.
- Select the FPAM job you want to transfer WIP to.
- Select the Close job after WIP transfer check box, if you want to cancel the existing job once you have transferred the WIP.
- Type the WIP amount you want to transfer.
- Add a description about the transfer.
- Click Save.
Create monthly invoices using interim text
Invoicing - View, Add and Edit Invoices
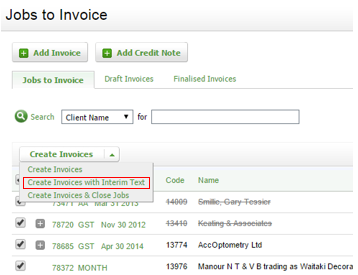
You can bulk create the interim (progress) invoices for all your FPAM jobs each month. The amount of each monthly invoice is determined by the set fee you added in the Contacts area.
- Click Jobs & Billing > Jobs to Invoice.
- Enter your fixed price agreement job type in the search field, then press Enter - all your fixed price agreement jobs will be displayed.
- Create draft invoices for each of these jobs:
- Select the first check box to select all the jobs.
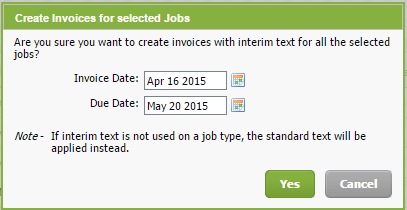
- Click the green arrow beside Create Invoices, then click Create Invoices with Interim Text.
- Check and edit the dates, if required.
- Click Yes to continue.
- Click the Draft Invoices tab - the invoice amount defaults to the set fee as specified in the Contacts area.
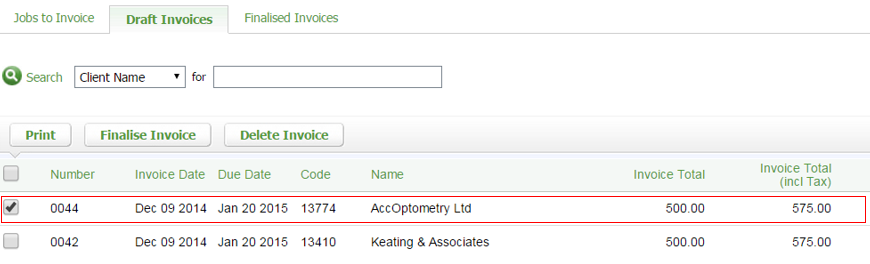
- Proceed to finalize, print and send these invoices, as required.
Do not close the FPAM job until the final invoice has been created and finalized.
View reports
To monitor the status of the FPA during the year, you can use the following reports:
Invoicing - View, Add and Edit Invoices
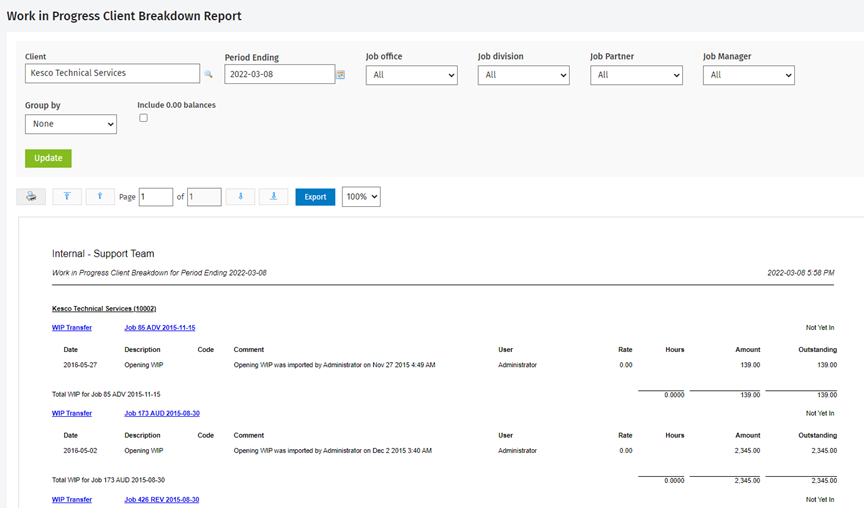
- Work in Progress Client Breakdown Report - enter the client name in the search option and view all the jobs open for this client.
Firm - View WIP and Profitability Information
- Job Profitability Report - use this report to monitor the final status of the FPA after all the jobs have been completed and the final invoice has been created. Select the relevant client and obtain the final write-up or write-off for the FPAM job. Compare the agreed fee to the total WIP that was transferred throughout the year.