Add a job manually
Jobs - View, Add and Edit Jobs
You can create jobs in Jobs & Billing individually when new work comes in (for example, business development opportunities or other special work) in bulk (for example, all your annual accounts jobs at the beginning of the year) or as recurring jobs (for example, monthly jobs). Bulk-creating jobs and setting up recurring jobs will save you a lot of time and ensures that you do not forget to create jobs each month.
- Choose one of these options to begin:
- Click Jobs & Billing > Jobs.
- Click Jobs & Billing> My Timesheet.
- Click Contacts > Clients then locate and select the required client. Once the client Contact Details page is displayed, click the Jobs tab.
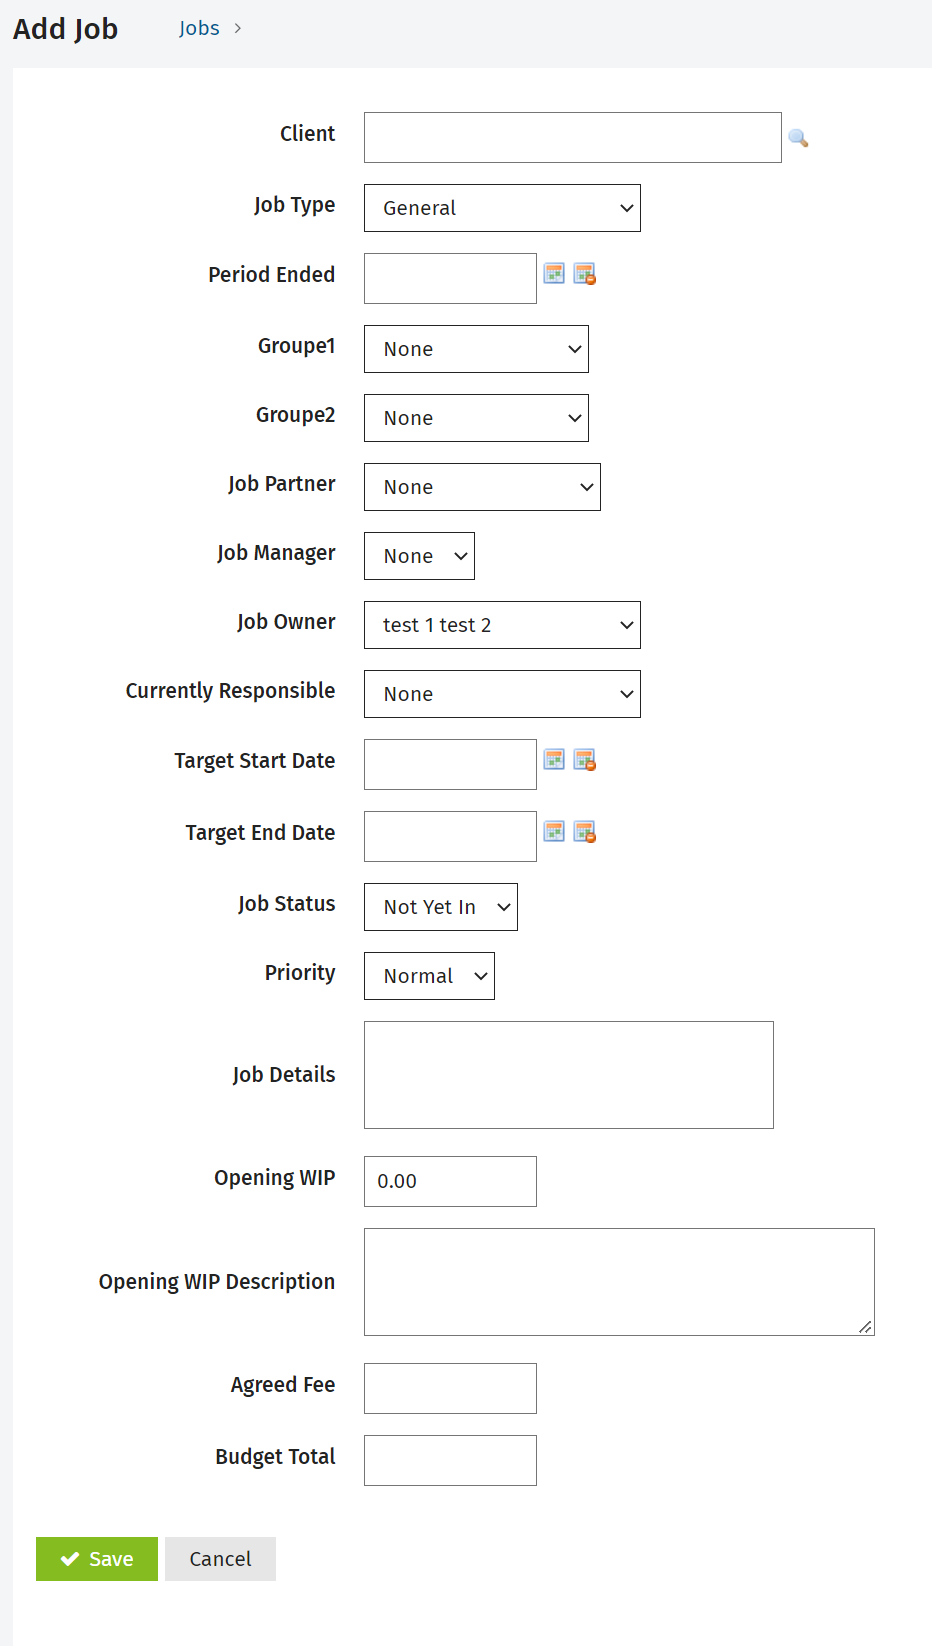
- Click Add Job.
- Click the search
 icon next to the Client field to locate and select the client.
- Select the job type from the drop-down list.
- Set the Period Ended date, if required, using the calendar
 icon.
icon. - Edit the custom group filters, if required.
- If you have set up custom groups and filters for your firm (for jobs and contacts), they are displayed here, for example the Location and Division fields below.
- By default, the job has its firm groups automatically set to whatever is set at the contact record.
- Edit the Job Owner, if required.
- This defaults to the partner or manager, depending on your job settings, or the automatic resources that is set up in Contacts.
- This person manages the job and may receive automated e-mails as the job progresses, if you have enabled them.
- Select the user who is Currently Responsible for the job, if required.
- Use the calendar icon to select the Target Start Date and the Target End Date of the job.
- Change the job status, if required - the initial default status is set to the first status for the selected job type.
- Set the priority of the job, according to your firm's convention.
- Type a description for the job in the Job Details box, if required.
- For example, you could enter detailed instructions for the job.
- Type an opening WIP amount and description, if required.
- You can enter the opening WIP manually as an alternative to importing it when you first start using Jobs & Billing.
- Type an amount in either one of these fields, depending on the situation:
- In the Agreed fee field, enter the amount you have agreed to charge the client. This becomes the default invoice amount and it will show in the Budget field in reports and job lists. This overrides any agreed fees you may have created for the client.
- In the Budget total field, enter the estimated cost of the job. This amount does not show in the invoice.
- Click Save.
An amount entered in the Opening WIP field, or imported via the import WIP process will be included in the imported WIP amounts in the WIP Control widget, WIP Control Report, WIP Control by Group Report and in Export data. The amounts will be included in the opening WIP in the View WIP screen, in the Work in Progress Client Breakdown Report, and the Grouped Work in Progress Report.