Set up firm groups
Settings - Jobs & Billing
Custom groups are useful for multiple offices, multiple division firms that want to organize contacts, jobs, and users into firm groups such as office, division, or both. When custom groups have been set up, they can be applied as filters on various pages, such as the Add Job page, and reports.
Contents
Set up custom groups and filtering options
You can set up a maximum of two custom groups to provide additional filtering options for contacts, jobs, and users.
- Click Settings > Firm Settings.
- Click Firm Filtering & Group Settings.
- Select the check box to enable custom group 1, then enter a name for the group.
If your firm is also using CCH iFirm in French or if you have to communicate with some French speaking contacts, you have to click the button and then enter the French description of the label.
 - For an additional group, repeat the previous step for the custom group 2.
- Select which areas the groups apply to: Contacts, Jobs, and Users - settings are automatically saved.
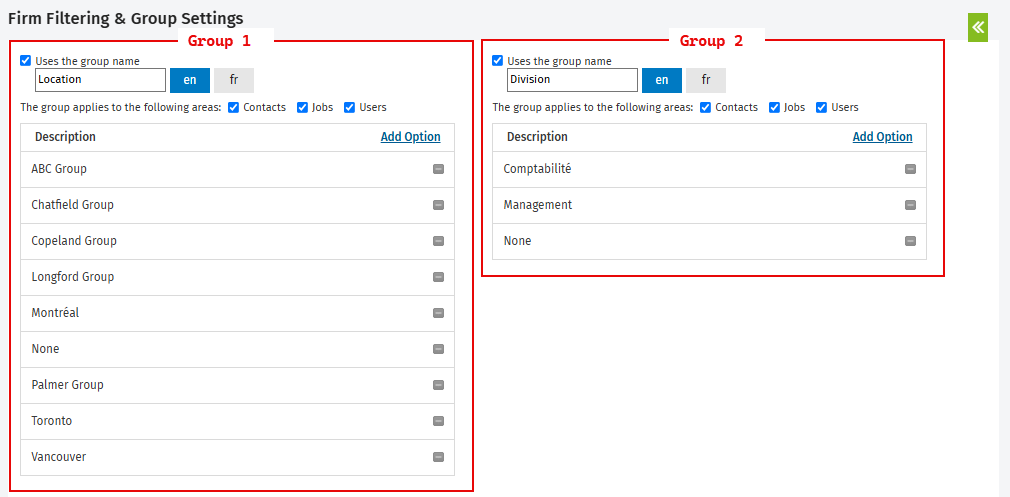
Add a group option
You can import the options via a .csv file.
- Click Settings > Firm Settings.
- Click Firm Filtering & Group Settings.
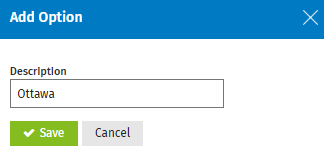
- Click Add Option for the group you want to add options for.
- In the Description field, enter the option's name.
If your firm is also using CCH iFirm in French or if you have to communicate with some French speaking contacts, you have to click the button and then enter the French description of the label. - Click Save.
Edit a group option
- Click Settings > Firm Settings.
- Click Firm Filtering & Group Settings.
- Click the name of the option you want to edit.
- In the Description field, edit the option's name.
If your firm is also using CCH iFirm in French or if you have to communicate with some French speaking contacts, you have to click the button and then enter the French description of the label. - Click Save.
Delete a group option
You cannot delete options that are currently assigned to one or more contacts, jobs, recurring job settings, or users. Use the hide icon  to make an option unavailable.
- Click Settings > Firm Settings.
- Click Firm Filtering & Group Settings.
- Click the Delete button
 on the row of the option you want to delete.
 - Click Yes to confirm.
Hide a group option
If an option is currently assigned to a contact, job, recurring job setting or user, it can only be hidden. For reports, hidden options are still available for filtering.
- Click Settings > Firm Settings.
- Click Firm Filtering & Group Settings.
- Click the Hide button on the row of the option you want to hide.
- Click Yes to confirm.
Show a group option
To show a group option that was previously hidden:
- Click Settings > Firm Settings.
- Click Firm Filtering & Group Settings.
- Click the Show button
 on the row of the option you want to show.
 - Click Yes to confirm.
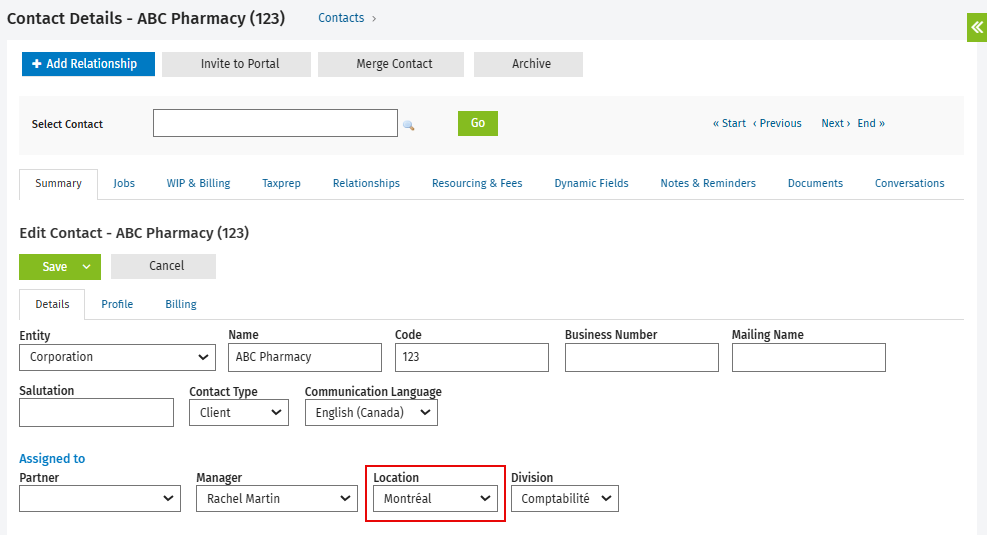
Assign custom groups to a contact
Once you have set up custom groups, they will appear as options when you add or edit a contact. Custom groups are located in the Assigned to section of the Details tab. When editing an existing contact, click Edit details on the Summary tab of the Contacts Details page.
Filter contacts by custom groups
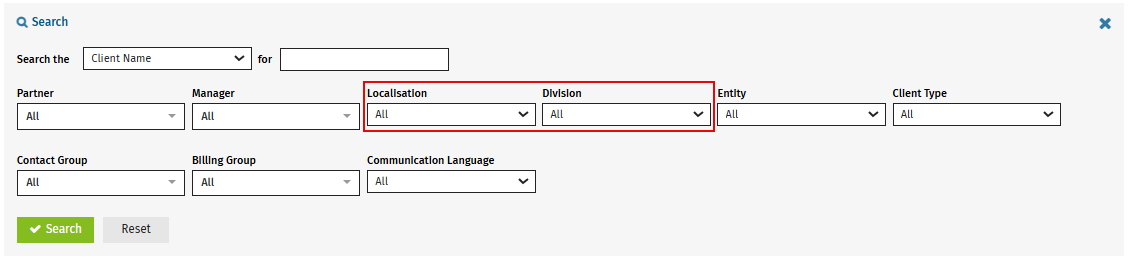
- Click Contacts > All Contacts.
- Click the Search icon.
- Select the custom group or groups you want to filter by.
- Click Search - a list of contacts matching your search criteria is displayed.
Filter reports by custom groups
You can filter all of the Contacts reports and some of the Jobs & Billing reports by custom groups. You have the option to multi-select custom group options in some of the Jobs & Billing reports.
Filter the Contacts reports
- Click Reports > All Reports.
- Click the Contacts tab.
- Click the report you want to run.
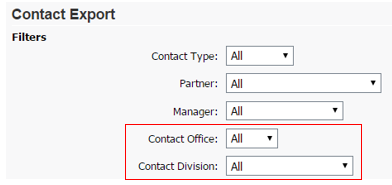
- Select the customs group options (the location for these depends on the report type).
- Run the report.
Using custom groups to filter the Contact Details report:
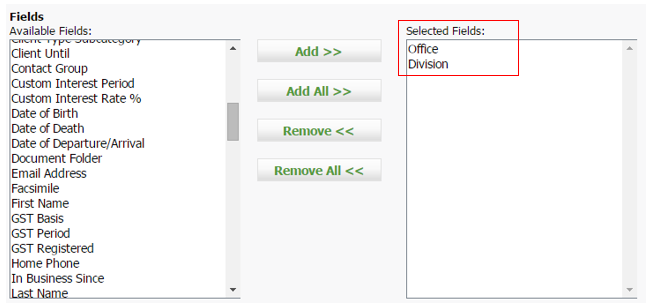
Using custom groups as fields in the Contact Details report:
Filter the Timesheets by Job Type Report (multi-select custom group options)
- Click Reports > All Reports.
- Click the Jobs & Billing tab.
- Click the Timesheets by Job Type.
- Select the custom group options.
- Update the report.
Filter Jobs & Billing reports
The following Jobs & Billing reports can be filtered by custom groups:
Job Reports
Billing & Accounts Receivable Reports Workflow Reports Client Profitability Reports Employee Reports |
* You have the option to multi-select custom group options.
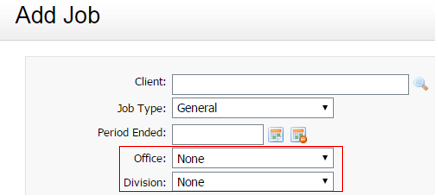
Assign custom groups to a Job
If you have set up custom groups, they will appear as options when you add a single job, add jobs in bulk, add a single recurring job, add bulk recurring jobs, or edit a job.
Filter jobs by custom groups
- Click Jobs & Billing > Jobs.
- Click the tab you require (for example, Open Jobs).
- Click the Search icon.
- Select the custom group or groups you want to filter by.
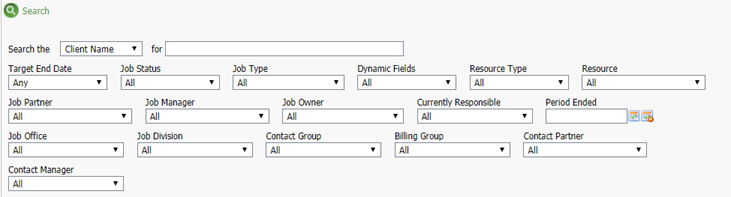
- Click Search - a list of jobs matching your search criteria is displayed.
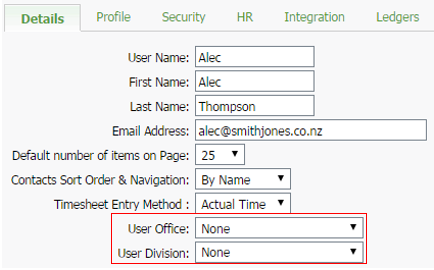
Assign custom groups to a user
Once you have set up custom groups, they will appear as user group options when you add or edit a user. The user group options appear beneath the Open Office Documents with field.
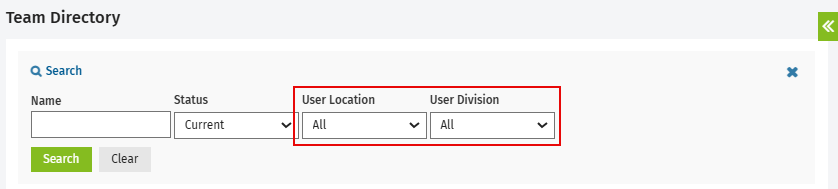
Filter the team directory by custom groups
- Click Team Directory.
- Click the Search icon.
- Select the custom group or groups you want to filter by.
- Click Search.